MBOT Bumper and Led display rotating fixture
thingiverse
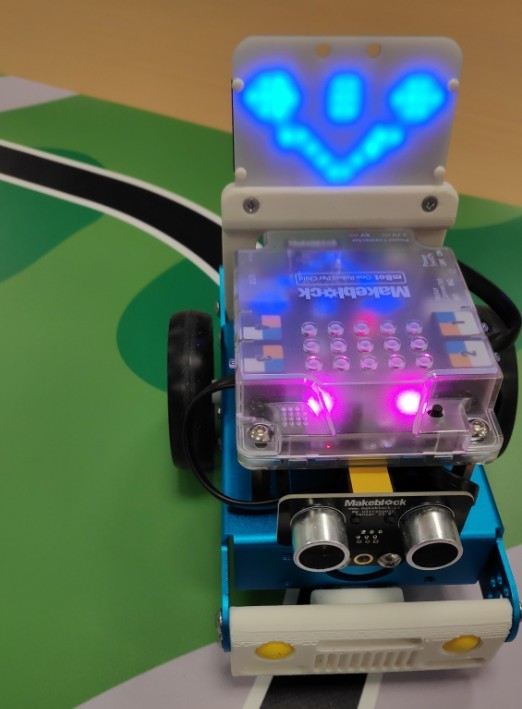
Two add-ons have been designed for your MBOT robots using SOLIDWORKS. One attachment is designed for the front, giving a more realistic car appearance with a light shield for the line detector and two eyes that can be printed in different colors and glued into place. A second attachment is designed for the rear, allowing you to display an LED screen while keeping the Ultrasonic sensor on the front. Both attachments share the same mounting location. You now have the option to use both add-ons with your robots. A rotating fixture has been created to store your MBOT robot with its display in place. Simply rotate and plug it into power before using it. Some screws will be needed, and it is recommended that you tap the holes before screwing them into place. For the rotating fixture, M3 nuts are necessary, and you can view the fixture for more information. You can see from the photos that the robots remain in the same position without any adjustments to the case when using these two add-ons. These add-ons were designed for my wife, who teaches technology. I love these tiny robots and having the display on top allows you to add funny messages during operation. The original models were printed in ABS using a UP mini machine, but you can also print them in PLA if you prefer. Some support will be needed for the grid of the front bumper, which must be printed facing down. No supports are required for the display parts.
With this file you will be able to print MBOT Bumper and Led display rotating fixture with your 3D printer. Click on the button and save the file on your computer to work, edit or customize your design. You can also find more 3D designs for printers on MBOT Bumper and Led display rotating fixture.
