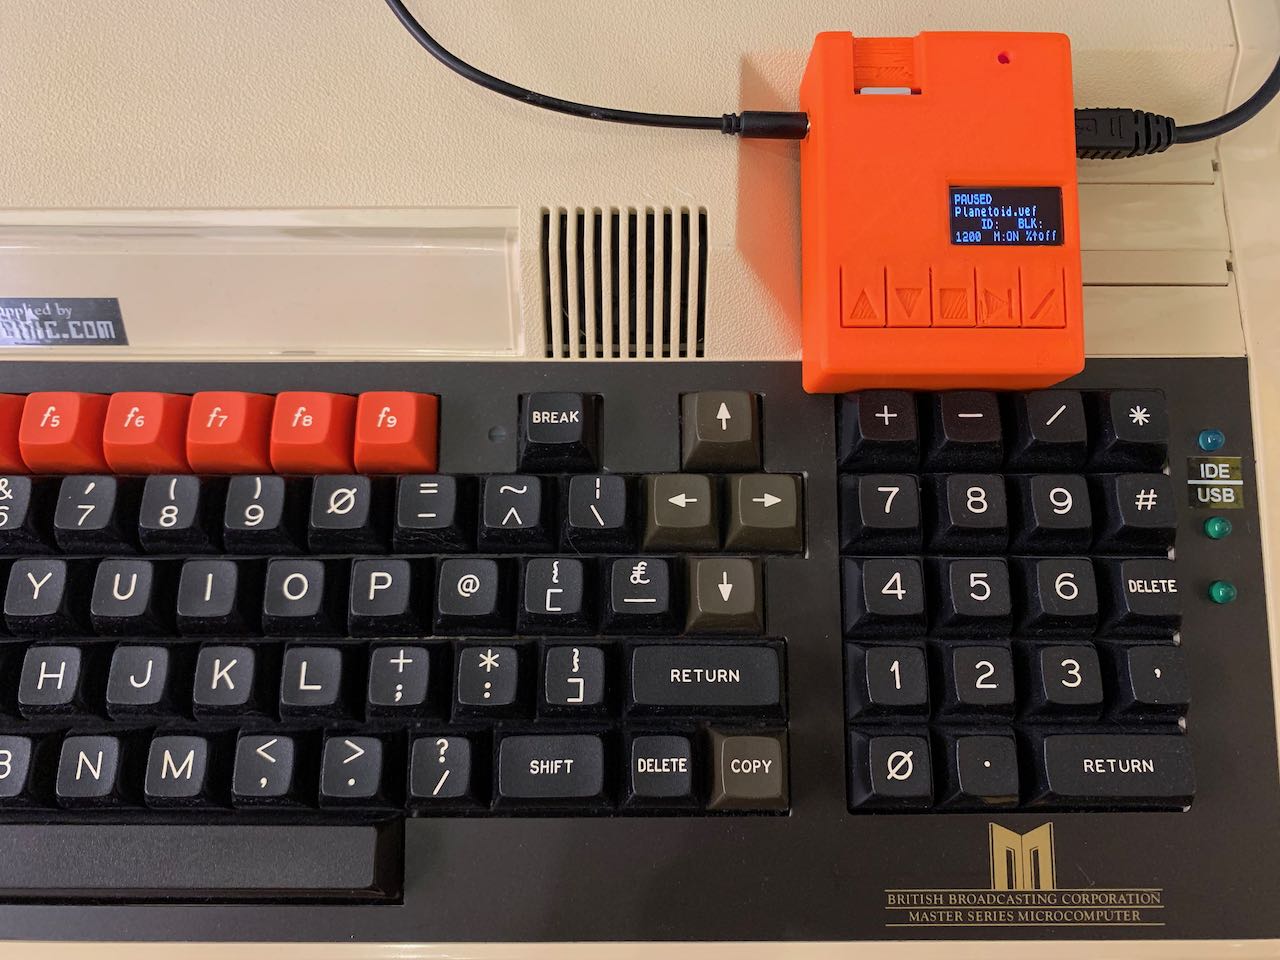
MAXduino case for TZXduino / MaxDuino board from ProjectAVR
prusaprinters
<p>I bought this "MaxDuino" board on eBay. It emulates a tape player for retro-computing. As I intend to use the board for my Acorn machines, it was modified to support Motor Control via the 3.5mm stereo plug.</p><h4>Design</h4><p>I used Fusion 360 to design a simple case that has a slot for the MicroSD card, a cutout for the OLED display as well as 3.5mm audio out and the mini-USB power connector. All model files are available.</p><h4>PrusaSlicer settings</h4><ul><li>Plater presets: 0.2mm Quality, Prusament PETG</li><li>Print Settings > Layers and Perimeters > Vertical shells, increase to 3 perimeters</li><li>Print Settings > Support Material > uncheck "Don't support bridges" (Advanced mode setting)</li></ul><p>--> By default, PrusaSlicer will NOT create supports under long bridging sections. The results were very poor with this default value.</p><h4>Supports</h4><ul><li>Choose "everywhere" for the supports to ensure the USB / audio / MicroSD ports are printed correctly</li><li>Then, use the "Paint-on supports" feature to REMOVE (right-click) supports from the icons on the buttons</li></ul><h4>Printing</h4><ul><li>I used PETG "Prusament" filament on my Prusa Mini printer.</li><li>Temperature settings etc. are left at default.</li><li>The top case is printed as a single part; the buttons are "hinge-type" just like on the Prusa Mini.<ul><li>This takes about 2.5 hours to print</li></ul></li><li>The bottom cover takes about 45 minutes to print</li></ul><h4>Assembly</h4><ul><li>The PCB fits quite tightly; you may have to slightly bend the case outward to allow the USB and audio connector to slide in</li><li>The bottom cover plate protects the PCB from short-circuits and other damage; it uses small 3x12mm self-tapping screws</li></ul><h4>Result</h4><p>Overall I'm quite happy with this first revision of the case:</p><figure class="image image_resized image-style-align-center" style="width:50%;"><img src="https://media.prusaprinters.org/media/prints/58527/rich_content/94e82ea6-7d84-4514-a8db-f66c4ff413e2/38a31ba1-1e17-4779-9c8b-879b8e6f8769_1_105_c.jpeg#%7B%22uuid%22%3A%221a6094c8-9aad-418d-ac0f-7b7b5fbb4743%22%2C%22w%22%3A1024%2C%22h%22%3A768%7D"></figure><p>There is some room for improvement:</p><ul><li>The MicroSD cutout has large overhangs that do not print nicely, even with full supports enabled.<ul><li>Not sure how to improve this - I'm open to suggestions</li></ul></li><li>The button icons have fairly large overhangs that are not always printed nicely.<ul><li>Perhaps use outlines instead of cutouts to improve print quality?</li></ul></li></ul><p> </p><figure class="image image_resized" style="width:75%;"><img src="https://media.prusaprinters.org/media/prints/58527/rich_content/22def58c-d87f-4b40-b4b2-75255c01a4e2/07da08d4-be51-47fb-9409-3e58d236b4ff_1_105_c.jpeg#%7B%22uuid%22%3A%22ad8f0bd0-a0bc-43cd-9b22-91e98d23c285%22%2C%22w%22%3A1024%2C%22h%22%3A768%7D"></figure><p> </p>
With this file you will be able to print MAXduino case for TZXduino / MaxDuino board from ProjectAVR with your 3D printer. Click on the button and save the file on your computer to work, edit or customize your design. You can also find more 3D designs for printers on MAXduino case for TZXduino / MaxDuino board from ProjectAVR.
