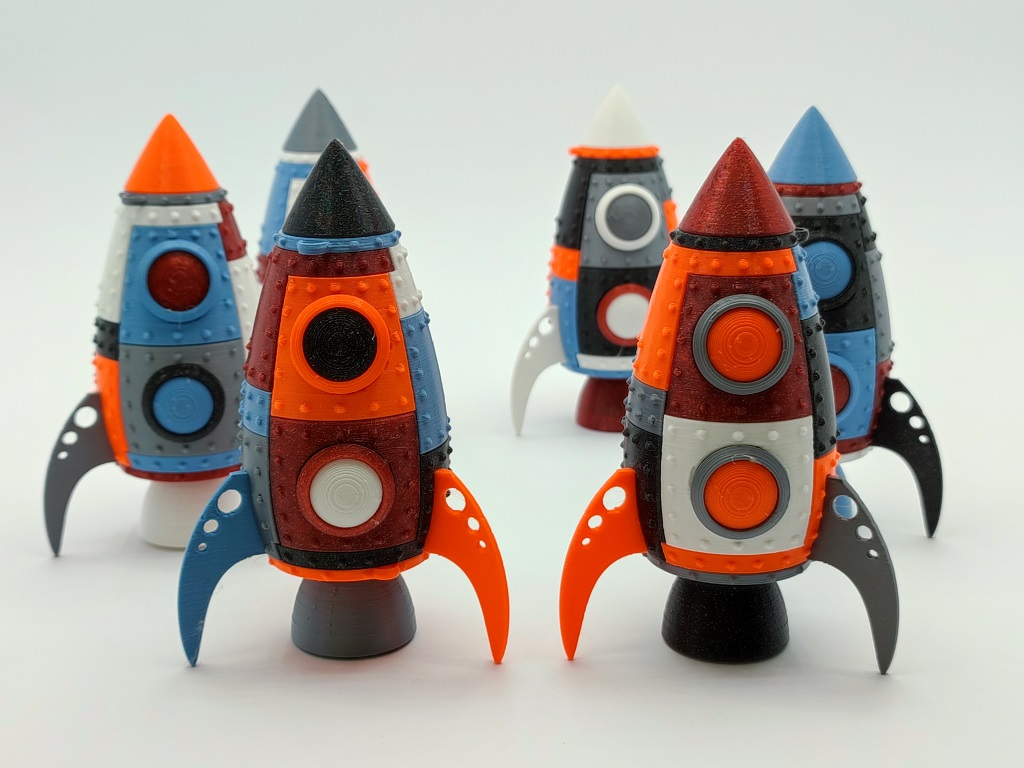
Martin's Puzzle Rocket
prusaprinters
<p>Some months ago, my brother and his wife had their third baby. Obviously, as the coolest uncle ever, I had to give a spectacular gift to the little guy. So, I thought hard. Both parents are science fiction nerds. My initial idea was a mobile with space ships. But which universe should I take? Star Trek? Star Wars? Elite Dangerous? How could I know what sci-fi universe the baby will be a fan of? After all, he couldn’t talk yet.</p><p>Then I remembered, that the parents were also big puzzle fans. And that was the moment I got the inspiration for the puzzle rocket. </p><p>I designed all the parts in FreeCAD. Detail work (the rivets and the exhaust plume) was done in Blender. All in all, I needed three prototypes and around a month of tweaking to get everything right. The rocket consists of 24 different parts and I am told, it is quite challenging to put everything together without the manual. But fear not! A detailed assembly manual is provided.</p><p><strong>For detailed printing and assembly instructions please refer to the provided manual (bottom of download page).</strong></p><h4> </h4><h4><strong>Which parts to print</strong></h4><p>You will need to print the following parts:</p><ul><li>One of each:<ul><li>part01.stl to part_14.stl</li><li>tip.stl</li><li>nozzle_core.stl</li><li>lower_ring.stl</li><li>upper_ring.stl</li></ul></li><li>Two of each:<ul><li>window_inside.stl</li><li>window_outside.stl</li></ul></li><li>Three times:<ul><li>fin.stl</li></ul></li></ul><p>You can also print a variation with loops prepared for hanging the rocket to the ceiling. In that case print the following:</p><ul><li>Everything of the above except lower_ring.stl and upper_ring.stl</li><li>Instead print: lower_ring_loop.stl, upper_ring_loop.stl</li><li>Optionally print exhaust_plume.stl</li></ul><p> </p><h4><strong>Printing</strong></h4><ul><li>Print with PETG or PLA, your preferred settings, 0.2 mm layer height</li><li>All parts are already aligned correctly, there should be no need to rotate something</li><li>Two parts need special attention:<ul><li>Print <strong>nozzle_core.stl</strong> at <strong>100%</strong> infill to make it sturdier. Experience with my little nephews has shown that this is the part that might break first.</li><li>Print the fins (<strong>fin.stl</strong>) with a <strong>brim</strong>, since they are attached to the print bed with a small surface only. After printing cut off the brim with a sharp knife. Also print the fins aligned with the Y-axis (edge of the fin points to the front) and in a straight line (one after the other). That way the fans will have a better effect, which is crucial for these small parts (Thanks to Awong1214 and berzerker99 for these tips!)</li></ul></li><li>A nice effect is achieved if you print the parts in different colors. If you want to achieve a really colorful look, do not print parts with adjacent numbers with the same color. Instead choose the parts at random. But this is absolutely up to you!</li><li>Overall printing time should be around 8-9 hours.</li></ul>
With this file you will be able to print Martin's Puzzle Rocket with your 3D printer. Click on the button and save the file on your computer to work, edit or customize your design. You can also find more 3D designs for printers on Martin's Puzzle Rocket.
