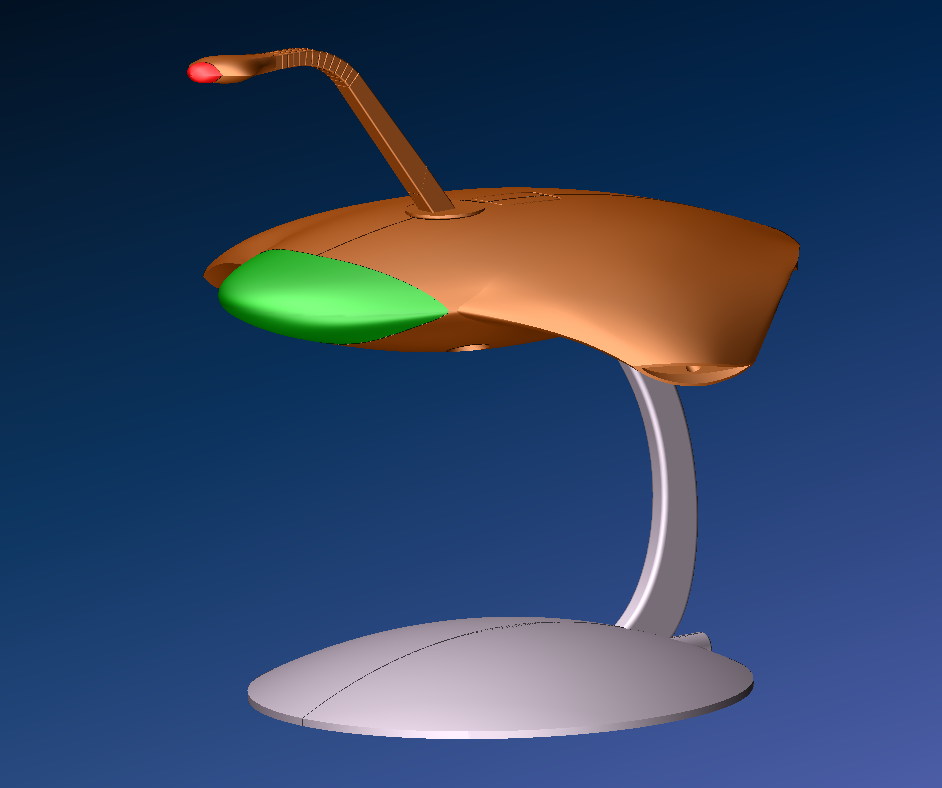
Martian War Machine by mech-G reworked
thingiverse
What a wonderful model! Great meshes allows for importing and editing in my tools. #This is a Work In Progress. (WIP) ________________________________ Revision 4 10/13/2021 Fixed design error on the top of the base pylon ________________________________ Revision 3 10/03/2021 I changed the neck base to use a retaining clip and added the clip to the files. It should be easy to get on and off if required. The original one I designed broke when I tested it for strength. ________________________________ Revision 3 10/01/2021 I added flat areas in the hull halves to allow better adhesion to the bed. So far, I have gone through 3 boxes of copper filament trying to print 3X scaled parts that are not a warped mess. Adding these flats should help. Also. I recommend adding some stock around the back end using a scaled blocks or slabs. Be careful to NOT cover the dowel pin hole! I am trying again in white PLA on hair spray. If it works, I'll order copper. If not.. I will give up and admit to defeat. ________________________________ Revision 3 9/06/2021 ### The Hull has been updated thanks to mech-G. #### I asked if he would make the hulls back end closer to movie's model and he was more than willing. I tipped 20 bucks. I also changed the top of the pylon and hull parts to make them stronger for the connection to each other. (I may changed this to allow bolting them together.) This is ready for 3D printing. I have not printed it myself so any one that beats me to it, any feed back about issues should sent to me via a message. Also.. I am trying to figure out a way to print the reflector looking lens for the heat ray. I have looked and every single image and re-watched the movie, pausing to look at how its lit. The lens cover of the heat ray should be clear. A clear filament can work if its printed only one wall thick. Note that it will be extremely fragile. You can make it a lot sturdier buy panting it inside and out with clear finger nail polish. I am planning on using an orange LED to light the heat ray but this is still all in pre planning. If you print the nose, repulsers and wing tips in green, they can be light with a clear or green LED. Testing showed there was little difference in the color of the green. If you are going to leave this lit all the time, it might look better to print those parts in a few layers of clear filament and light them with green LEDs. All this is more experimenting that needs to be done. Where am I with this? I have spent the last 2 weeks upgrading my printer and tweaking the firmware and slicer settings to get the best possible finish using silk copper filament. The stuff is so shinny, any defects in quality are very visible. I hope to me printing parts this week. If I still cant get the quality where I want, I will print everything in grey, sand, seal and paint the copper parts. #####Anyone that would like to tip a few bucks to him or myself is more than appreciated. ________________________________ Revision 2 8/24/2021 I made the nose in to a shell to print easier. ________________________________ Revision 1 8/23/2021 I split the nose part so it can be printed easier. The nose led holder should have the LEDs installed and tested before gluing it up. In fact.. ALL of the wiring and LEDs should be installed and tested before gluing anything together. There is no going back once this is one big piece! ________________________________ I reworked a lol of parts to add conduits for wiring and holes for LEDs. I changed the base and sliced if so it can be scaled up. At 200%, 5mm LEDs should fit easily. Anything over 200%, warp the LEDs in tape or print tube spacers. I sliced the hull so it can be printed easier. I added alignment pins in the base and the hull. It should print good if you are careful about getting things orientated on the bed for slicing. Some parts will have no bottom layer count. Some will need no infill. I will produce more info about how to print this once I start printing. If anyone wants to take this to the next level... You can get a kit to add sound and control the LEDs in sync. More than I am willing to spend. https://www.monstersinmotion.com/cart/alphabetical-uz-c-9_189/war-of-the-worlds-martian-war-machine-148-or-135-lighting-kit-p-13540.html THE MUNIMUM SCALE YOU CAN PRINT THIS IS 200%. ANY SMALLER AND THE NECK PART WILL NOT WORK!
With this file you will be able to print Martian War Machine by mech-G reworked with your 3D printer. Click on the button and save the file on your computer to work, edit or customize your design. You can also find more 3D designs for printers on Martian War Machine by mech-G reworked.
