Makerfarm Prusa i3 Control Panel Mount
thingiverse
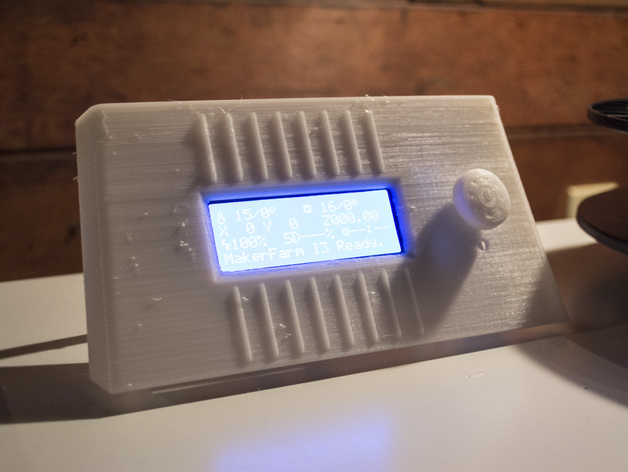
Here's how to secure your control panel on an 8" Makerfarm Prusa i3: Mount the control panel mounting bracket according to its instructions. Place the snap-in brackets on the bracket and align them with the holes on the control panel cover so they securely click into place, effectively holding the cover over the LCD screen. To create a control panel cover for this printer, print it using a high-resolution mode with a vertical orientation and set up in Slic3r to have the print process take around 16 hours total completion time. Before printing the cover, create an enclosed hollow space or "dummy solid" inside the frame which simulates LCD display screen size in its interior; this allows you print outside edges as solid parts while having free path for cooling fans when necessary for successful finishing job without interfering with critical structural components like electronic display itself during assembling afterwards removing dummy fill to see perfect alignment everywhere including where screws need go in.
With this file you will be able to print Makerfarm Prusa i3 Control Panel Mount with your 3D printer. Click on the button and save the file on your computer to work, edit or customize your design. You can also find more 3D designs for printers on Makerfarm Prusa i3 Control Panel Mount.