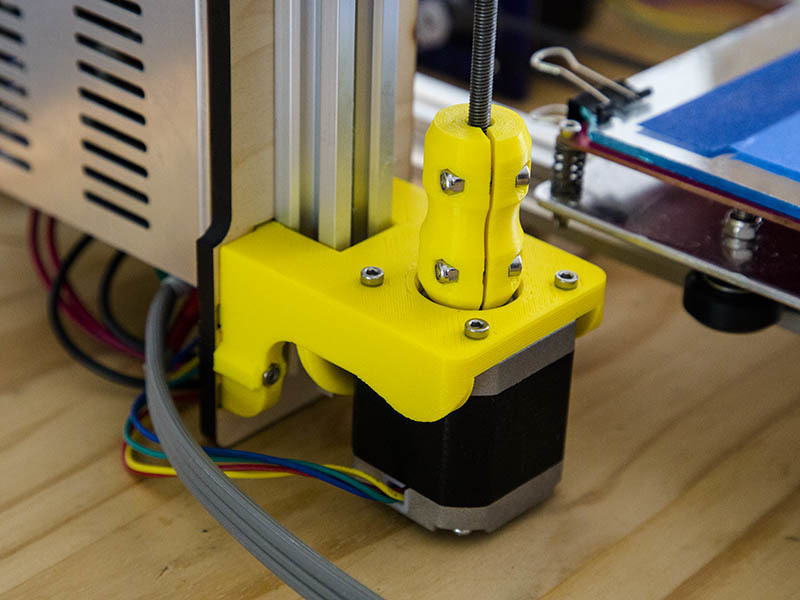
Makerfarm i3v Z Motor mount & Coupler Upgrade
thingiverse
**9/2/2018 Update** I've upgraded to using M8 leadscrews & remixed cperiod's lead screw nut plates, allowing me to use the same Z motor mounts without any changes. You can find his design here: https://www.thingiverse.com/thing:2917730 and I also made a remix of it. It has been working quite well. I designed this for the Makerfarm i3v 10", but it should be compatible with the 8" & 12" versions as well. This is for the i3v that uses M5 threaded rod. I worked on this design a year ago, but just got back to it recently. I used the design files from the 12" version located here for the dimensions: https://github.com/DonKahones/MakerFarm-Prusa-i3v-12-Inch I mount each plastic Z motor mount to the wooden frame with 2 - M3x20mm screws & a locknut instead of the original M3x16mm & nuts. I can make a version for the M8 rod if someone wants that. I've already worked out the details. The plastic coupling is 42mm high with 2mm of plastic between where the motor shaft ends & the M5 threaded rod begins. It connects to 19mm of the shaft. If I hadn't added a 1mm chamfer at the top & bottom of the coupling opening, it would be 20mm. You should be able to slide the coupling all the way down the motor shaft without hitting the motor or plastic mount. To upgrade this: 1. Print out 2 **Z-MotorMount_Rev31.stl** or if you prefer to use supports, print 2 of the **Z-MotorMount_NoSupports_Rev31.stl** You should be able to easily break the supports off with very little filing needed. I used a wire cutter to pull the supports at the base away from each other & then used needle-nose pliers as needed. 2. If you're going to use my plastic couplers, print 2 of the **ShaftCoupler_M5x20mm_M5x20mm_rev16.stl** parts 3. Unscrew the set screws in the couplings from the Z motors 4. Raise the X-axis up with the threaded rods out of the way & clamp them to the frame somehow 5. Unscrew the screws holding the wooden Z motor mounts to the frame 6. Unscrew the M3x10mm screws holding the motor to the wooden Z motor mounts Before beginning, make sure the plastic Z motor mounts fit & file down with a file or rasp so they fit. I only spent about 2 minutes on each mount filing for fit. 7. Mount the motors to the new plastic Z motor mounts with those same M3x10mm screws 8. Before mounting the plastic mounts to the wooden frame, insert the M3 locknuts in each mount (it's easier to do this now than later). I use the M3x20mm screws to initially pull it in place. I added a photo for this. 9. Mount each Z motor mount to the frame & tighten the M3x20mm screws. If you're not using my plastic couplers, attach your couplers according to these instructions: 10. Attach M3x16mm screws 7 locknuts to the plastic couplers 11. Orient the coupling with the text Up on top of the coupling & press each onto the motor shaft until it's all the way in. 12. Unclamp your X-axis as needed & insert the M5 threaded rod into the coupling until it's all the way in. 13. Tighten the 4 - M3x16mm screws until they're tight enough 14. Check all your connections to make sure nothing came loose during your upgrade. My hotend fan came loose when I was doing this. 15. Turn your machine back on & level your bed. That should do it. I printed my parts using esun PLA+ yellow filament. I used Slic3r Prusa edition 1.40.0 with 40% gyroid infill, .2mm layer height and 3 perimeters. The arch I added to the design gives it a little more strength. The only wooden parts left on my printer are the large frame parts.
With this file you will be able to print Makerfarm i3v Z Motor mount & Coupler Upgrade with your 3D printer. Click on the button and save the file on your computer to work, edit or customize your design. You can also find more 3D designs for printers on Makerfarm i3v Z Motor mount & Coupler Upgrade.
