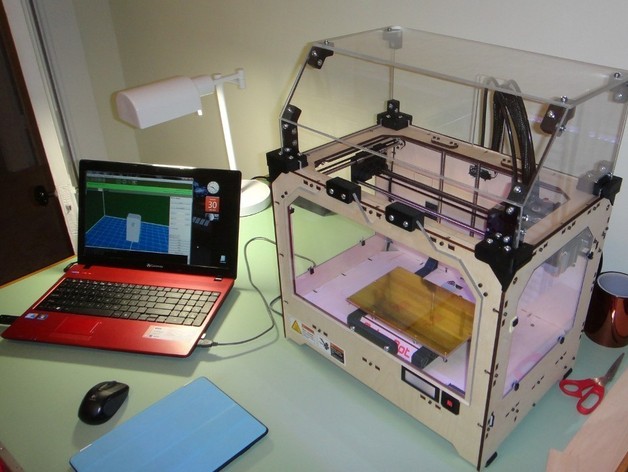
Makerbot Replicator Enclosure (No Laser Needed)
thingiverse
Construct your own MakerBot Replicator enclosure without needing a laser cutter. Assemble it using a band saw, drill press, and screwdriver. The enclosure is made of 1/4-inch acrylic plastic for clear parts to avoid sagging, and costs less than half the price of laser-cut alternatives. The top hood and front window openings can be removed without tools for easy access to your MakerBot. Begin by cutting all acrylic plastic parts with a band saw and drill press. For the front window, first create a 1/4-inch radius using a 1/2-inch hole and following the provided drawing. Keep the plastic film on the acrylic panels for protection during cutting, drilling, or sanding. Use Sharpie pens to mark the parts, as marks will disappear once the film is removed before final assembly. Assemble the enclosure using MakerBot-printed brackets and 10-32 x 1-inch machine bolts and nuts (42 in total). Recessed areas in the MakerBot parts accommodate nuts, requiring only a screwdriver for assembly. Follow the parts illustration for correct placement of each component. Ensure proper fit by allowing tolerance in cutting holes to 1/4-inch size. Panels should sit flush with the top inner surface of the MakerBot for accurate bolt alignment. If needed, adjust notches on panels to clear mated printed MakerBot corner pieces. Sand edges smooth after cutting acrylic parts and drill slots for side windows. Install "Side Panel Clips" by Etrohn from Thingiverse for added stability. For more information and photos of the build, visit The Tinker's Workshop blog at thetinkersworkshop.blogspot.com.
With this file you will be able to print Makerbot Replicator Enclosure (No Laser Needed) with your 3D printer. Click on the button and save the file on your computer to work, edit or customize your design. You can also find more 3D designs for printers on Makerbot Replicator Enclosure (No Laser Needed).
