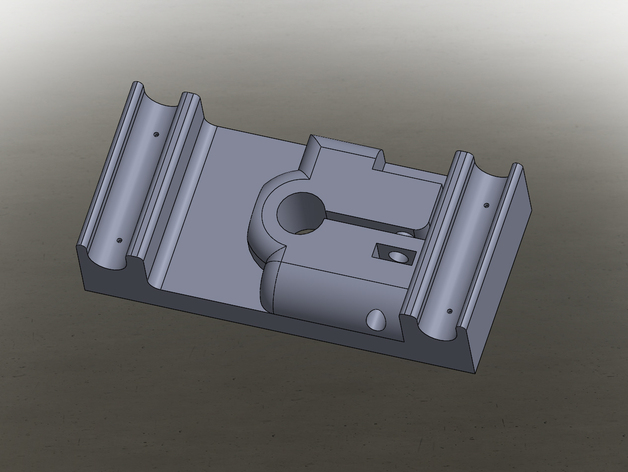
MakerBot Indicator holder to level build plate.
thingiverse
If you've spent much time leveling your printer's build plate as I do this tool will save you a fortune. This is the most critical part of a successful build - it can be extremely infuriating if not done right. This jig is designed to work seamlessly with all MakerBot’s that feature 8mm rails on their gantry. I'll be offering them as a kit on eBay and will link to the product from here. You will need to move the gantry (and the jig) manually around by hand, after raising the build plate using the jog option to engage the tip of the indicator. Don't use this with the built-in leveling routine of your printer. First, zero out the indicator and adjust the three leveling screws below the build plate as needed to get the indicator to read 0 in all positions. Even if the build plate is a bit warped, you should still be able to get a good reading in four corners. The jig was designed to be adjustable and will fit most indicators with 3/8" (0.373’) shafts. Here are some great alternatives to buy: $19.99 - http://www.harborfreight.com/1-inch-travel-machinists-dial-indicator-623.html, $34.99 - http://www.harborfreight.com/1-inch-sae-metric-digital-indicator-93295.html or $45.99 - http://www.autozone.com/autozone/accessories/COMP-Cams-0-to-1-in-camshaft-checking-fixture-travel-dial-indicator/_/N-26dy?itemIdentifier=85891_0_0_ **Jig Information and Assembly** This jig was designed, printed and tested on a MakerBot 2X that has undergone the following upgrades and setting adjustments. Hardware Upgrades: 1) The build plate - upgrade it from the default plastic plate to an aluminum heated build plate using this bottleworks setup - http://www.bctechnologicalsolutions.com/HBP/index.html. 2) Aluminium arm, replace with a aluminium upgraded build plate using this carl’s aluminium carriage setup - http://shop.raffle.ch/shop/alucarriage-dual/ 3) Dual End Carriage X and Dual Cooling block from carls aswell, this setup has been great in my testing. Use carls link on his webpage for ordering details. MakerBot Setting Upgrades: 1) Make sure to configure your makerbots firmware as per your requirements - a basic default config is listed above, you will want to look around online for any changes depending what type of filament, layer and other print options. Other upgrades from http://www.ebay.com are 10 x $5 m4 machine screws used as build plate leveling adjusters. And the below mentioned .250 OD Magnets - .25" OD - Buy from eBay in Bulk!
With this file you will be able to print MakerBot Indicator holder to level build plate. with your 3D printer. Click on the button and save the file on your computer to work, edit or customize your design. You can also find more 3D designs for printers on MakerBot Indicator holder to level build plate..
