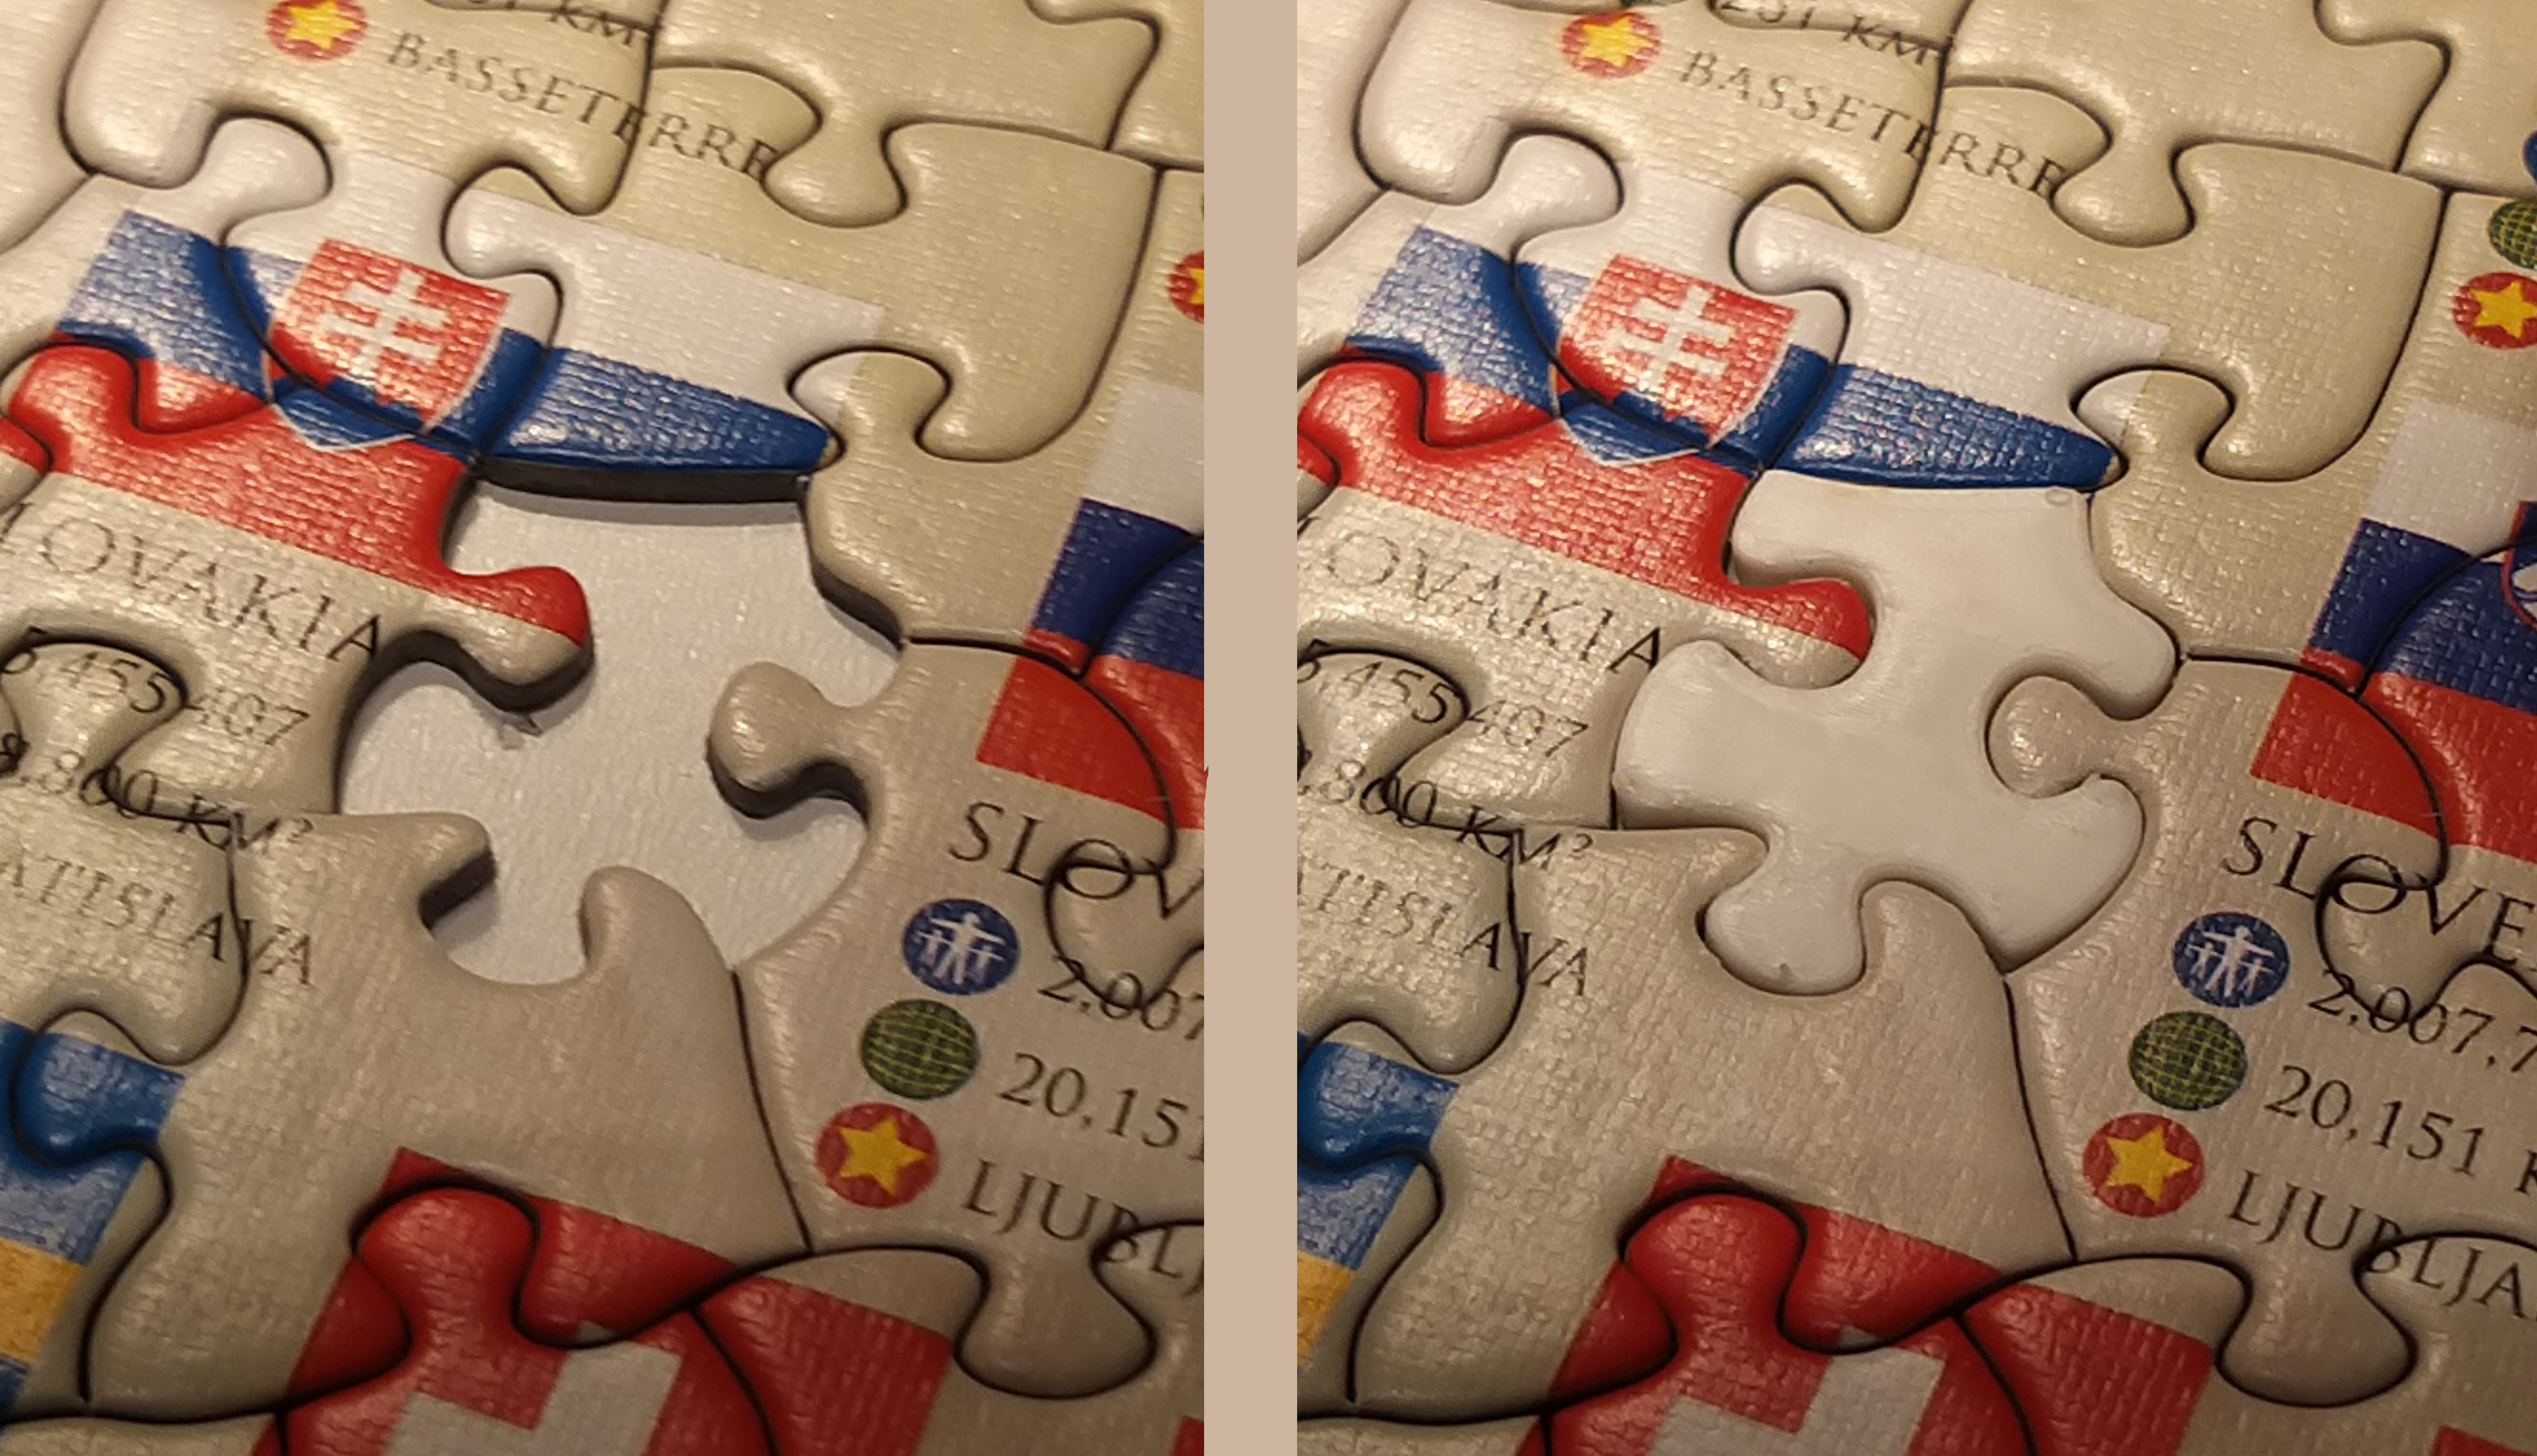
Make the missing piece of the puzzle.
prusaprinters
<p>Losing a piece of your puzzle is annoying. Even though you know the piece is gone, it doesn't feel like the puzzle is finished when it's possible to put the last piece. If you have a 3D printer, the solution does not have to be far away. It is relatively easy to make a replacement piece. The new piece will not be exactly like the one that was lost, but it will be possible to complete the puzzle.<br> </p><p><strong>A way to make a new piece:</strong></p><p>1. Assemble the puzzle.</p><p><br>2. Place graph paper under the puzzle arrow where a piece is missing.</p><figure class="image image_resized" style="width:75%;"><img src="https://media.printables.com/media/prints/297400/rich_content/b1d9c2a8-688a-4f06-8d76-5235d7fcbe91/milemeterparpir.jpg#%7B%22uuid%22%3A%220c97a692-19ad-4ff9-ab7b-704995f4c465%22%2C%22w%22%3A3271%2C%22h%22%3A2508%7D"></figure><p>3. Take a photo vertically above the missing piece. Better photo gives more accurate piece.</p><figure class="image image-style-align-center image_resized" style="width:75%;"><img src="https://media.printables.com/media/prints/297400/rich_content/5a2738fa-9895-463a-8d05-28b2bfed8caa/20221016_202417.jpg#%7B%22uuid%22%3A%224d3eb1a5-a38b-48b6-94ba-ae4ddd9665f0%22%2C%22w%22%3A5664%2C%22h%22%3A3184%7D"></figure><p>4. Open a 3D drawing program – <a href="https://www.autodesk.com/products/fusion-360/personal">Fusion 360</a> is used here.</p><p><br>5. To get an aspect ratio on the screen, draw a 1x1 cm square.</p><figure class="image image-style-align-center image_resized" style="width:50%;"><img src="https://media.printables.com/media/prints/297400/rich_content/1bde7081-9525-4e8b-a0a4-ae7d699758a1/10x10mm-kvadrat.png#%7B%22uuid%22%3A%2267c25170-7e82-4e35-af02-49da8d232280%22%2C%22w%22%3A568%2C%22h%22%3A426%7D"></figure><p>6. Insert the photo flush with the square < Insert - Canvas ><br> </p><figure class="image image-style-align-center image_resized" style="width:50%;"><img src="https://media.printables.com/media/prints/297400/rich_content/200188ce-50bc-4529-9506-58322437ff5f/canvas-1.png#%7B%22uuid%22%3A%222c5b64e6-02a4-447a-8905-47ea25033e2d%22%2C%22w%22%3A387%2C%22h%22%3A290%7D"></figure><p>7. Make a rough scaling by comparing the image and the square of 1x1 cm</p><figure class="image image-style-align-center image_resized" style="width:75%;"><img src="https://media.printables.com/media/prints/297400/rich_content/790f8a45-5857-40c2-9a89-726f5c51a698/canvas-2.png#%7B%22uuid%22%3A%2217cd5b8c-bf5a-4329-8c50-b0d6e2bfe76e%22%2C%22w%22%3A1061%2C%22h%22%3A796%7D"></figure><p>8. Calibrates the size of the image using the graph paper < right click on the canvas, select Calibrate ></p><figure class="image image-style-align-center image_resized" style="width:50%;"><img src="https://media.printables.com/media/prints/297400/rich_content/36ece10d-ab89-48d8-832a-de8bb6132f86/kalibrer-1.png#%7B%22uuid%22%3A%22671c0290-a9c4-413f-ae97-42669c900d3e%22%2C%22w%22%3A485%2C%22h%22%3A442%7D"></figure><figure class="image image-style-align-center image_resized" style="width:75%;"><img src="https://media.printables.com/media/prints/297400/rich_content/54a7a13f-b4ab-4fb6-af75-3a0d494224c7/kalibrer-2.png#%7B%22uuid%22%3A%225b38ca84-60cd-4c0e-a760-7bda05611a76%22%2C%22w%22%3A781%2C%22h%22%3A587%7D"></figure><p>9. Draw a line around the edge of the hole for the missing piece <Use Spline: CREATE – Spline – Fit Point Spline></p><figure class="image image_resized" style="width:75%;"><img src="https://media.printables.com/media/prints/297400/rich_content/5b2a336b-041f-44c2-9789-eda1f27f800c/streg-1.png#%7B%22uuid%22%3A%22015dd378-26b3-4bff-8718-856c7eda2357%22%2C%22w%22%3A769%2C%22h%22%3A512%7D"></figure><figure class="image image-style-align-center image_resized" style="width:75%;"><img src="https://media.printables.com/media/prints/297400/rich_content/aafc758a-fc09-4d36-b0e0-a0b3d700e5ba/streg-2.png#%7B%22uuid%22%3A%2247918ae4-1a50-4f7c-8e5e-29b852f71ca4%22%2C%22w%22%3A1524%2C%22h%22%3A1016%7D"></figure><p>10. Draw all the way around until there is a continuous figure <End with: Finish Sketch></p><figure class="image image-style-align-center image_resized" style="width:75%;"><img src="https://media.printables.com/media/prints/297400/rich_content/fa9c210e-e47e-42b9-9f31-7a1e02fa2e27/streg-3.png#%7B%22uuid%22%3A%22e4c4ce23-d956-41c9-b890-cb352f1c0efa%22%2C%22w%22%3A1529%2C%22h%22%3A1019%7D"></figure><p>11. Measure the thickness of the other pieces and extrude the figure with this thickness <Create – Extrude>.</p><figure class="image image-style-align-center image_resized" style="width:50%;"><img src="https://media.printables.com/media/prints/297400/rich_content/ed082f0b-e00a-426d-a0f7-085a9914ceae/20221017_102950.jpg#%7B%22uuid%22%3A%221c8ac996-5f60-433c-927d-b217b17120bd%22%2C%22w%22%3A3183%2C%22h%22%3A3183%7D"></figure><figure class="image image-style-align-center image_resized" style="width:75%;"><img src="https://media.printables.com/media/prints/297400/rich_content/1d8f7a30-642d-4ea1-8db5-1b9142750ee7/brik-1.png#%7B%22uuid%22%3A%22a70df7e1-02ff-4abd-81f8-a878c761f7e3%22%2C%22w%22%3A1518%2C%22h%22%3A1012%7D"></figure><p>12. Round the edges if desired and save the file.</p><figure class="image image-style-align-center image_resized" style="width:75%;"><img src="https://media.printables.com/media/prints/297400/rich_content/4954fabd-7710-4717-82f6-d4ca9aa33cb9/brik-2.png#%7B%22uuid%22%3A%2298a799cb-a457-44ad-b885-8b9c430842f4%22%2C%22w%22%3A1519%2C%22h%22%3A1013%7D"></figure><p>13. Import the file into a Slicer and print it with a 3D printer. Vola, you have a new piece and can now complete the puzzle.</p><figure class="image image-style-align-center image_resized" style="width:75%;"><img src="https://media.printables.com/media/prints/297400/rich_content/971cbfe3-0d0f-4092-b168-ebe1eefad5e1/print-1.png#%7B%22uuid%22%3A%223f85eba3-77be-47cc-b376-bd534bb9e89a%22%2C%22w%22%3A1919%2C%22h%22%3A1041%7D"></figure><figure class="image image-style-align-center image_resized" style="width:75%;"><img src="https://media.printables.com/media/prints/297400/rich_content/d00bf2e3-9092-4bb0-8dfd-c4ff63191dcb/20221017_114119-2.jpg#%7B%22uuid%22%3A%2294e9fb9e-6e13-4526-b06d-56dee2b7f9c4%22%2C%22w%22%3A5664%2C%22h%22%3A3184%7D"></figure><figure class="image image-style-align-center image_resized" style="width:50%;"><img src="https://media.printables.com/media/prints/297400/rich_content/668cf864-7e28-4241-8346-43d160e1b142/20221017_214219.jpg#%7B%22uuid%22%3A%2244cc22d7-ffa1-4911-80ad-00586333746c%22%2C%22w%22%3A3501%2C%22h%22%3A2334%7D"></figure><p>14. You can choose to stop here with a solid color piece, or you can go ahead and color it.</p><p><br>15. It can be colored by painting/drawing directly on the piece, or transferring a color print to the piece, e.g. by printing a label and putting it on the piece. The quality of the result is entirely dependent on your personal graphic skills and execution. Good luck.</p><figure class="image image-style-align-center image_resized" style="width:50%;"><img src="https://media.printables.com/media/prints/297400/rich_content/938b9bc5-4851-45f2-9ebf-28b9a5f95d0d/20221017_150221.jpg#%7B%22uuid%22%3A%226bbc28c2-209b-4828-b024-075e9ce85b5f%22%2C%22w%22%3A4067%2C%22h%22%3A2711%7D"></figure><figure class="image image-style-align-center image_resized" style="width:50%;"><img src="https://media.printables.com/media/prints/297400/rich_content/28d330f1-83f2-4de7-acd3-b4c18455153a/20221017_214248.jpg#%7B%22uuid%22%3A%22f70e6039-1e46-44c7-b649-1780a81e16f0%22%2C%22w%22%3A3857%2C%22h%22%3A2571%7D"></figure><p> </p>
With this file you will be able to print Make the missing piece of the puzzle. with your 3D printer. Click on the button and save the file on your computer to work, edit or customize your design. You can also find more 3D designs for printers on Make the missing piece of the puzzle..
