Magnetic Ticketholder
prusaprinters
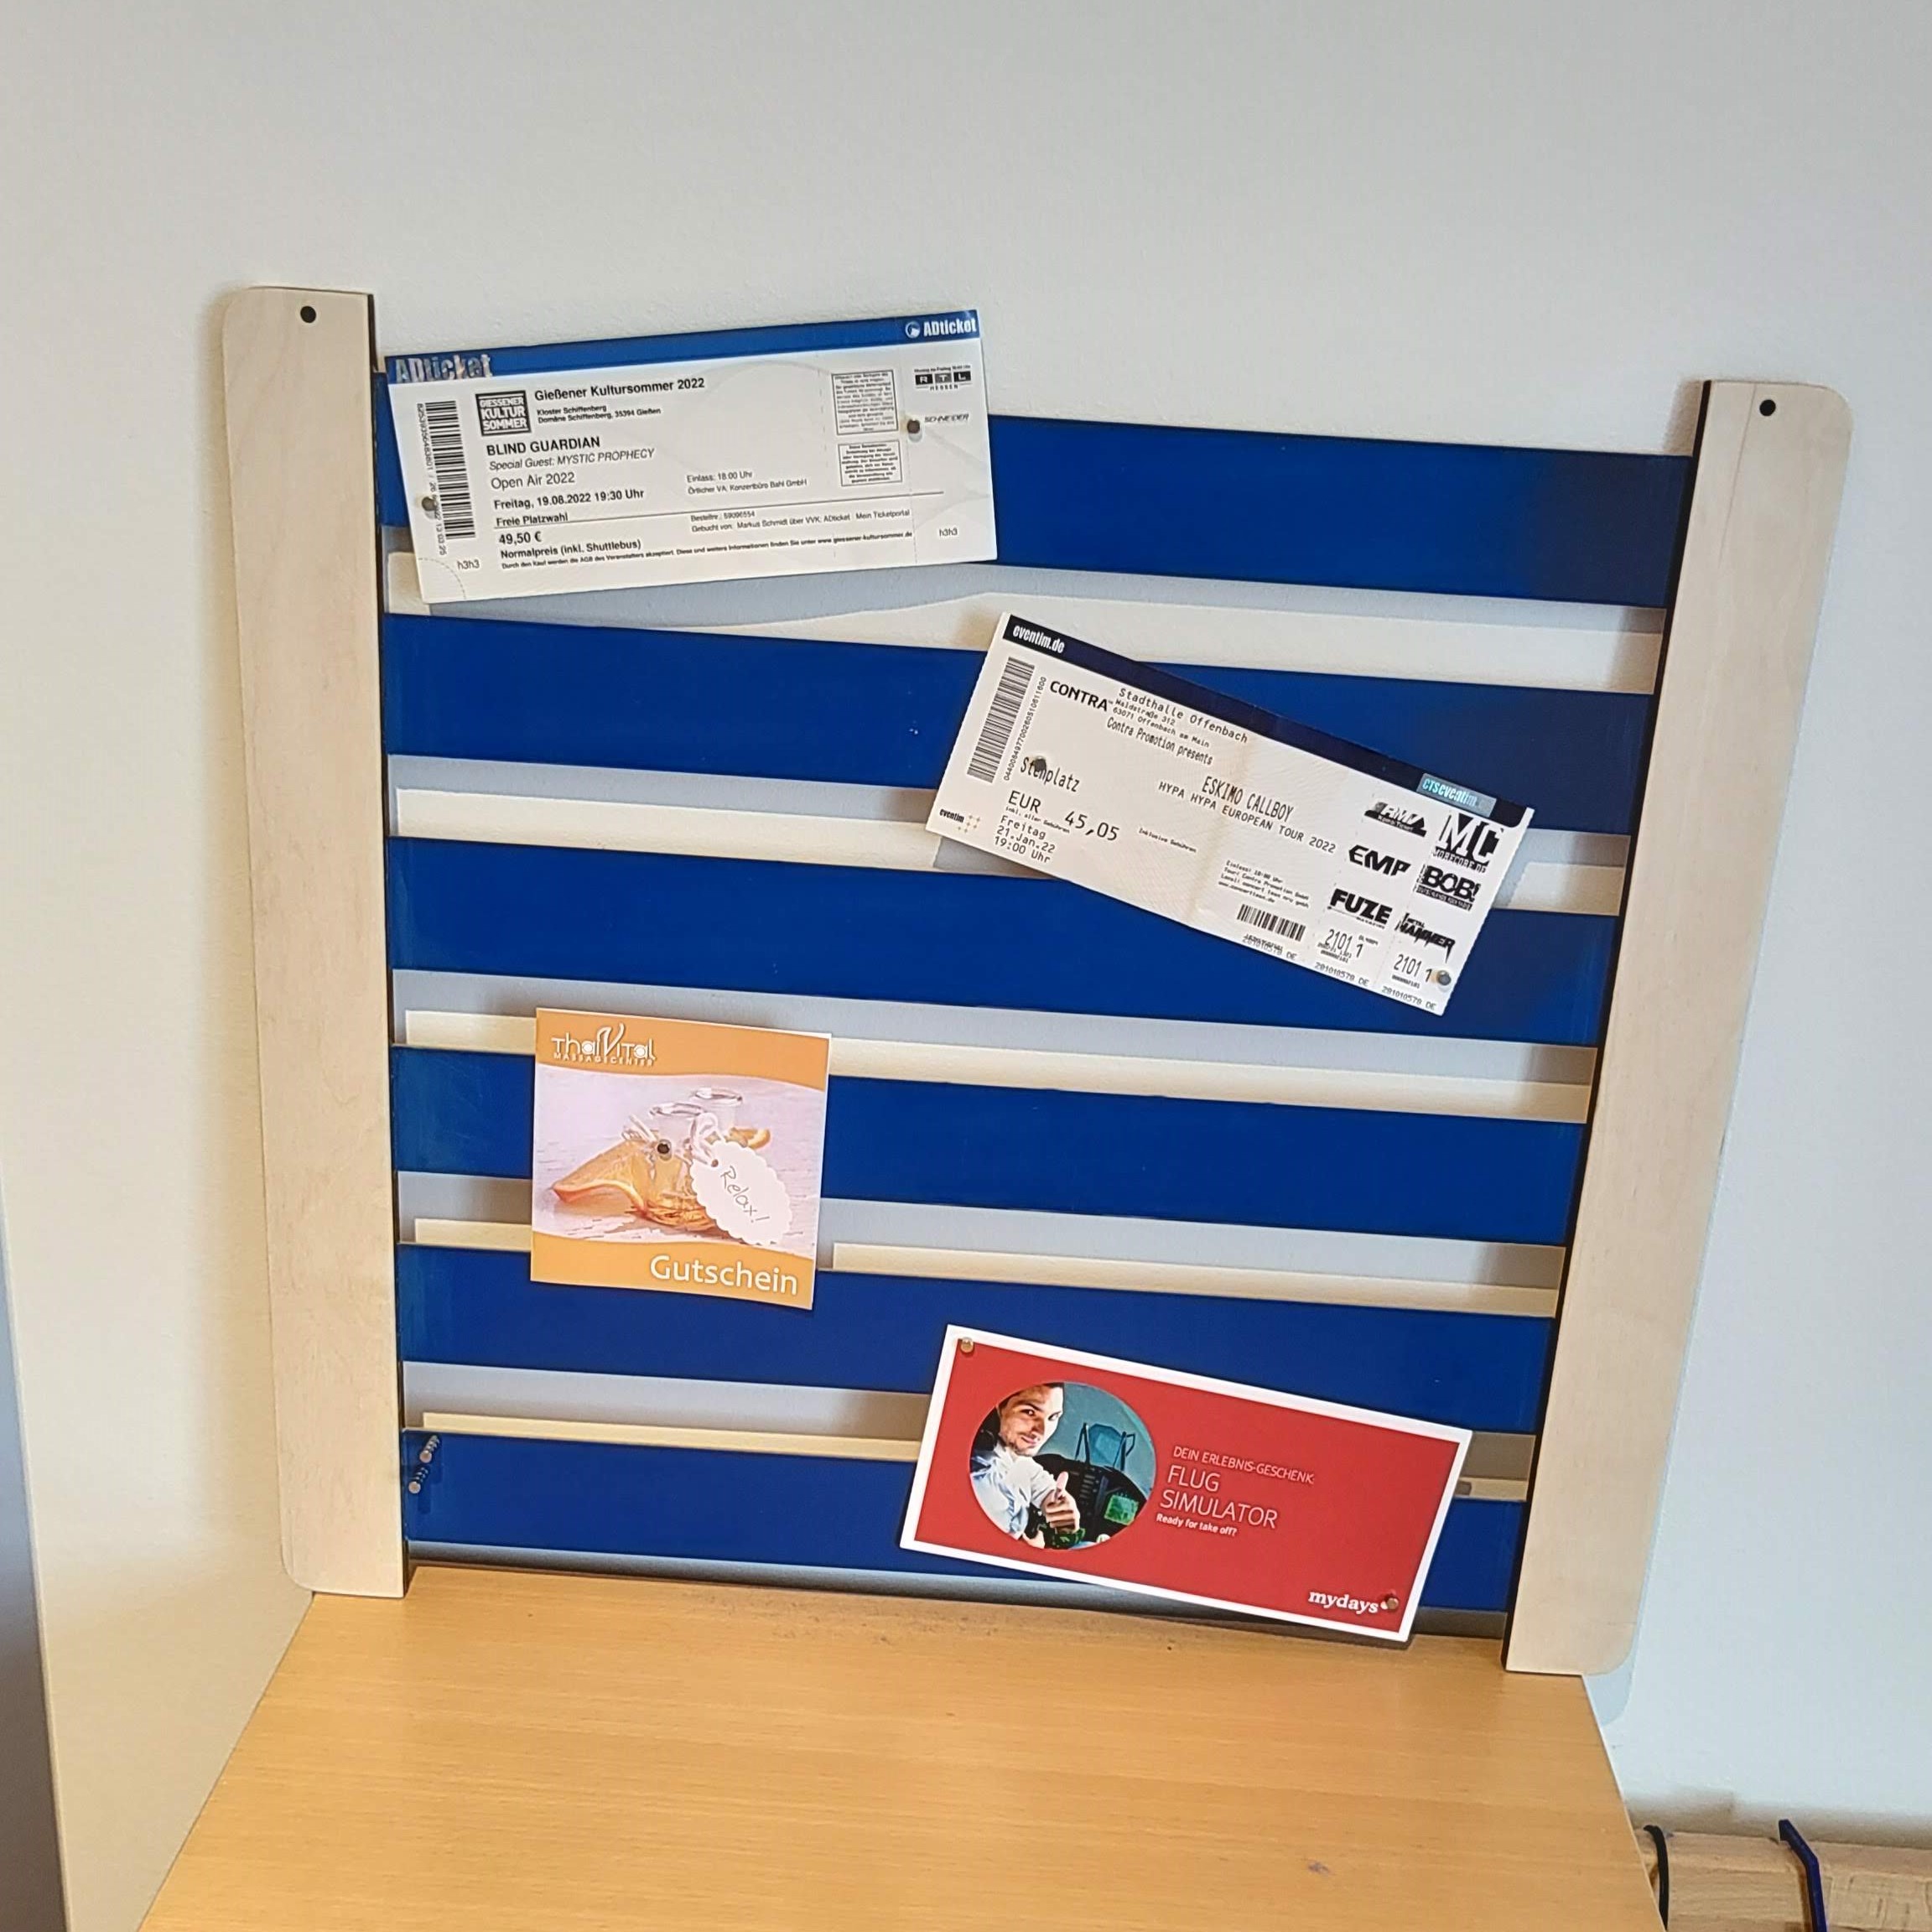
<p><img src="https://content.instructables.com/ORIG/FIY/JFT7/L7Q7CHBL/FIYJFT7L7Q7CHBL.jpg?auto=webp&frame=1&width=700&height=1024&fit=bounds&md=2600f11c51b821be8a0325995b01371f" alt="Magnetic Ticketholder"><a href="https://content.instructables.com/ORIG/FIY/JFT7/L7Q7CHBL/FIYJFT7L7Q7CHBL.jpg?auto=webp&frame=1&width=1024&height=1024&fit=bounds&md=2600f11c51b821be8a0325995b01371f"> </a></p><figure class="table"><table><tbody><tr><td><figure class="image"><img src="https://content.instructables.com/ORIG/FVJ/77GW/L7Q7CIYB/FVJ77GWL7Q7CIYB.jpg?auto=webp&frame=1&crop=3:2&width=350&height=1024&fit=bounds&md=038cf078a858aeeb9171ea2b4a6e3580" alt="Magnetic Ticketholder"></figure></td><td><figure class="image"><img src="https://content.instructables.com/ORIG/FU8/7UD3/L7Q7CIYC/FU87UD3L7Q7CIYC.jpg?auto=webp&frame=1&crop=3:2&width=350&height=1024&fit=bounds&md=ee62d03311ff09e9ea59f6d18652b2b8" alt="Magnetic Ticketholder"></figure></td><td><figure class="image"><img src="https://content.instructables.com/ORIG/FYL/B3ZW/L7Q7CIYD/FYLB3ZWL7Q7CIYD.jpg?auto=webp&frame=1&crop=3:2&width=350&height=1024&fit=bounds&md=d1f82a19cd93350ba42a0d17ec763899" alt="Magnetic Ticketholder"></figure></td></tr></tbody></table></figure><p>Hello reader,</p><p>here is my instruction for an easy to use and build ticket, picture or coupon holder. I already tried to find a good solution with the laser cuter, but was never really happy with the end result.(The other Versions <a href="https://a360.co/3KTehuh">Here </a>or <a href="https://a360.co/3Rne5WR">Here</a>) Here you can see the Fusion project I was happy with. It's a small one day project.</p><p> </p><p><strong>Supplies</strong></p><ul><li>3 mm Wood at least 600 mm * 300 mm</li><li>Wood glue</li><li><a href="https://www.amazon.de/Magnetleiste-Ferroleiste-selbstklebend-Magnetband-Wandleiste/dp/B079Z14W5R/ref=sr_1_42?__mk_de_DE=%C3%85M%C3%85%C5%BD%C3%95%C3%91&crid=1UNXQTG2YSFL1&keywords=metallleiste+selbstklebend+3mm&qid=1662494460&sprefix=metallleiste+selbstklebend+3mm%2Caps%2C68&sr=8-42">2/3 mm thick metall bars 50 mm</a> wide the length isn't really important, because I added to my Fusion 360 a parameter you can change</li><li>some small magnets</li></ul><p><strong>Cut the .Dxf</strong></p><p><img src="https://content.instructables.com/ORIG/FUD/YD5N/L7Q7CHRJ/FUDYD5NL7Q7CHRJ.png?auto=webp&frame=1&width=1024&height=1024&fit=bounds&md=71b9a6bcdb65fed7f731c07fcafc4af2" alt="Cut the .Dxf"><a href="https://content.instructables.com/ORIG/FUD/YD5N/L7Q7CHRJ/FUDYD5NL7Q7CHRJ.png?auto=webp&frame=1&width=1024&height=1024&fit=bounds&md=71b9a6bcdb65fed7f731c07fcafc4af2"> </a></p><p>Cut the .dxf files or use the .ai files on your laser cutter. I had no problem with these files, but you can also download the fusion 360 file and create the .dxf from this file in case something doesn't work out for you.</p><h3>Attachments</h3><ul><li><img src="https://content.instructables.com/static/image/file.default.gif" alt="download {{ file.name }}"><a href="https://content.instructables.com/ORIG/FI3/5WJX/L7Q7CHTT/FI35WJXL7Q7CHTT.ai">ticketholder.ai</a></li><li><img src="https://content.instructables.com/static/image/file.default.gif" alt="download {{ file.name }}"><a href="https://content.instructables.com/ORIG/FWS/WQQA/L7Q7CHTU/FWSWQQAL7Q7CHTU.dxf">topbottom.dxf</a></li><li><img src="https://content.instructables.com/static/image/file.default.gif" alt="download {{ file.name }}"><a href="https://content.instructables.com/ORIG/F66/1TBK/L7Q7CHTV/F661TBKL7Q7CHTV.dxf">middle.dxf</a></li></ul><p><strong>Glue Bottom and Middle Part</strong></p><p><img src="https://content.instructables.com/ORIG/FU3/FI6K/L7Q7CHBR/FU3FI6KL7Q7CHBR.jpg?auto=webp&frame=1&crop=3:2&width=600&height=1024&fit=bounds&md=2c35fe7a90c10f20982c2b99c26b132c" alt="Glue Bottom and Middle Part"><a href="https://content.instructables.com/ORIG/FU3/FI6K/L7Q7CHBR/FU3FI6KL7Q7CHBR.jpg?auto=webp&frame=1&width=1024&height=1024&fit=bounds&md=2c35fe7a90c10f20982c2b99c26b132c"> </a></p><p><img src="https://content.instructables.com/ORIG/FP0/AA1K/L7Q7CHBQ/FP0AA1KL7Q7CHBQ.jpg?auto=webp&frame=1&crop=3:2&width=600&height=1024&fit=bounds&md=bfc033704a243906d27069634320a564" alt="Glue Bottom and Middle Part"><a href="https://content.instructables.com/ORIG/FP0/AA1K/L7Q7CHBQ/FP0AA1KL7Q7CHBQ.jpg?auto=webp&frame=1&width=1024&height=1024&fit=bounds&md=bfc033704a243906d27069634320a564"> </a></p><p>Now you have to glue the middle and the bottom part together. Here you should add the metal bars to get the right and left side alight and with an 90 degree angle.</p><p><strong>Glue the Middle to the Top</strong></p><p><img src="https://content.instructables.com/ORIG/FQL/5CVD/L7Q7CHBO/FQL5CVDL7Q7CHBO.jpg?auto=webp&frame=1&crop=3:2&width=600&height=1024&fit=bounds&md=e0760fe921f370f9b0c9f902de7a4f04" alt="Glue the Middle to the Top"><a href="https://content.instructables.com/ORIG/FQL/5CVD/L7Q7CHBO/FQL5CVDL7Q7CHBO.jpg?auto=webp&frame=1&width=1024&height=1024&fit=bounds&md=e0760fe921f370f9b0c9f902de7a4f04"> </a></p><p><img src="https://content.instructables.com/ORIG/FZN/3QE9/L7Q7CHBP/FZN3QE9L7Q7CHBP.jpg?auto=webp&frame=1&crop=3:2&width=600&height=1024&fit=bounds&md=e5ee3887501bb032d2953ed7848cd3c1" alt="Glue the Middle to the Top"><a href="https://content.instructables.com/ORIG/FZN/3QE9/L7Q7CHBP/FZN3QE9L7Q7CHBP.jpg?auto=webp&frame=1&width=1024&height=1024&fit=bounds&md=e5ee3887501bb032d2953ed7848cd3c1"> </a></p><p>The next step is to glue the top right and left sides. I glued each side separately because I did not have more weights. Here, you should glue the wood with wood glue and the metal strips with epoxy.</p><p><strong>Grind (optional)</strong></p><p><img src="https://content.instructables.com/ORIG/FV9/LDD5/L7Q7CIZE/FV9LDD5L7Q7CIZE.jpg?auto=webp&frame=1&width=624&height=1024&fit=bounds&md=809913ea3ed171ab3d7c2e239bca3d27" alt="Grind (optional)"><a href="https://content.instructables.com/ORIG/FV9/LDD5/L7Q7CIZE/FV9LDD5L7Q7CIZE.jpg?auto=webp&frame=1&width=1024&height=1024&fit=bounds&md=809913ea3ed171ab3d7c2e239bca3d27"> </a></p><p>In the end, I decided to sand everything again so that if there were any inaccuracies, I could remove them. In addition, I was able to remove the slight charring at the edge of the laser cut.</p><p><strong>Finally</strong></p><p><img src="https://content.instructables.com/ORIG/FN2/5EZT/L7Q7CIWZ/FN25EZTL7Q7CIWZ.jpg?auto=webp&frame=1&width=700&height=1024&fit=bounds&md=0c717bb9f0dbaa9dc3d1e10ac22c20c5" alt="Finally"><a href="https://content.instructables.com/ORIG/FN2/5EZT/L7Q7CIWZ/FN25EZTL7Q7CIWZ.jpg?auto=webp&frame=1&width=1024&height=1024&fit=bounds&md=0c717bb9f0dbaa9dc3d1e10ac22c20c5"> </a></p><p>I think the results speak for them themselves. I really like the design and appreciated the easy access to my coupons and tickets. I hope you enjoyed this instruction and have fun to build it. Let me know in the comments what you think or if you have any questions? Thank you for reading.</p><p><a href="https://www.youtube.com/channel/UCKLloFoVPy84dioQ_5BPWQw">YouTube</a></p><p><strong>If you like to, check out </strong><a href="https://www.prusaprinters.org/social/194698-max-siebenschlafer/prints?o=liked"><strong>my other designs</strong></a><strong> too!</strong></p>
With this file you will be able to print Magnetic Ticketholder with your 3D printer. Click on the button and save the file on your computer to work, edit or customize your design. You can also find more 3D designs for printers on Magnetic Ticketholder.