Magnetic Pegboard Screwdriver Rack
thingiverse
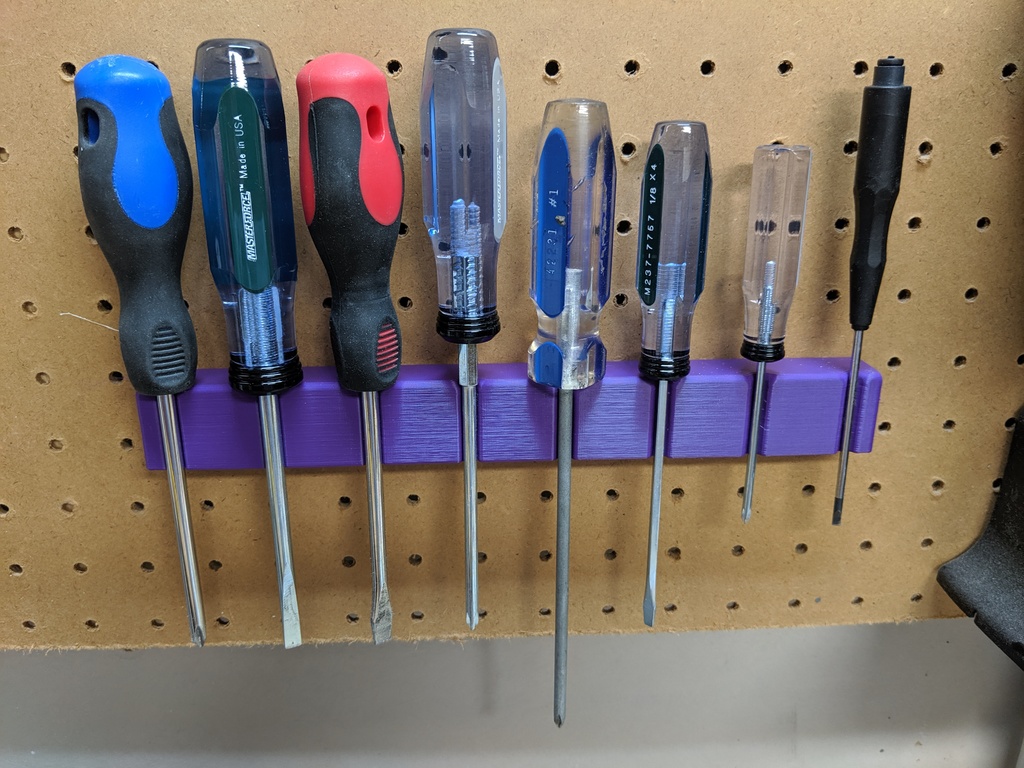
No special print settings required, though re-orienting the model is essential - I always forget to do that in F360, sorry about it. Fortunately, no supports were needed during printing. You can use either 10X2mm or 10X3mm rare earth magnets, with heavier tools working better when using the 3mm option, although they are much more expensive. Sixteen magnets are required (two per slot), and once inserted, they cannot be removed without damaging the print. Pegboard holes, specifically 1/4" in this case, are notoriously unevenly spaced. A simple solution is to use a 5/16 drill bit and just widen one of the holes. Be cautious not to force it too much, as you will break off the hooks if you do.
With this file you will be able to print Magnetic Pegboard Screwdriver Rack with your 3D printer. Click on the button and save the file on your computer to work, edit or customize your design. You can also find more 3D designs for printers on Magnetic Pegboard Screwdriver Rack.