Magnetic filament coupler
prusaprinters
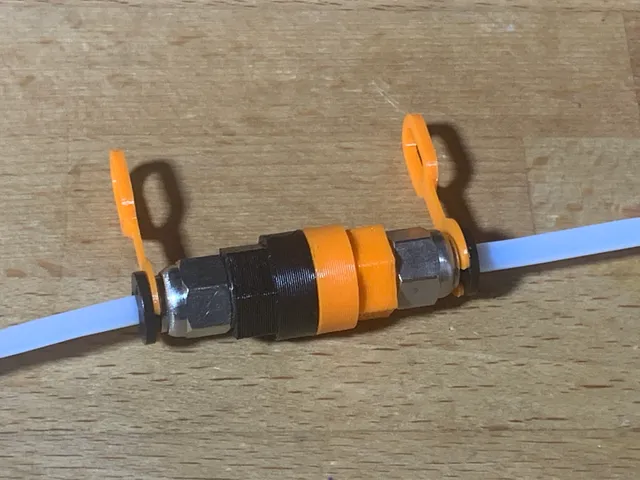
This is a filament coupler that uses ring magnets to allow quick disconnect of a PTFE tubeThis design offers a few improvements over the other designs I've found:Uses a PC4-M10 coupler with a retention clip (I suggest this one) to keep the PTFE tube in place, and prevent it from slipping backwards.Ends the PTFE tube inside the print, which prevents it from slipping forwards.The ring magnet is printed in-place and the mating surface is plastic to prevent chipping. Other designs expose the magnets, and in my experience they require a bit of glue to hold in place. And even then, the magnets tend to chip if they collide too hard. Not this. 12mm hex grip to make assembly easier. I personally find it difficult to get a good grip on small round surfaces, and so being able to use a standard tool, even if just for a couple of turns makes putting this together much easier.BOMPC4-M10 couplerPC4-M10 retention clip12mm x 3mm ring magnets with a 4mm hole.I had success with these Ferrite magnetsThese freedom unit .47 inch neodymium ones are effectively the same size and should be stronger.PTFE tube with 4mm outer diameter (I suggest the one with a 3mm inner diameter)Suggested Print SettingsPETG filament0.2mm layer height100% infillAdding a pause at or before 4.4mm layer height to insert the ring magnetSmooth or satin print surfaceAssembly1. With the print paused, insert the magnet. Be mindful of the magnet's polarity as you insert it so that the resulting print will have the desired attraction. The magnets have a countersunk hole, so in my prints I found it best to use a convention where orange has the counter sunk hole up, and black has the counter sunk hole down. 2. Once printed, insert the PTFE tube through the PC4-M10 coupler, and allow the PTFE tube to protrude by about 3.5mm. The intention is to have the PTFE tube to protrude far enough so that when screwed together, it goes completely through the magnet and makes contact with the inside of the mating surface. 3. Screw the coupler to the printed part. A 12mm wrench on the printed part, and a 10mm wrench on the metal coupler will help if you're like me and can't grip the small parts very well 4. Ensure that the PTFE tube clears the magnet, and completely touches the inside of the mating surface without any crimps or compression. If you like, take a hobby knife and chamfer the hole to the PTFE tube. In my testing, this is not necessary; but if it makes you happier, by all means go for it.*Note: Do not try to push the PTFE tube to be flush with the outer surface. It's a 3.5 mm hole, and you have a 4mm PTFE tube. It won't fit, and isn't designed to. 5. Attach retention clips and attempt to mate the couplers. If you've aligned your magnets correctly during the printing pause, you should get that satisfying snap letting you know you're ready to go.
With this file you will be able to print Magnetic filament coupler with your 3D printer. Click on the button and save the file on your computer to work, edit or customize your design. You can also find more 3D designs for printers on Magnetic filament coupler.