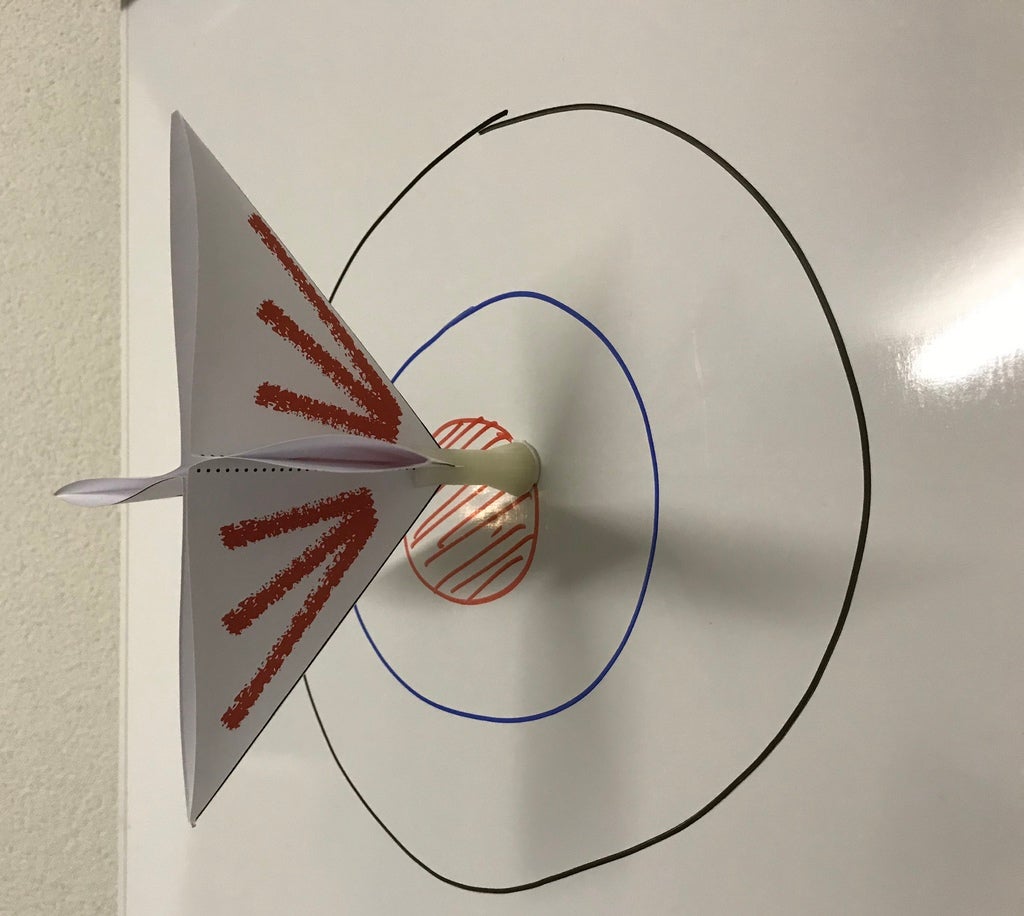
Magnetic Dart
prusaprinters
<p>This is a magnetic dart. A normal whiteboard with any drawing on it can be used as a target.<br/> You need to print the paper tail on a "normal" printer, cut it to be square, fold it and insert it in the dart body. (You can create any tail you like).<br/> Further you need a round magnet 10 mm and 5 mm height. You can buy those in the internet (i.e. supermagnets.ch).<br/> Also cut a 2 cm disc with a 1 cm hole to glue around the magnet. This is for shock absorption I used a 3 mm isolation foam.</p> <p>For the tail-fin: there is a .pdf file as an example.<br/> Print out this file borderless preferably on A4 format (American format should not make much of a difference)</p> <p>After printing cut the paper to become square.<br/> Fold the ends along the horizontal line up (Valley fold)<br/> Fold back turn 90 degrees and fold the ends according the vertical line up (Valley fold)</p> <p>Turn the paper over and fold the paper according to the dotted diagonal lines (mountain fold)<br/> Repeat for the other diagonal</p> <p>Than form the fin as shown in the picture (hold the end together with 4 fingers.<br/> Make sure that the tip is "sharp".</p> <p>Insert the tip in the body. The cuts in the body are inside tapered to accommodate the 90 degree angle of the tip.<br/> When you use 80-100g paper, glue is not needed (at least for the result on my 3D-printer, Da Vinci Mini W)</p> <p>I have added some pictures to explain this.</p> <h3>Print instructions</h3><h3>Category: Toy & Game Accessories Summary</h3> <p>This is a magnetic dart. A normal whiteboard with any drawing on it can be used as a target.<br/> You need to print the paper tail on a "normal" printer, cut it to be square, fold it and insert it in the dart body. (You can create any tail you like).<br/> Further you need a round magnet 10 mm and 5 mm height. You can buy those in the internet (i.e. supermagnets.ch).<br/> Also cut a 2 cm disc with a 1 cm hole to glue around the magnet. This is for shock absorption I used a 3 mm isolation foam.</p> <p>For the tail-fin: there is a .pdf file as an example.<br/> Print out this file borderless preferably on A4 format (American format should not make much of a difference)</p> <p>After printing cut the paper to become square.<br/> Fold the ends along the horizontal line up (Valley fold)<br/> Fold back turn 90 degrees and fold the ends according the vertical line up (Valley fold)</p> <p>Turn the paper over and fold the paper according to the dotted diagonal lines (mountain fold)<br/> Repeat for the other diagonal</p> <p>Than form the fin as shown in the picture (hold the end together with 4 fingers.<br/> Make sure that the tip is "sharp".</p> <p>Insert the tip in the body. The cuts in the body are inside tapered to accommodate the 90 degree angle of the tip.<br/> When you use 80-100g paper, glue is not needed (at least for the result on my 3D-printer, Da Vinci Mini W)</p> <p>I have added some pictures to explain this.</p> <h3> Print Settings</h3> <p><strong>Printer:</strong> XYZ Da Vinci Mini W</p> <p><strong>Rafts:</strong> No</p> <p><strong>Supports:</strong> No</p> <p><strong>Resolution:</strong> 0.2</p> <p><strong>Infill:</strong> standard</p> <h3> How I Designed This</h3> <p>Desgned with Tinkercad</p>
With this file you will be able to print Magnetic Dart with your 3D printer. Click on the button and save the file on your computer to work, edit or customize your design. You can also find more 3D designs for printers on Magnetic Dart.
