Magnetic Charging Phone Stand
prusaprinters
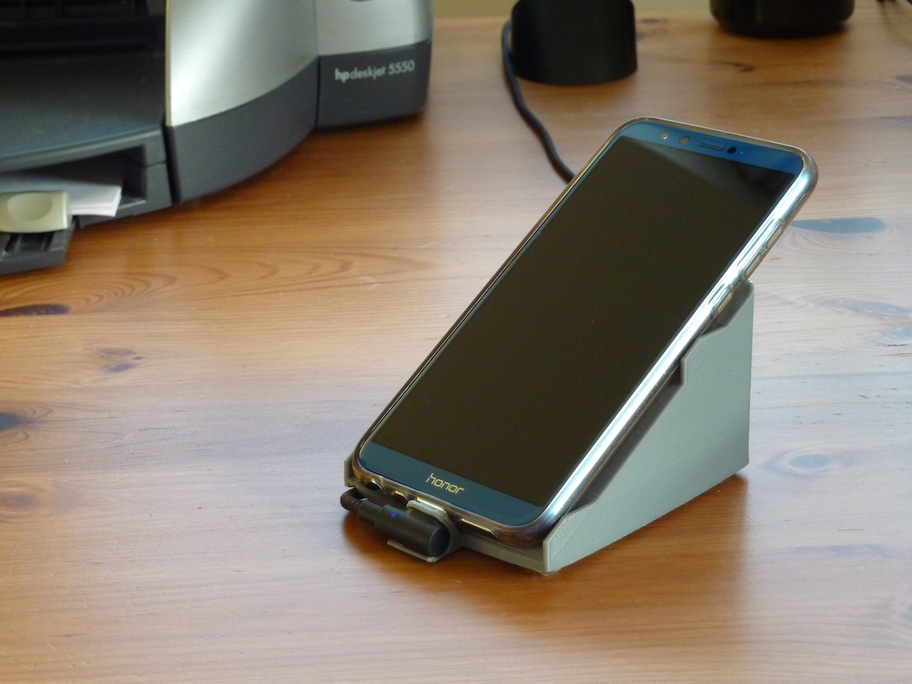
<p>A desk phone-stand with an integrated <a href="https://smile.amazon.co.uk/dp/B07WMFM5N2">right-angled magnetic charging cable</a>, which runs through the bottom of the stand and out of the back. Just drop the phone onto the stand to start charging.</p><p>It’s sized for a phone wearing <a href="https://smile.amazon.co.uk/gp/product/B07B3DV9M8">this case</a>, leaving the fingerprint sensor on the back clear. You can edit it online <a href="https://www.tinkercad.com/things/iOiQSBvGRqS">in Tinkercad</a> to fit your own phone (case).</p><p>Add four <a href="https://www.google.co.uk/search?q=2.5%C2%A0mm+adhesive+feet&tbm=shop">2.5 mm-tall adhesive rubber feet</a> under the stand for grip.</p><p><strong>See </strong><a href="https://www.prusaprinters.org/prints/139268"><strong>V2</strong></a><strong> which has a narrower bed for more comfortable access to the power button.</strong></p><p><i>(Re entry into Cable Organizers competition: I designed this to organise a single loose charging cable – not quite sure whether it’s what the competition setters had in mind…)</i></p><h3>Print settings</h3><p><strong>Layer height</strong>: I used 0.32 mm – though after eight months of pressing my fingertips against the side multiple times a day as I release the phone, I see there’s a crack there, so maybe 0.2 mm would be better to squish the layers together more.<br><strong>Initial layer height</strong> (assuming 0.32 mm layer height elsewhere): 0.172 mm to avoid a small gap, in Cura at least, between the sloping phone bed and the charger retainer<br><strong>Line widths</strong>: inner wall & infill 0.4 mm; outer wall & top 0.8 mm (my nozzle diameter is 0.4 mm)</p><p><strong>Wall thickness</strong>: 1.2 mm (being a 0.8 mm outer plus, where there’s space for it, a 0.4 mm inner)<br><strong>Outer before inner walls</strong> for the slope of the bed.<br>I put the <strong>Z seam</strong> at the back, out of sight.</p><p>Just two <strong>top layers</strong> (for 0.32 mm layer height), to avoid extra passes making the phone-bed bridge sag, and so that the finished bed is thin enough to have some give, which is probably good for dropping the phone onto it over and over.<br>I used no <strong>bottom layers</strong>.</p><p><strong>Infill:</strong><br>I used a Cura <a href="https://support.ultimaker.com/hc/en-us/articles/360013370140-How-to-adjust-print-settings-of-a-part-of-my-model-in-Ultimaker-Cura">infill mesh</a> to make two sections:</p><ul><li>To contain the cable tunnel, I used 15% Triangles infill for the bottom 3.692 mm (to just below the phone bed).</li><li>I left the rest with no infill: the phone bed bridged happily without; and with no infill the thin bed has a bit of give.</li></ul><p>I positioned the infill mesh over the top rather than bottom section, to avoid a Cura bug/feature whereby the meshed infill got printed before the walls.</p><p><strong>Supports</strong>: none</p><h3>How I designed this</h3><p>In Tinkercad. <a href="https://www.tinkercad.com/things/iOiQSBvGRqS">Edit it online.</a></p>
With this file you will be able to print Magnetic Charging Phone Stand with your 3D printer. Click on the button and save the file on your computer to work, edit or customize your design. You can also find more 3D designs for printers on Magnetic Charging Phone Stand.