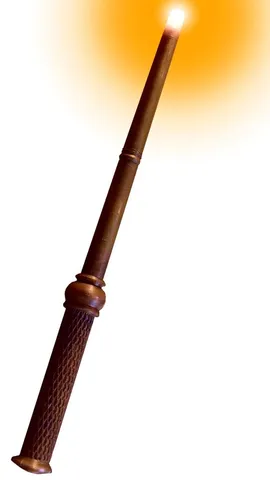
Magic Wand / Wizards Wand (+light)
prusaprinters
If you would like to buy or manufacture this wand, contact me at info@fedevel.comThis wand can be printed without or with an LED light. The wand itself is built from 5 main pieces - they screw together. This project also includes additional pieces for a battery holder, in case you would like to add the LED light.If you need any help with building this wand, just let me know. - RobertPS: If there is interest, I will make this tutorial more detailedPrint SettingsPrinter Brand:CrealityPrinter: Ender 3 ProRafts:YesSupports: NoResolution:200Infill: 20Filament: Verbatim PETG Transparent Notes: Printing the wand:1. The "Tip" & "Bottom" can be printed without rafts 2. You may want to print the "Handle" upside down (but it may not be required)Adding the LED light (Optional):Print the battery holder components. You will need 4x bh_side and 2x bh_end. Use 100% infill, no rafts and make sure to place the bh_side flat so they are stronger (see the attached pictures).Post-PrintingThe wandAfter printing, you may need to clean up the threads a little bit.Battery holder (Optional)You will need:2x Aluminium Rivets https://sk.farnell.com/laser/1799/rivets-2-4mm-x-5-5mm-x30/dp/25037342x Ring Tongue Terminal https://sk.farnell.com/jst-japan-solderless-terminals/0-5-3/terminal-ring-tongue-m3-22awg/dp/26777131x 10cm / 4inch Red wire https://sk.farnell.com/lapp-kabel/4126104s/wire-liy-red-0-25mm/dp/47556501x 20cm / 8inch, 1x 30cm / 12inch Black wire https://sk.farnell.com/lapp-kabel/4126001s/wire-liy-black-0-25mm/dp/4755571A spring from battery holder: https://sk.farnell.com/multicomp-pro/mp000345/battery-holder-aaa-wire-lead/dp/31265825x LR44 batteries3D printed holder partsYou will also need super glue, a soldering iron and a hand riveter to put everything together. You may use a heatshring (https://www.digikey.sk/product-detail/en/qualtek/Q2-F3X-1-8-01-QB48IN-25/Q2F3X018B-ND/1210323) to protect the soldered contacts.To see how the finished battery holder looks, check out bh_dissasembled picture. Only glue the bh_sides to the "-" bh_end. The "+" bh_end (with spring) can be detached, so you can easily replace batteries. Once the battery holder is assembled, insert it inside of the handle and solder the switch.Build Option 1: Wand Only (no light)Simply screw the 5 main pieces together.Build Option 2: With a Simple LightYou can add an LED into the tip of the wand. Place a switch inside of the bottom part (there is already an opening ready for a switch like this https://sk.farnell.com/c-k-components/os102011ms2qs1/switch-slide-shorting-spdt/dp/2435105), wire up some batteries, connect a resistor (e.g. 1k), connect an LED (choose your color) and put everything inside of the wand.Build Option 3: Add Light Effects and Spell RecognitionYou can create the electronics for this wand by following a step-by-step tutorial on youtube.The finished wand is able to recognize different spells (wand movements) and generate different light effects.Here is a link to the tutorial: https://www.youtube.com/playlist?list=PLXvLToQzgzdea0sQXmpY8k4tfiXpkYIwOThe Finished Wand: Category: Toys & Games
With this file you will be able to print Magic Wand / Wizards Wand (+light) with your 3D printer. Click on the button and save the file on your computer to work, edit or customize your design. You can also find more 3D designs for printers on Magic Wand / Wizards Wand (+light).
