Maghex Perfect Set Magnet Jig
prusaprinters
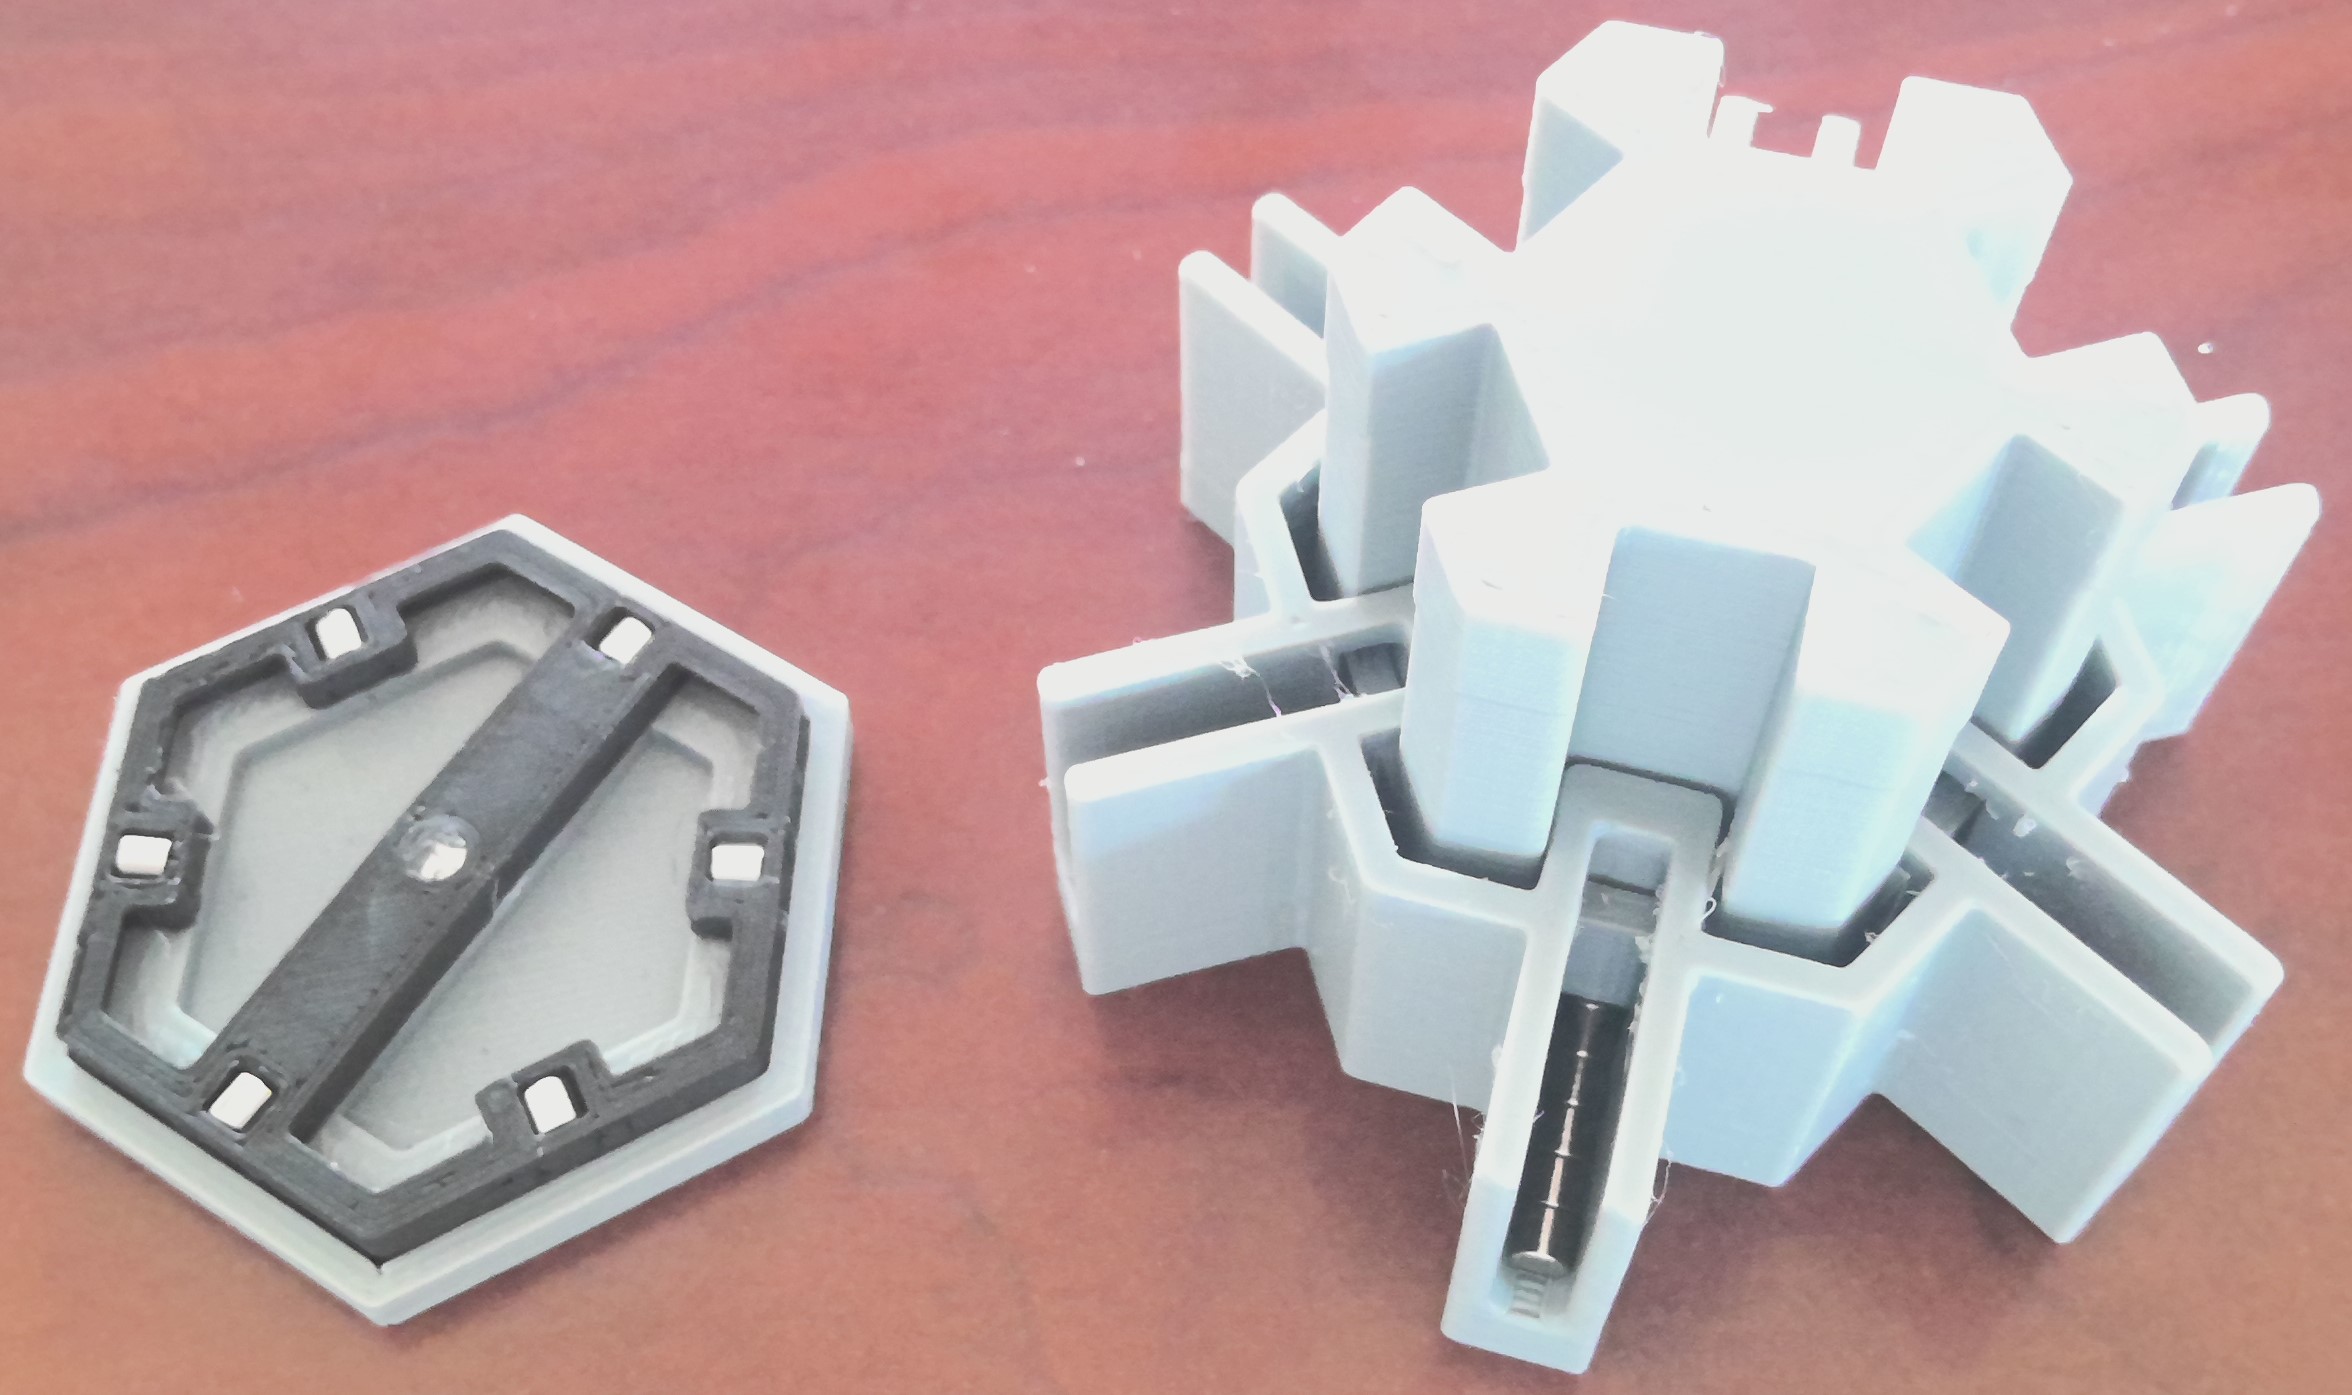
<p>V1.2:</p><ul><li>Increased depth of magnet recess in Bottom Jig to make the magnet sit flush, instead of protruding</li></ul><p>V1.1:</p><ul><li>I noticed that the magnets tended to go perpendicular in the channel when the magnet count got low. I've added a top stopper to each channel to prevent this.</li><li>Widened the holes in the top jig for the alignment magnets. They will now need to be glued into place as I found the alignment post were too fragile and kept breaking.</li><li>Update width of alignment posts. The magnets should now no longer stick out towards the center.</li></ul><p>======================================================================</p><p>Introducing the maghex magnet set jig. You want this, no, you need this if you're getting into the maghex system. Make your life easier and reduce the hardest and most annoying part of the system (setting the magnets) down to a trivial ~15 seconds per piece and have perfectly aligned magnets every time.</p><figure class="media"><oembed url="https://www.youtube.com/watch?v=JQBdhiR4BRk"></oembed></figure><p>This jig is intended to set magnets with the <a href="https://www.printables.com/model/253284-maghex-base-with-centermag">Maghex base with centermag</a>. This was designed to allow for every maghex to accept magnetized terrain, hence every single maghex I print has a center mag. It may work with other version of of maghex bases, but it was design for this. I have included the original parametric Fusion 360 design file (.f3z) that you should use if you ever have to remix the model for any reason.</p><p>All three printable pieces of the jig are included in the one 3mf file. </p><p>This print can print without any supports. Ensure the “Top Jig” piece is oriented the correct way prior to printing.</p><figure class="image image_resized" style="width:36.13%;"><img src="https://media.printables.com/media/prints/287733/rich_content/427582be-4081-4995-ad99-f62f3c8e7694/print-orientation.png#%7B%22uuid%22%3A%222498d16d-4b05-4525-a489-041239e0158d%22%2C%22w%22%3A1032%2C%22h%22%3A928%7D"></figure><h3>Setup and Use</h3><p>Follow these steps to ensure flawless use.</p><p>NOTE: This was printed with a .6mm nozzle.</p><h4>Setting the alignment magnets:</h4><p><strong>CenterMag Setting:</strong></p><ol><li>Insert the magnet in any direction and push with force to insert if you don't already have a set polarity based off previously printed pieces. If you already have printed maghex's with center magnets, you'll want to ensure proper polarity.</li><li>If you do not wish to utilize the center magnet (i.e. you do not plan to utilize magnetic terrain) then you can skip this step.</li></ol><figure class="image image_resized" style="width:50%;"><img src="https://media.printables.com/media/prints/287733/rich_content/56f93be1-9189-4dcc-a0fa-25c3dbf59b0a/win_20221002_14_40_34_pro.jpg#%7B%22uuid%22%3A%22b28c2ffe-4487-4eb4-bee0-f2ca3058ba22%22%2C%22w%22%3A999%2C%22h%22%3A718%7D"></figure><p><strong>Outer Mag Setting:</strong></p><ol><li>Set the magnets into the Top Jig in an alternating pattern of polarity with a dab of glue. I found it easiest to set 3 of the same polarity (blue) then set the other 3 with the opposite polarity (red). </li><li>Once all magnets are inserted, insert the Pusher into Top Jig to ensure free sliding movement. </li></ol><p>Tips:</p><ul><li>These can be relatively easily inserted using a pair of needle nose pliers as see below. </li></ul><p> NOTE: After setting about 150 bases the magnet holes widened in PLA and the magnets began to shift upon insertion. I've narrowed the space to attempt to prevent this. After testing this in ASA material it's proven to be much more robust.</p><p>NOTE2: With the <a href="https://www.printables.com/model/253284-maghex-base">new model of hexes</a> I've increased the tolerance a bit and now the jig works fairly effortlessly. It's now fairly robust with PLA (200+ hexes). </p><ul><li>Magnets must be fully inserted into alignment posts, or they may interfere with the Pusher.</li></ul><figure class="image image-style-align-center image_resized" style="width:41.45%;"><img src="https://media.printables.com/media/prints/287733/rich_content/0be7abe4-3c3d-473c-8d07-6927dd519e0e/win_20221002_14_40_20_pro.jpg#%7B%22uuid%22%3A%2275862470-6998-4952-b087-7981411a13e1%22%2C%22w%22%3A1206%2C%22h%22%3A1221%7D"></figure><figure class="image image-style-align-center image_resized" style="width:45.7%;"><img src="https://media.printables.com/media/prints/287733/rich_content/7c85488c-7163-4794-8a73-1018f2417976/win_20221002_15_01_52_pro.jpg#%7B%22uuid%22%3A%22c137ef03-41d3-4b29-ad45-9a0b93734521%22%2C%22w%22%3A1589%2C%22h%22%3A1150%7D"></figure><h4>Jig Usage</h4><p><strong>Setting CenterMag:</strong></p><p>1. Drop magnet on top of Bottom Jig and place empty maghex on top of it with one side inserted at an angle. </p><figure class="image image_resized" style="width:64.74%;"><img src="https://media.printables.com/media/prints/287733/rich_content/f851f8fc-96bc-4a58-8130-606bd67e2e90/win_20221002_14_49_36_pro.jpg#%7B%22uuid%22%3A%22c27087c5-fd92-426f-beb6-e9a810e79609%22%2C%22w%22%3A3968%2C%22h%22%3A2232%7D"></figure><p>2. Push down on center of maghex to insert magnet.</p><figure class="image image-style-align-center image_resized" style="width:23.34%;"><img src="https://media.printables.com/media/prints/287733/rich_content/c4f8eda8-ed10-4150-95fa-be2cd640f7f4/win_20221002_14_50_21_pro.jpg#%7B%22uuid%22%3A%22534c90fa-dbe6-40cc-83fc-94e47ac384e1%22%2C%22w%22%3A850%2C%22h%22%3A739%7D"></figure><p>Tips:</p><ul><li>Ensure empty maghex is aligned properly with center post.</li><li>Use a pushing block to ensure uniform force is applied to prevent bending centerpost.</li></ul><p> </p><p><strong>Setting up Top Jig and Pusher:</strong></p><p>1. Insert Pusher into Top Jig.</p><figure class="image image-style-align-center image_resized" style="width:23.1%;"><img src="https://media.printables.com/media/prints/287733/rich_content/51ebb5f4-7109-4c47-9cd4-0c463fab97cd/win_20221002_14_41_24_pro.jpg#%7B%22uuid%22%3A%22c817da6f-0ff3-41cf-a6bd-4918515230fc%22%2C%22w%22%3A1409%2C%22h%22%3A1434%7D"></figure><p>2. Pull Pusher all the way to the top of the Top Jig.</p><figure class="image image-style-align-center image_resized" style="width:23.42%;"><img src="https://media.printables.com/media/prints/287733/rich_content/ab373c3c-04cb-42f7-8e53-48f00b8e4f6e/p1.jpg#%7B%22uuid%22%3A%22d8417bc9-cbde-49fc-8ae1-67714c712317%22%2C%22w%22%3A1243%2C%22h%22%3A1322%7D"></figure><p>3. Insert magnet clusters into magnet chambers to preload the Top Jig.</p><figure class="image image-style-align-center image_resized" style="width:23.4%;"><img src="https://media.printables.com/media/prints/287733/rich_content/1eb4fd7d-1ae2-43ae-a5a1-dfe6eafe25a6/p1.jpg#%7B%22uuid%22%3A%22f19bcc64-0919-4a6e-96c4-eee905db550e%22%2C%22w%22%3A1243%2C%22h%22%3A1322%7D"></figure><p>Tips:</p><ul><li>Ensure your magnet clusters contain the same number of magnets. If not, it's possible to get into a groove and only insert 5 magnets in one chamber and 6 in the others, leaving you to try and determine the polarity you missed. Totally didn't happen to me….</li></ul><p><strong>Setting Outer Magnets:</strong></p><p>1. Place Top Jig with Pusher on top of Maghex aligned in Bottom Jig.</p><figure class="image image-style-align-center image_resized" style="width:24.1%;"><img src="https://media.printables.com/media/prints/287733/rich_content/5ec3845b-17dd-4225-b180-f16f73cf43c5/win_20221002_14_50_54_pro.jpg#%7B%22uuid%22%3A%22bcaf151f-5f80-4520-827b-d9770b670ba6%22%2C%22w%22%3A1277%2C%22h%22%3A1338%7D"></figure><p>2. Using push block, push down until magnets are set in the maghex. You may have to slightly rock the push block until the magnets are set.</p><figure class="image image-style-align-center image_resized" style="width:38.52%;"><img src="https://media.printables.com/media/prints/287733/rich_content/0a4bd33e-ec19-4278-93e9-6c18ccab026d/win_20221002_14_51_25_pro.jpg#%7B%22uuid%22%3A%222354c924-b7c2-4ed8-813d-8c93575f4aae%22%2C%22w%22%3A2171%2C%22h%22%3A1661%7D"></figure><figure class="image image-style-align-center image_resized" style="width:47.11%;"><img src="https://media.printables.com/media/prints/287733/rich_content/82a99522-8b4d-4a9c-87e5-ee99ec55302c/win_20221002_14_52_09_pro.jpg#%7B%22uuid%22%3A%22fbf285ca-bfd7-4aed-b5b3-9d01197c42c1%22%2C%22w%22%3A2352%2C%22h%22%3A1395%7D"></figure><p>3. Remove Bottom Jig and Maghex.</p><p>4. Pull up on Pusher to preload next cycle.</p>
With this file you will be able to print Maghex Perfect Set Magnet Jig with your 3D printer. Click on the button and save the file on your computer to work, edit or customize your design. You can also find more 3D designs for printers on Maghex Perfect Set Magnet Jig.