Macintosh BlueSCSI 1.0 Bracket
prusaprinters
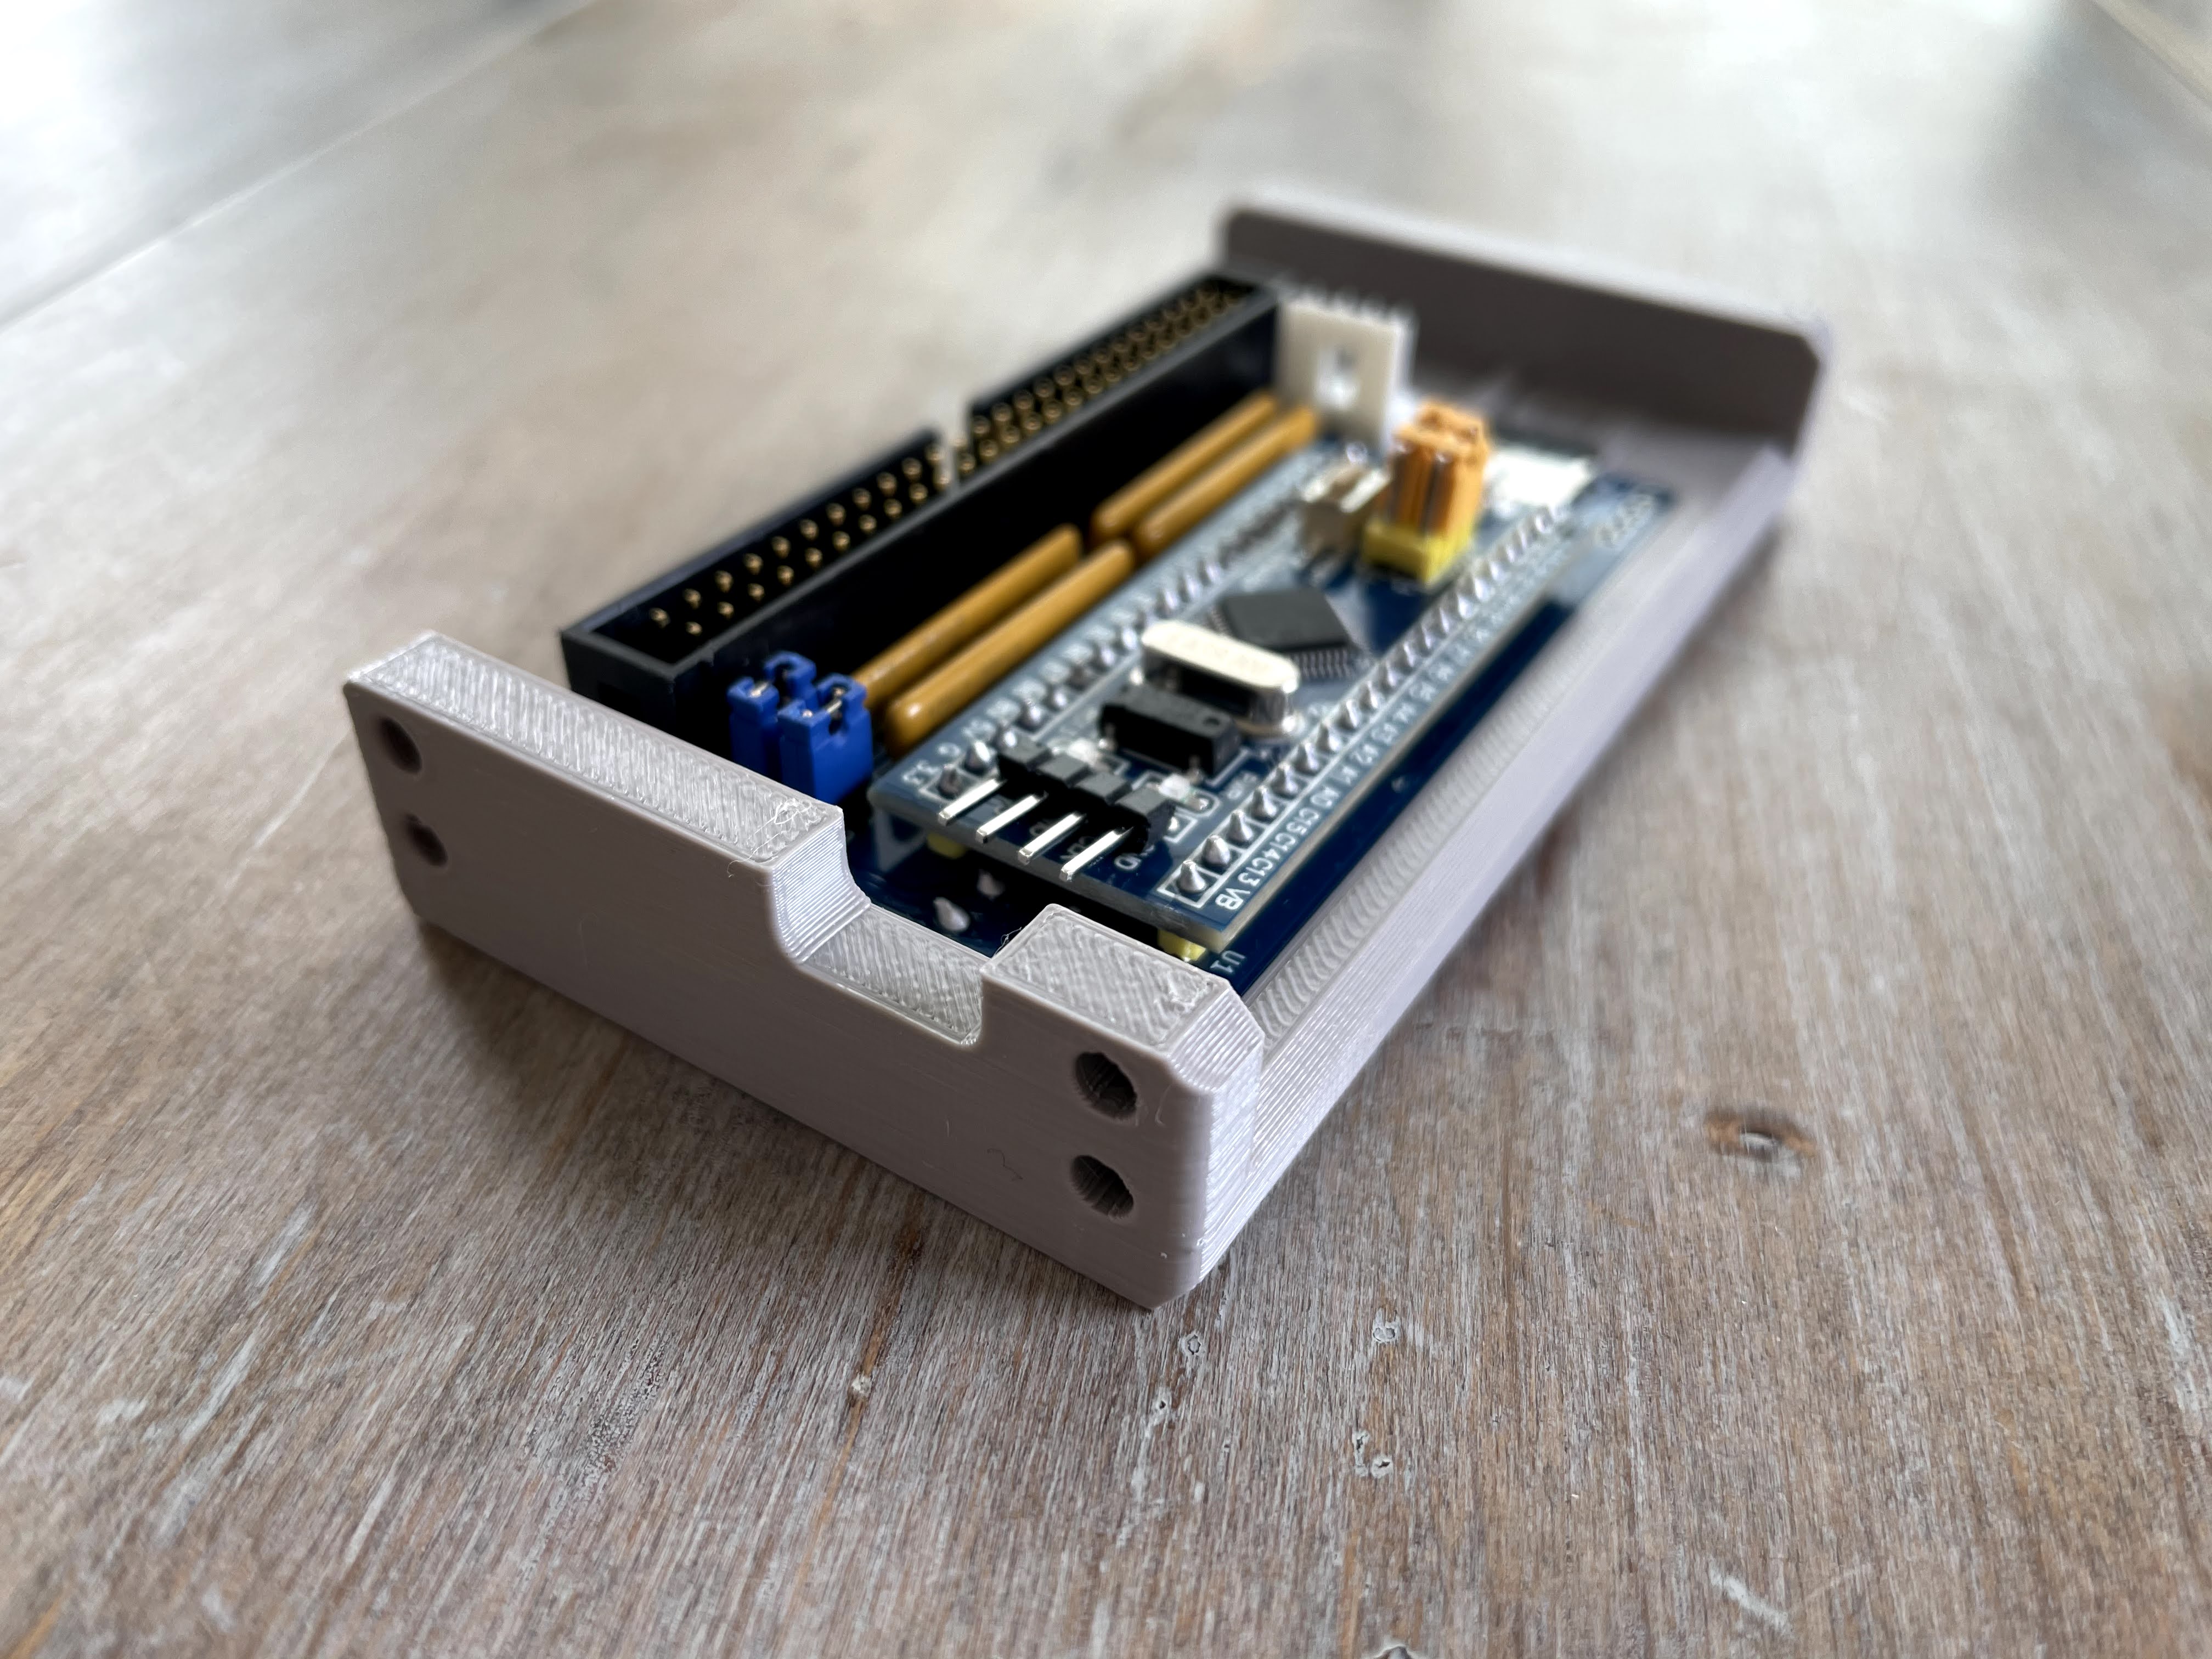
<p>This 3D printed bracket is designed to mount a BlueSCSI in the 3.5" hard drive bay in vintage Macintosh computers. The BlueSCSI slides into the hold-downs near the SCSI connector, firmly snaps into place on the back, and is optionally held into the bracket with a single M2.5 screw. It uses the original hard drive screws.</p><p>There is plenty of space underneath the BlueSCSI for the pin headers and diodes (even if you decide to not trim off the pin headers during assembly). There is a notch on the side to give easier access to the programming header, if needed. There's also a tray to make lining up and installing the MicroSD card easier.</p><h3>Where can I buy one?</h3><p>Of course, you're welcome to print your own, but if you don't have a 3D printer, you can <a href="https://www.etsy.com/listing/990568228/macintosh-bluescsi-bracket?ref=prusaprinters">purchase a bracket on my Etsy store</a>.</p><h3>Compatibility</h3><p>The bracket comes in two versions: one with 45 mm mounting hole spacing, and one with 60 mm mounting hole spacing.</p><h4>Macintosh SE</h4><p>Untested, but expected to work with both versions. 45 mm recommended. If you try it, I recommend checking the hole spacing for 45 mm. If it works, please let me know!</p><h4>Macintosh SE/30</h4><p>45 mm version recommended, 60 mm compatible. The original SCSI cable is just long enough to reach the BlueSCSI.</p><figure class="image image_resized" style="width:75%;"><img src="https://media.prusaprinters.org/media/prints/64637/rich_content/c125e34b-3fd7-44c7-acd9-db1edec0562a/img_2171.jpg#%7B%22uuid%22%3A%22069d4022-cc8d-474e-bf8c-6254dde8a0b3%22%2C%22w%22%3A960%2C%22h%22%3A720%7D"></figure><h4> </h4><h4>Classic II</h4><p>60 mm compatible. The 60 mm version tested and fits. The original SCSI cable is just long enough to reach the BlueSCSI.</p><figure class="image image_resized" style="width:75%;"><img src="https://media.prusaprinters.org/media/prints/64637/rich_content/553c6136-9b2f-448b-a4dc-c2db96d9a45d/img_2203.jpg#%7B%22uuid%22%3A%22d0c886da-9c19-4054-a463-7912c04dfb61%22%2C%22w%22%3A960%2C%22h%22%3A720%7D"></figure><h4>Macintosh LC, LCII, LCIII, and Performa 475/476</h4><p>45 mm version recommended, 60 mm compatible. Tested for fitment in the LCII and Performa 476. Mount the bracket as far back in the hard drive bay as possible, using position “B”. Store the two extra screws on the bracket for future use.</p><figure class="image image_resized" style="width:75%;"><img src="https://media.prusaprinters.org/media/prints/64637/rich_content/60551597-5d7c-4e2e-9484-f9fb4ba012c4/img_2184.jpg#%7B%22uuid%22%3A%22c4c8e769-5007-4266-8915-d0913337381a%22%2C%22w%22%3A960%2C%22h%22%3A720%7D"></figure><figure class="image image_resized" style="width:75%;"><img src="https://media.prusaprinters.org/media/prints/64637/rich_content/4c56eebc-2323-40b7-bff1-33c3ee6a0f98/img_2188.jpg#%7B%22uuid%22%3A%22826d0178-d21c-40dd-8add-cb0034cb9db4%22%2C%22w%22%3A960%2C%22h%22%3A720%7D"></figure><h3>BlueSCSI Installation</h3><p>To install the BlueSCSI into the bracket, firmly slide it forward and under the catches on the front of the bracket. Use your thumbs to firmly push down on the corners of the BlueSCSI, and it will snap into place. <strong>It does take a very, very firm push the first time you install it</strong> - just make sure it is firmly pushed towards the front of the bracket, and under the catches. Then, give it a very solid press down on each remaining corner. To remove the BlueSCSI, flex the bracket like an ice cube tray, and the BlueSCSI will pop out. Installation of the M2.5 screw is optional.</p>
With this file you will be able to print Macintosh BlueSCSI 1.0 Bracket with your 3D printer. Click on the button and save the file on your computer to work, edit or customize your design. You can also find more 3D designs for printers on Macintosh BlueSCSI 1.0 Bracket.