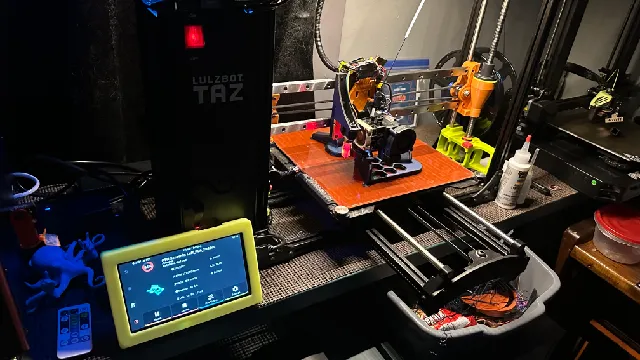
Lulzbot Taz 6 X Linear Rails MOD
prusaprinters
Wanted to give a quick warning: There are a lot of tight tolerances at play here, you may have to heat up certain things to make them a snug fit, etc, depending on your printer. THIS MOD REQUIRES A PRETTY DEEP UNDERSTANDING OF HOW THESE THINGS WORK. But as usual, enjoy :)Make sure to use a strong filament to print the parts. PETg, ABS, Etc.I went ahead a published this, but A LOT more info needs added. I will add the rest later, I wasn't very prepared to add this to Printables, ( It was meant to be just a GitHub thing ), but I will try my best to make it as detailed as I can given the amount of time I have to do these things, haha LINKS:https://a.co/d/asvMYez ← I used two of these in my build.https://a.co/d/7lZNEgn ← Use this to lubricate the rails.https://a.co/d/aOkivR2 ← More precise bearings if you need these for other rails. The BEAUTY of open source hardwarehttps://ohai.lulzbot.com/group/taz-6/ ← Any info related to the hardware of this printer is located here: These are Open Hardware Assembly Instructions.https://download.lulzbot.com/TAZ/6.0/ ← All things related to printer: printable parts, manuals, software, etc.https://cad.onshape.com/documents/db1314645041f433a24b6dc3/w/6aee9c13ac54c11d09e02da0/e/b7de97fc974a48bdc73dd85b ←←← An VERY good model of anything on this printer. In this model, everything is STOCK. A MASSIVE Thanks to Daniel and Helton at Engineerable. I also had an issue with the PEI, ( I think it's called that, the thin layer used for adhesion ), peeling away from the glass. Instead of ordering a new piece and replacing, I altered it. I took the bed off the printer, peeled off the PEI sheet, and removed the glue. Removing the glue is a royal PITA, so if you attempt to do this as well, be prepared to use a lot of alcohol and goo gone.Afterwards though, you should end up with a nice smooth piece of glass. Now for adhesion, I use this on the bare glass: https://a.co/d/6tAwpxu Follow the instructions carefully it work very well for me. I redid the belt clamp system to be stronger for photo listed below, (stock part shown) :X Carriage and Belt Clamp STL Files. The system is a little finicky, but it is used to position the belt in the location you choose to allow for better tension across the entire X axis. MY GITHUB PAGE For this printer and the BigTreeTech Octopus Mainboard swap.https://github.com/FunkyNuggets007/Taz6_BTTOctopus_BLTouch_Klipper_HemeraXSRevo_CB1-PI4B
With this file you will be able to print Lulzbot Taz 6 X Linear Rails MOD with your 3D printer. Click on the button and save the file on your computer to work, edit or customize your design. You can also find more 3D designs for printers on Lulzbot Taz 6 X Linear Rails MOD.
