LulzBot TAZ 6 Remix Custom
thingiverse
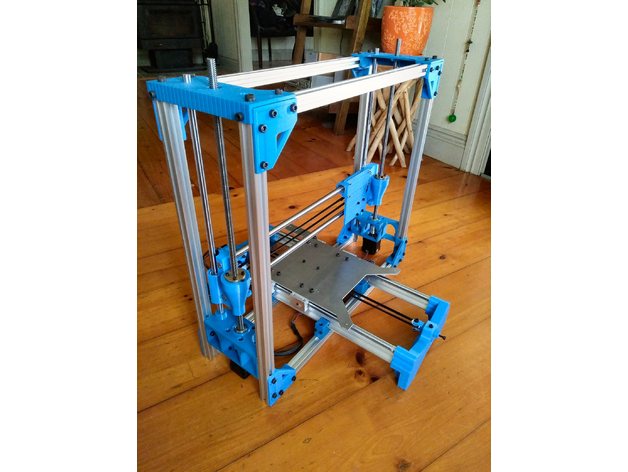
This has been completely revised into a new version of the Yaxis and other enhancements https://www.thingiverse.com/thing:3819363 If you prefer this Yaxis with supported rails, just download the updated parts from the new version. This is my version of the LuzBot TAZ 6, based on and partly redrawn from the LulzBot OpenSource files but reconfigured to avoid some unusual ideas like inadequate belt tensioning and poorly drawn components that left me perplexed. 2018 July: Added 10mm Bearing holders for the X axis carriage. 2018 MAJOR UPDATE: I have completely redesigned the lower Z axis motor mounts (version 3). This is a more printer-friendly design and provides a bit more Z axis height for certain applications. Parts: 2020 extrusion 4x 500 4x 510 SBR12 12mm Supported Linear Rail (Y axis) 2x 500 SBR12UU Bearing Block (Y axis) 4x bearing block (or three if preferred) 12mm Smoothrod (X axis) 2x 520 10mm Smoothrod (Z axis) 2x 450 10x2 Leadscrew 2x 420 Z X Axis Bearing Z 2x LM10LUU (long bearing or 4x short) X 3x LM12UU Z axis Leadscrew 2x 608Z bearing T-Slot Slide in T-nuts for 2020 Frame M5 T nuts x80+ (76 for frame and Y axis only) Bolts M5x10 Caphead x80+ (76 for frame and Y axis only) M5x25 Caphead x11 Yaxis to Main Frame and XY belt pulley +Nyloc nuts M4x30 Caphead x3 XY Belt tension +Nyloc nuts M4x20 x8 Mixture of Caphead and Countersunk for X carriage bearings +Nyloc nuts M3x55 Caphead x8 Yaxis Clamp Blocks +Nyloc nuts M3x10 Caphead x20 Nema17 motor mount and Zaxis M10x2 nut I replaced the original download with a new one that includes the STL files for doing the X Smooth Rods without using melt-in inserts. Update: in the downloads there is a ZIP file 1st_concept_z_carriage_no_insert.zip which contains the STL's for doing the X Smooth Rods without using the Melt in inserts. These are not tested to date but should work without a problem. It uses M3 Square nuts... square because at 3mm a hexagon is almost round and it might just spin. So do a search on eBay and get some square nuts; they're cheap. Note: the left hand one has a shouldered hole so you only need nuts at one end... this could also be used for the Heat Insert instead of the z_carriage_motor_ak.stl and save 2 inserts for a rainy day. Added: Y_axis_linear_rail_clamp_less_2mm.stl with 2mm more clearance for the Y axis bearing block. Added: Y_axis_endplate_Test.stl this is to make sure the endplates fit the Linear Rails With this cutting list, the Max Travel of Z is 250mm. You can achieve 260mm but homing with the raise before descending will catch the fame corner on the X motor. Print Settings: Printer: Wilson II Rafts: Doesn't Matter Supports: Yes Resolution: 0.2 Infill: 80%
With this file you will be able to print LulzBot TAZ 6 Remix Custom with your 3D printer. Click on the button and save the file on your computer to work, edit or customize your design. You can also find more 3D designs for printers on LulzBot TAZ 6 Remix Custom.