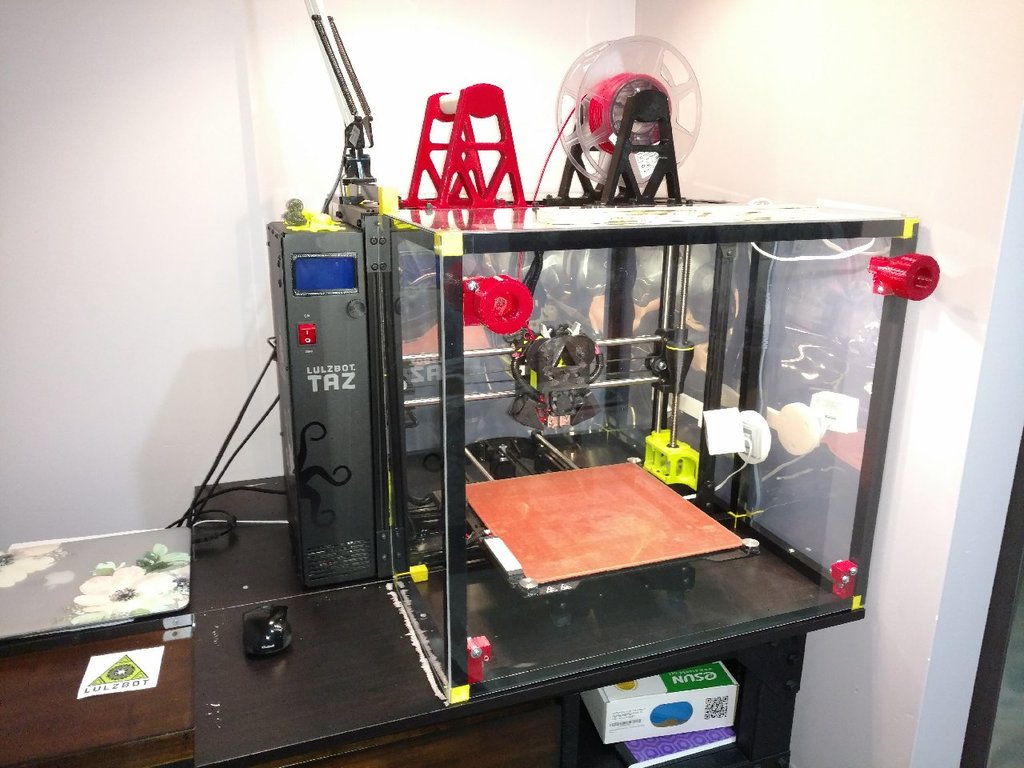
Lulzbot Taz 6 Enclosure
thingiverse
I had to safeguard my print bed against drafts in my chilly basement. This design utilizes balusters found at the hardware store. The aluminum balusters are originally designed for deck railings, but I repurposed them for this project. Initially, I employed a roll of plastic, securing it to the frame with black electrical tape, but I wasn't satisfied with that setup so I purchased Plexiglas from Lowes, a local home improvement store. To access the print bed, I created panel retainer components. These are essentially angled slides that the panel side rests on. You can remove the panel and place it on the lower components when you need to access the print bed; see page three of this design for details. Additionally, I printed two knobs that install along with the upper retainer components. Due to a shortage of balusters, I constructed a longer one using two scrap pieces. I also printed a C Connector with the third element oriented below the print bed. Note that these connectors are extremely tight fits, so you'll have to use a rubber mallet to tap them into place. Shrinking them slightly before printing is a good idea; once in, they won't come out unless you shrink the design a bit. I anchored the frame to a board under the printer to prevent it from moving, but that's an optional step.
With this file you will be able to print Lulzbot Taz 6 Enclosure with your 3D printer. Click on the button and save the file on your computer to work, edit or customize your design. You can also find more 3D designs for printers on Lulzbot Taz 6 Enclosure.