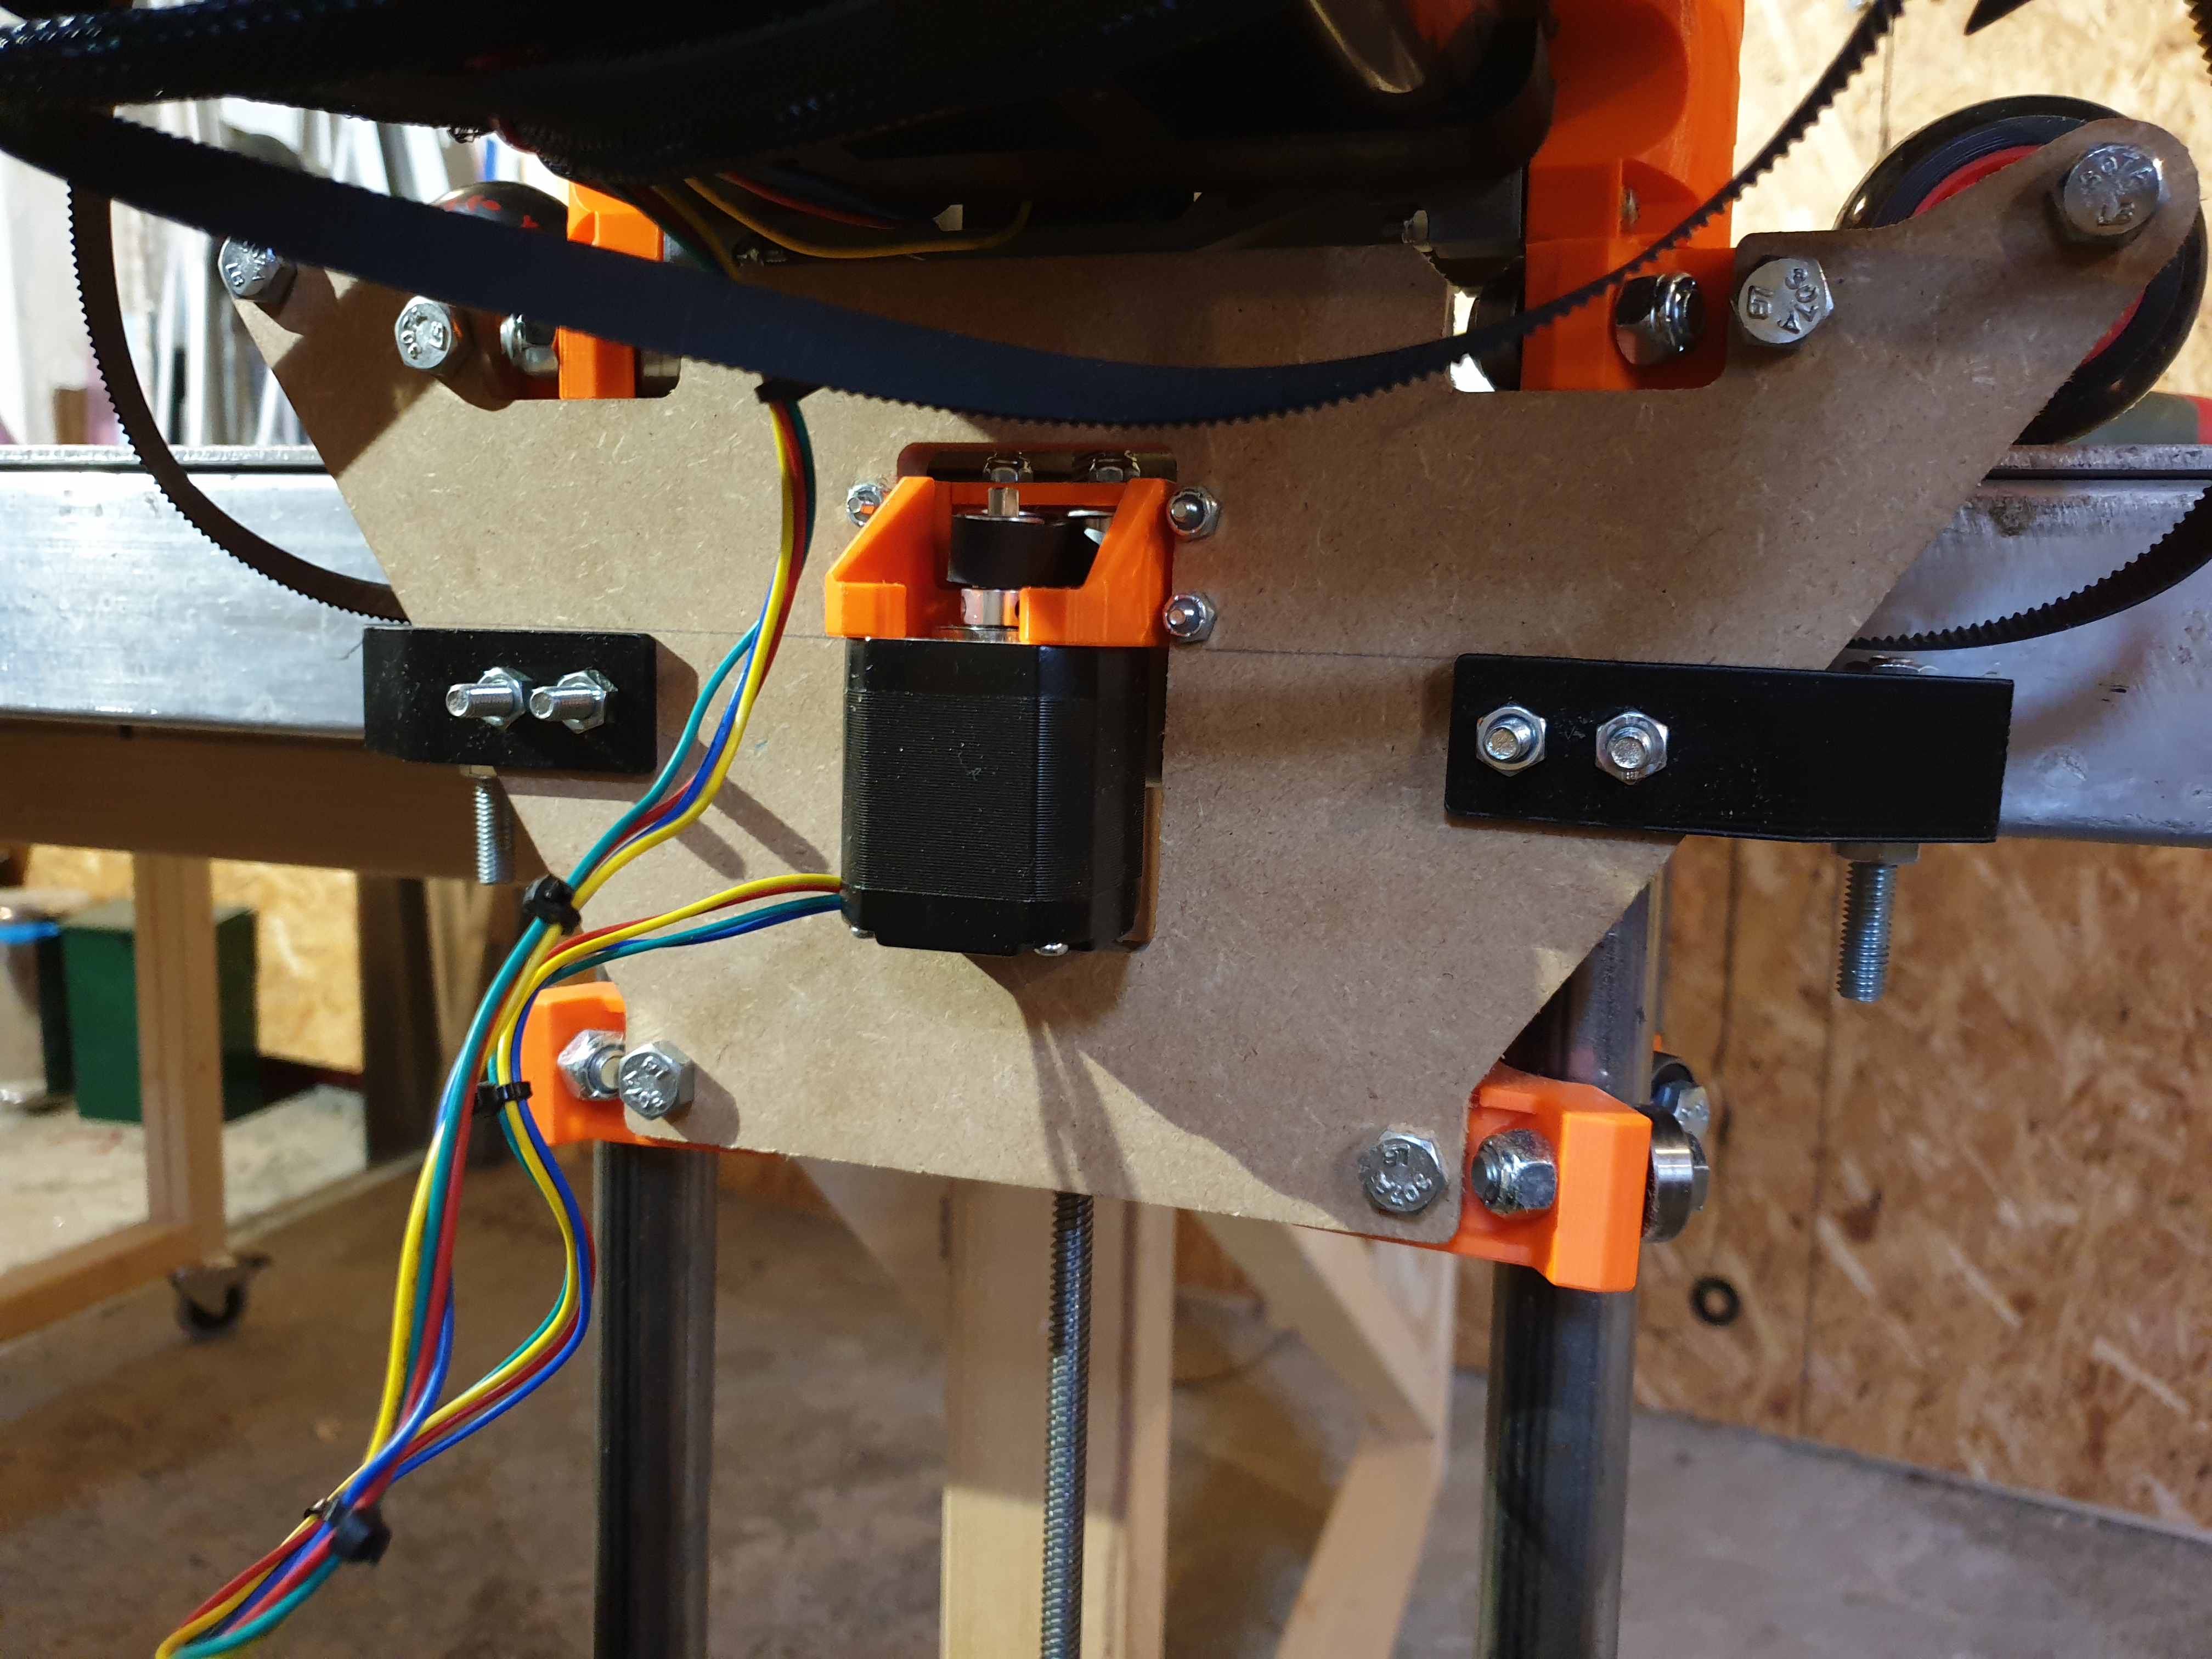
LowRider2 Y axis roller
prusaprinters
<p>This is a part for the LowRider2 CNC designed by Ryan - check out his stuff at <a href="https://www.v1engineering.com/">https://www.v1engineering.com/</a> and <a href="https://www.thingiverse.com/thing:3026040">https://www.thingiverse.com/thing:3026040</a></p> <p>My machine wouldnt move smootly enough on the y axis to prevent differences between each side on longer travels. So I needed some rollers on the Y axis that would hold the Y plate vertical and the steel rails a couple of mm from the table edge. This design worked out perfectly for me. Almost no friction at all. without the belts it will now easily travel across the whole 2m table if I just tilt it slightly. Im very happy with the result and it made my LowRider2 a great working machine. So I thought Id share it in case someone else wanted to give it a go.</p> <p>NB! Your table needs to be at minimum 45mm thick for this model to fit. You might be able to squeeze it flatter with the STEP file and use it on thinner tables.</p> <p>What you need:<br/> 4 printed parts - I only added one STL so be sure to print 2 as is, and 2 mirrored.<br/> 4 x M8 bolts (with hexagonal screw cap) - 25mm or longer + nuts<br/> 8 x M6 bolts (with hexagonal screw cap) - 25mm or longer + nuts<br/> 4 x bearings 608-2RS (the same ones used on LR2 that Ryan also provides)</p> <p>What to do:</p> <p>I simply drilled out the holes in the Y plate. Be sure to mount it lower than your belt. Se the line in the pictures.</p> <p>I only added one STL so be sure to print 2 as is, and 2 mirrored.</p> <p>The STL is for a 12,5mm plate (it might be ok to just cut of the one bracket on the outside and then it should fit any thickness) Ive got 25mm rails and this gave me about 2mm clearing between the rails and the table so Im guessing it will fit the 25.4mm rails, but it might be a good idea to print one piece to check.</p> <p>Also added a STEP file if you need to press/pull, extrude and so on to make it fit.</p> <p><strong>*</strong> 28.01.20<strong>*</strong><br/> Uploaded two alternative additions and their STEP file. I have not printed these myself, so they are suggestions to what I in theory would assume to work. These both have single brackets and should fit any plate thickness. One STL is still 2 x 6M bolts, but I also added one that uses 1 x 8M bolt. The reason beeing that the angled edge on the part should keep it straight with only one bolt.</p> <h3>Print instructions</h3><h3>Category: Parts Print Settings</h3> <p><strong>Printer Brand:</strong> Prusa</p> <p><strong>Printer:</strong> i3 MK3 MMU 2</p> <p><strong>Supports:</strong> No</p> <p><strong>Infill:</strong> 50</p> <p><strong>Notes:</strong></p> <p>Print them standing with brackets facing up and the bearing part facing down. I used a brim to be sure.</p>
With this file you will be able to print LowRider2 Y axis roller with your 3D printer. Click on the button and save the file on your computer to work, edit or customize your design. You can also find more 3D designs for printers on LowRider2 Y axis roller.
