Low Rider 2 Z Endstops
prusaprinters
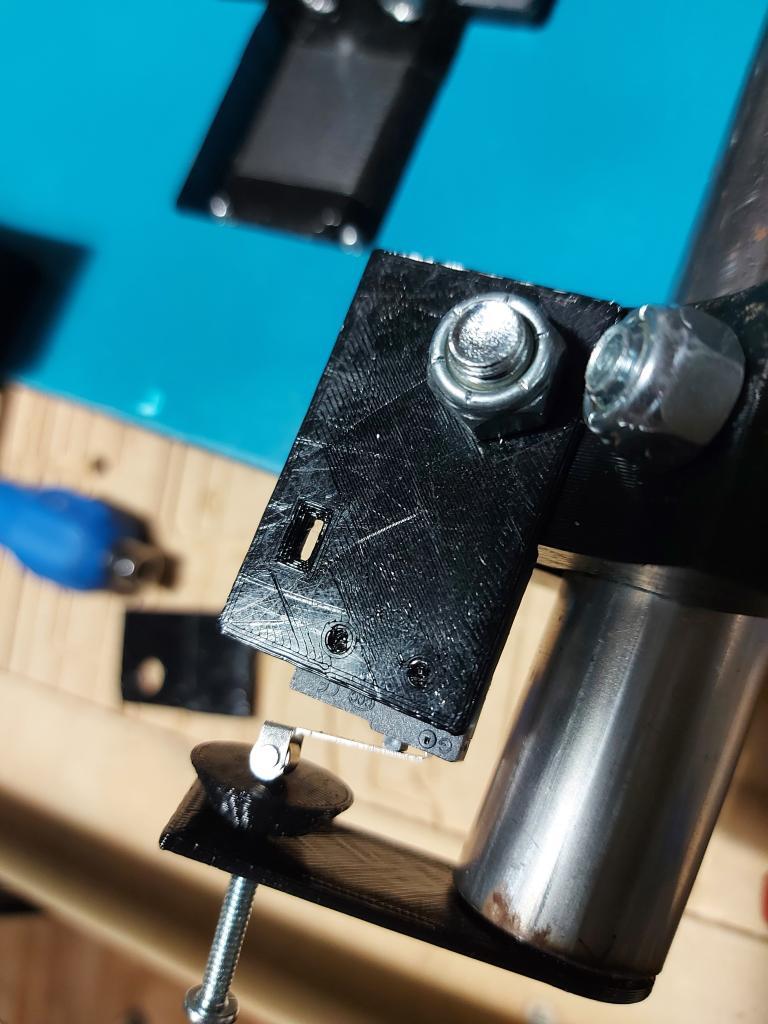
<p>Z endstop mounts for a LowRider2 CNC machine. Note that this was designed specifically for the "J" 25.4mm tube version of the LowRider 2, and also for 0.065" wall tube, as the Z tube ends are supposed to fit inside the tube.</p> <p>I designed these to mount to the lower Z tube holders, using the existing 5/16" bolt. No additional holes or mounts needed. This design assumes that you'll be homing the machine to Z Max, and using a touchplate to set your zero point.</p> <p>You will need:</p> <ul> <li>2 limit switches with 9.5mm spacing for the mounting holes, plus wiring</li> <li>4 2.5mm X 10mm screws to mount the switches</li> <li>2 #6-32 screws to hold the plungers, 1/2" length should be more than enough</li> <li>2 #8 wood or sheet metal screws, 1/2" length or longer to secure the Z tube ends to the tube</li> <li>2 zip ties to relieve strain on the wiring</li> </ul> <p>Print 2 each of the Z Tube ends and plungers, and 1 each of the switch holders. The switch holders should mount tightly to the lower Z tube guides on the LowRider2. They will require that you have about 3mm of extra space. I have the kit from V1 engineering for hardware, and Y plates made from 1/2" MDF, and there was enough.</p> <p>If you can set the switch offsets in firmware, you may not need the plungers or the #6-32 screws, as the switch can be activated directly against the Z tube ends. You can probably even make small adjustments to the homing height by moving the tube ends.</p> <h3>Print Settings</h3> <p><strong>Printer:</strong></p> <p>Self built</p> <p class="detail-setting rafts"><strong>Rafts: </strong> <div><p>No</p></div> <p><strong>Supports:</strong></p> <p>No</p> <p class="detail-setting resolution"><strong>Resolution: </strong> <div><p>0.33333mm</p></div> <p><strong>Infill:</strong></p> <p>20</p> <p><strong>Filament:</strong></p> Duramic PETG <p>Black</p> <p><br/> <p class="detail-setting notes"><strong>Notes: </strong></p> </p><div><p>Print settings shouldn't matter much. A coarse layer height is OK. These parts shouldn't take too much mechanical strain.</p> I printed 3 layers/,mm, 2 walls 20% infill. <h3>How I Designed This</h3> <p>I used TinkerCAD to design this, taking the .STL for the Z tube holder and subtracting it from a block to make a form-fitting shape to keep the switch holders from rotating while being held by only the single bolt. I left enough room for the switch so that it should fit wiring for most of the 9.5mm spaced limit switches that I've seen. The bottom of the Z tube cap is 2mm thick, so should be fairly flexible if you crash into it.</p> <p>This should be easily printable with no supports.</p> </div></p></p> Category: Machine Tools
With this file you will be able to print Low Rider 2 Z Endstops with your 3D printer. Click on the button and save the file on your computer to work, edit or customize your design. You can also find more 3D designs for printers on Low Rider 2 Z Endstops.
