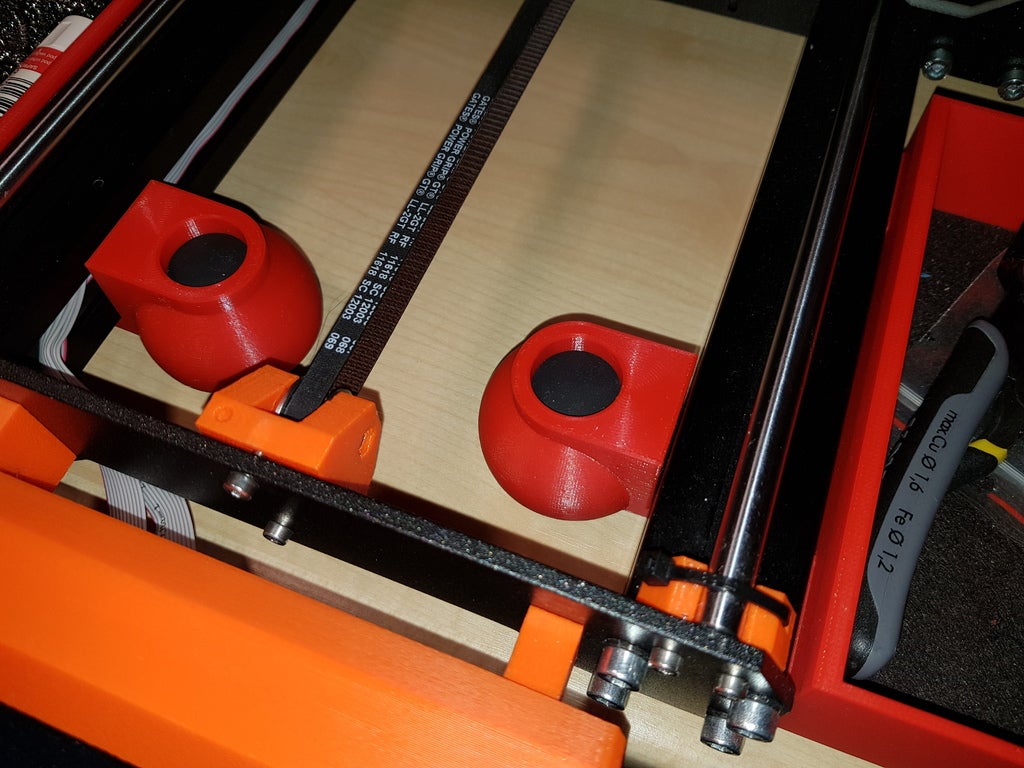
Low profile toolless Prusa i3MK3/S squash ball feet damper vibrations/noise isolator
prusaprinters
<p>You may find two versions of .stl attached:</p><ul><li>v2 which is higher (about 4 mm regards to v5) and tighter in tolerances, what results some minor problems during mounting into the profiles,</li><li>v5 which is lower and fits not so tight as v2 (easier to mount).</li></ul><p>If your printer is heavy loaded by filament spools (or by other equipment) at the back side than I recommend to use v2 feet at the back and v5 at the front.</p><p>I found some inspiration to design damper feet when I saw these things:</p><p><a href="https://www.thingiverse.com/thing:3385254">https://www.thingiverse.com/thing:3385254</a><br><a href="https://www.thingiverse.com/thing:2450161">https://www.thingiverse.com/thing:2450161</a><br><a href="https://www.thingiverse.com/thing:2980350">https://www.thingiverse.com/thing:2980350</a><br><a href="https://www.thingiverse.com/thing:3173854">https://www.thingiverse.com/thing:3173854</a><br><a href="https://www.thingiverse.com/thing:2823821">https://www.thingiverse.com/thing:2823821</a></p><p>My version is low profile, toolless, screwless :) and a little optimized, regards to another squash ball feet I found on Thingiverse. Print, push in the ball (marked by 2 yellow dots) and mount in the aluminium profiles of your Prusa without any additional tools or parts. It should fit another 3030 extrusions as well.</p><p> </p><p><strong>EDIT 27.04.2021</strong></p><p>I decided to add v6 which is this same as v2 but a little upgraded for better tolerances, so it's easier to mount, just like v5. I recommend to use v5 and v6 only.</p><p> </p><p><strong>Do not remove any parts of your printer to install these feet! No end plates or caps need to be removed! Simply angle the feet and slide them into the frame aluminium profile BOTTOM grooves. Insert feet at an angle and then level. I have designed them accordingly to use such shape fitting. You don't have to use any screws or dismount the frame.</strong></p><p> </p><h3>Print instructions</h3><p><strong>Printer Brand:</strong><br>Prusa</p><p><strong>Printer:</strong><br>i3 MK3</p><p><strong>Rafts:</strong><br>No</p><p><strong>Supports:</strong><br>Yes</p><p><strong>Resolution:</strong><br>0,2 layer</p><p><strong>Infill:</strong><br>15% honeycomb</p><p><strong>Filament:</strong><br>Plast-Spaw PLA, PETG, ABS</p><p><strong>Notes:</strong><br>You may use PLA, PETG or ABS. Any of these materials are strong enough to support printer. Use 2 perimeters and 4-5 top/bottom layers. Supports are needed only at the locking side (you may see how I support on the attached picture). Do not use supports under the dome.</p>
With this file you will be able to print Low profile toolless Prusa i3MK3/S squash ball feet damper vibrations/noise isolator with your 3D printer. Click on the button and save the file on your computer to work, edit or customize your design. You can also find more 3D designs for printers on Low profile toolless Prusa i3MK3/S squash ball feet damper vibrations/noise isolator.
