Low-Profile Glass Bed / Mirror Mounting Brackets
prusaprinters
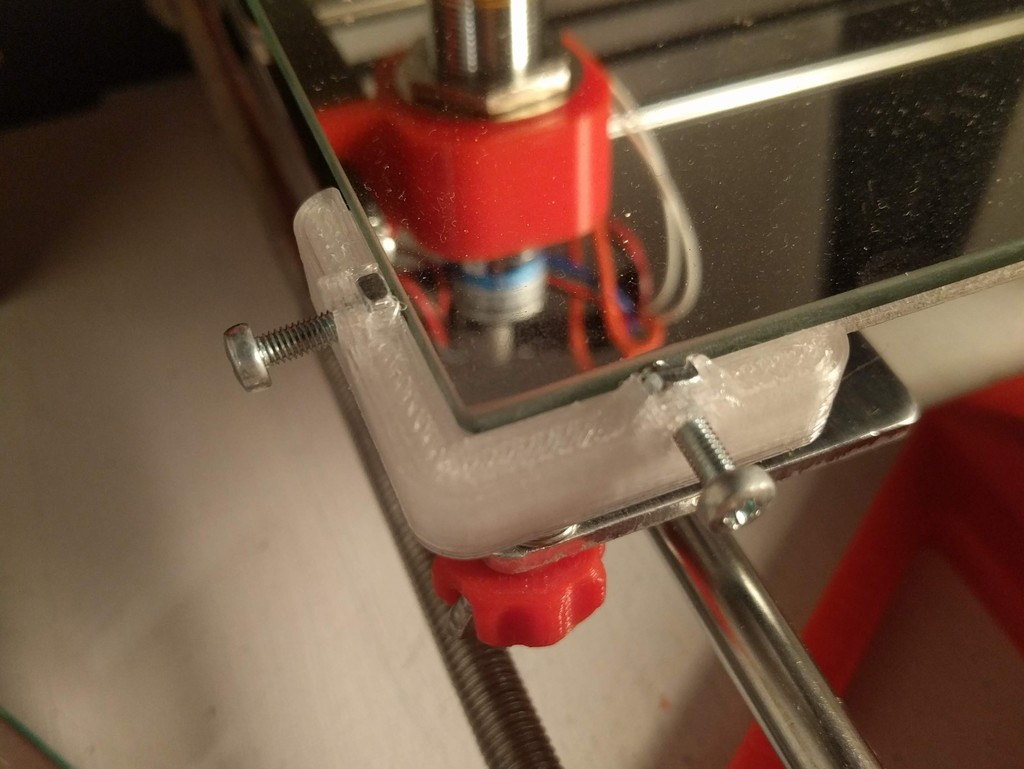
<p>I designed these mounting brackets myself with Fusion 360 after realizing that I had forgotten to think about mounting options when buying my glass bed (IKEA Mirror). My primary concerns were low-profile and easily adjustable and removable glass bed. Additionally, I prefer to design models for 3D printing without supports.</p><p>This bracket is only about 1-2mm higher than the top of the glass bed. It also features holding via M3 bolts and nuts.</p><p>The brackets allow the glass bed to be slightly larger than the heated bed.</p><p>As written in the print settings, it is important to consider the material you print this in.</p><h3>Print Settings</h3><p><strong>Printer: </strong>Anet A8</p><p><strong>Rafts: </strong>No</p><p><strong>Supports: </strong>No</p><p><strong>Resolution: </strong>0.2mm</p><p><strong>Infill: </strong>15%</p><p><strong>Filament:</strong> Amazon Basics Transparent PETG</p><p><strong>Notes:</strong></p><p>PETG or other temperature-resistant filament is strongly recommended when your bed temperature is commonly above 60°C to avoid melting. If you only print PLA, this can be printed with standard PLA.</p><p>If your slicer supports overriding infills in specific areas, it is recommended to increase the infill to 100% just around the mounting hole. This prevents the infill from being compressed by the spring over time.</p><h3>Assembly</h3><p>After printing four of these, you will need to add two M3 bolts and nuts to each corner bracket.</p><p>The M3 bolts I used were 12mm long, but anything from about 8mm to 20mm should work.</p><p>The M3 nuts should sit flush like so:</p><figure class="image"><img src="https://media.printables.com/media/prints/156783/rich_content/112a09d1-a6c0-4e66-9d8b-913f9389c4c9/img_20190706_213420.jpg#%7B%22uuid%22%3A%22b9203461-0f51-49bb-89a7-b2c9004367c8%22%2C%22w%22%3A2925%2C%22h%22%3A2196%7D"></figure><p>NOTE: The image is of the first time I printed this in PLA, I have since replaced these brackets with ones made of PETG, from the same model. As you can see, the PLA version had melted a bit due to printing the brackets in PETG.</p><p>To mount these on your printer, you will have to take each of the four screws holding your heated bed out. It is recommended to mount these one at a time, this way you don't have to try and get all screws lined up again at the same time.</p><p>If you have washers in the right size, it is recommended to put some between the printed part and the springs to spread out the force and reduce the strain on the printed part.</p><p>Remember to tighten the clamping screws once the bed is up to temperature, since the bed may expand. It is usually not necessary to use a screwdriver for this, just hand-tighten each screw while ensuring that the glass sits flush on the aluminum.</p>
With this file you will be able to print Low-Profile Glass Bed / Mirror Mounting Brackets with your 3D printer. Click on the button and save the file on your computer to work, edit or customize your design. You can also find more 3D designs for printers on Low-Profile Glass Bed / Mirror Mounting Brackets.
