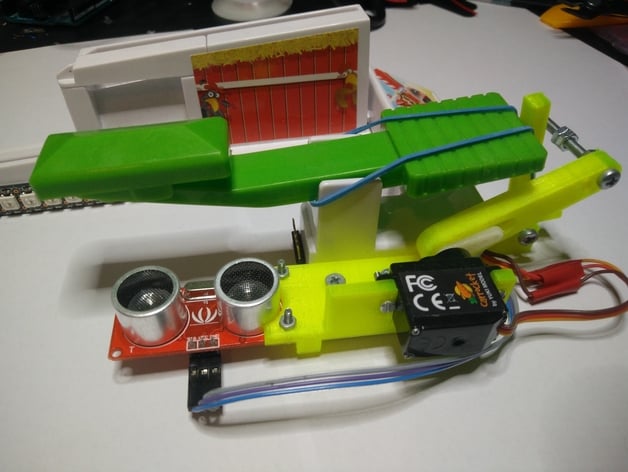
Looping Louie Autopilot
thingiverse
In 2013, I needed a showstopper for multiple Maker Faires. So, I decided to hack a game called Loopin' Louie, commonly known as Looping Louie in most of Europe. I added several 3D printed parts to it and connected another toy called "Mind Flex" brain controller. With these additional components and some servos, the player can control the game using their mind. A more streamlined version uses a servo and an ultrasonic sensor with three pins. When Louie hits the programmed height of the ultrasonic sensor, the autopilot mechanism is triggered, and the player's seesaw clicks to the top. Afterward, the notch tightens again, and the autopilot waits for Louie to come around the next time. Print all necessary parts, drill holes in the game's seesaw(s), and assemble it like in the pictures. The video showcases the game at Maker Faire Kerkrade (NL) in 2013. One seesaw is controlled by the brain, while the other three are controlled by the autopilot. Required components: Different 3mm screws and nuts A rubber band A small servo (9g, TowerPro or equivalent) Don't skimp on quality; I used a TowerPro servo that worked fine and still does. Arduino/Genuino or compatible board View the wiring of the Arduino in the Sketches. There are two sketches: BrainController.ino and Autopilot.ino. The Autopilot drives three servos and can be used standalone, but you can also use it to control one or two seesaws if desired. Refer to the code for further details. Print Settings: Printer Brand: Up! Printer: Up Plus Rafts: No matter what Supports: None Notes: Print the plate or individual parts I uploaded. There's an OpenScad file that can be customized for your needs.
With this file you will be able to print Looping Louie Autopilot with your 3D printer. Click on the button and save the file on your computer to work, edit or customize your design. You can also find more 3D designs for printers on Looping Louie Autopilot.
