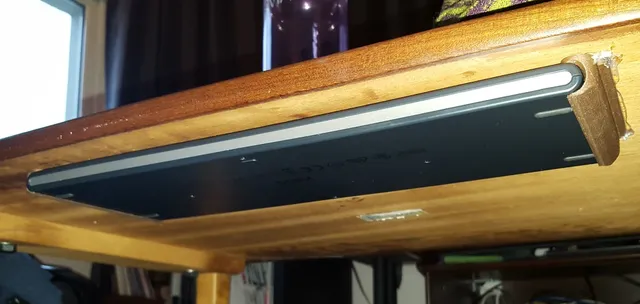
Logitech K830 mount
prusaprinters
Slide your Logitech Illuminated Living-Room Keyboard K830 under the coffee table for a clutter free experience when you're not using your HTPC. Print Settings Printer: Ultimaker Original+ Rafts: No Supports: Yes Notes: Some supports for the overhang can be nice, but if you have really good cooling you might be able to get away without it. Print one as is, and one mirrored. Post-Printing Mount it under the table Turn the table upside down. Turn your keyboard upside down, and lay it on the underside of your table top. Place the printed mounts on each side of the keyboard. Mark their location with a pencil. Check that the keyboard is free to move out. Note that there are two small stoppers to prevent it from being pushed too far in. Get your hot glue gun out. Move the keyboard and the mounts out of the way, and lay down a fat line of glue where one of the mounts will be. Be quick to plop down the mount, align it before it's too late, and let the hot glue set. Now put the keyboard back in place and check alignment. Readjust the position of the second mount if needed. Glue the other mount. Turn your table back the right way around. At this point it might be necessary to then rotate your table 180 degrees in the XY plane in order for the keyboard to face in the desired direction. If that is the case, rotate the table while wearing a dunce hat. You are now ready to enjoy a new life with a living room table that may, or, and this is the important part, may not, have a keyboard on top of it. How I Designed This FreeCAD I faffed about in FreeCAD a lot. You may not have the CAD files because they are embarassingly bad. But it is the end result that counts, right? Now enjoy your keyboard mount and lemmelone. Category: Organization
With this file you will be able to print Logitech K830 mount with your 3D printer. Click on the button and save the file on your computer to work, edit or customize your design. You can also find more 3D designs for printers on Logitech K830 mount.
