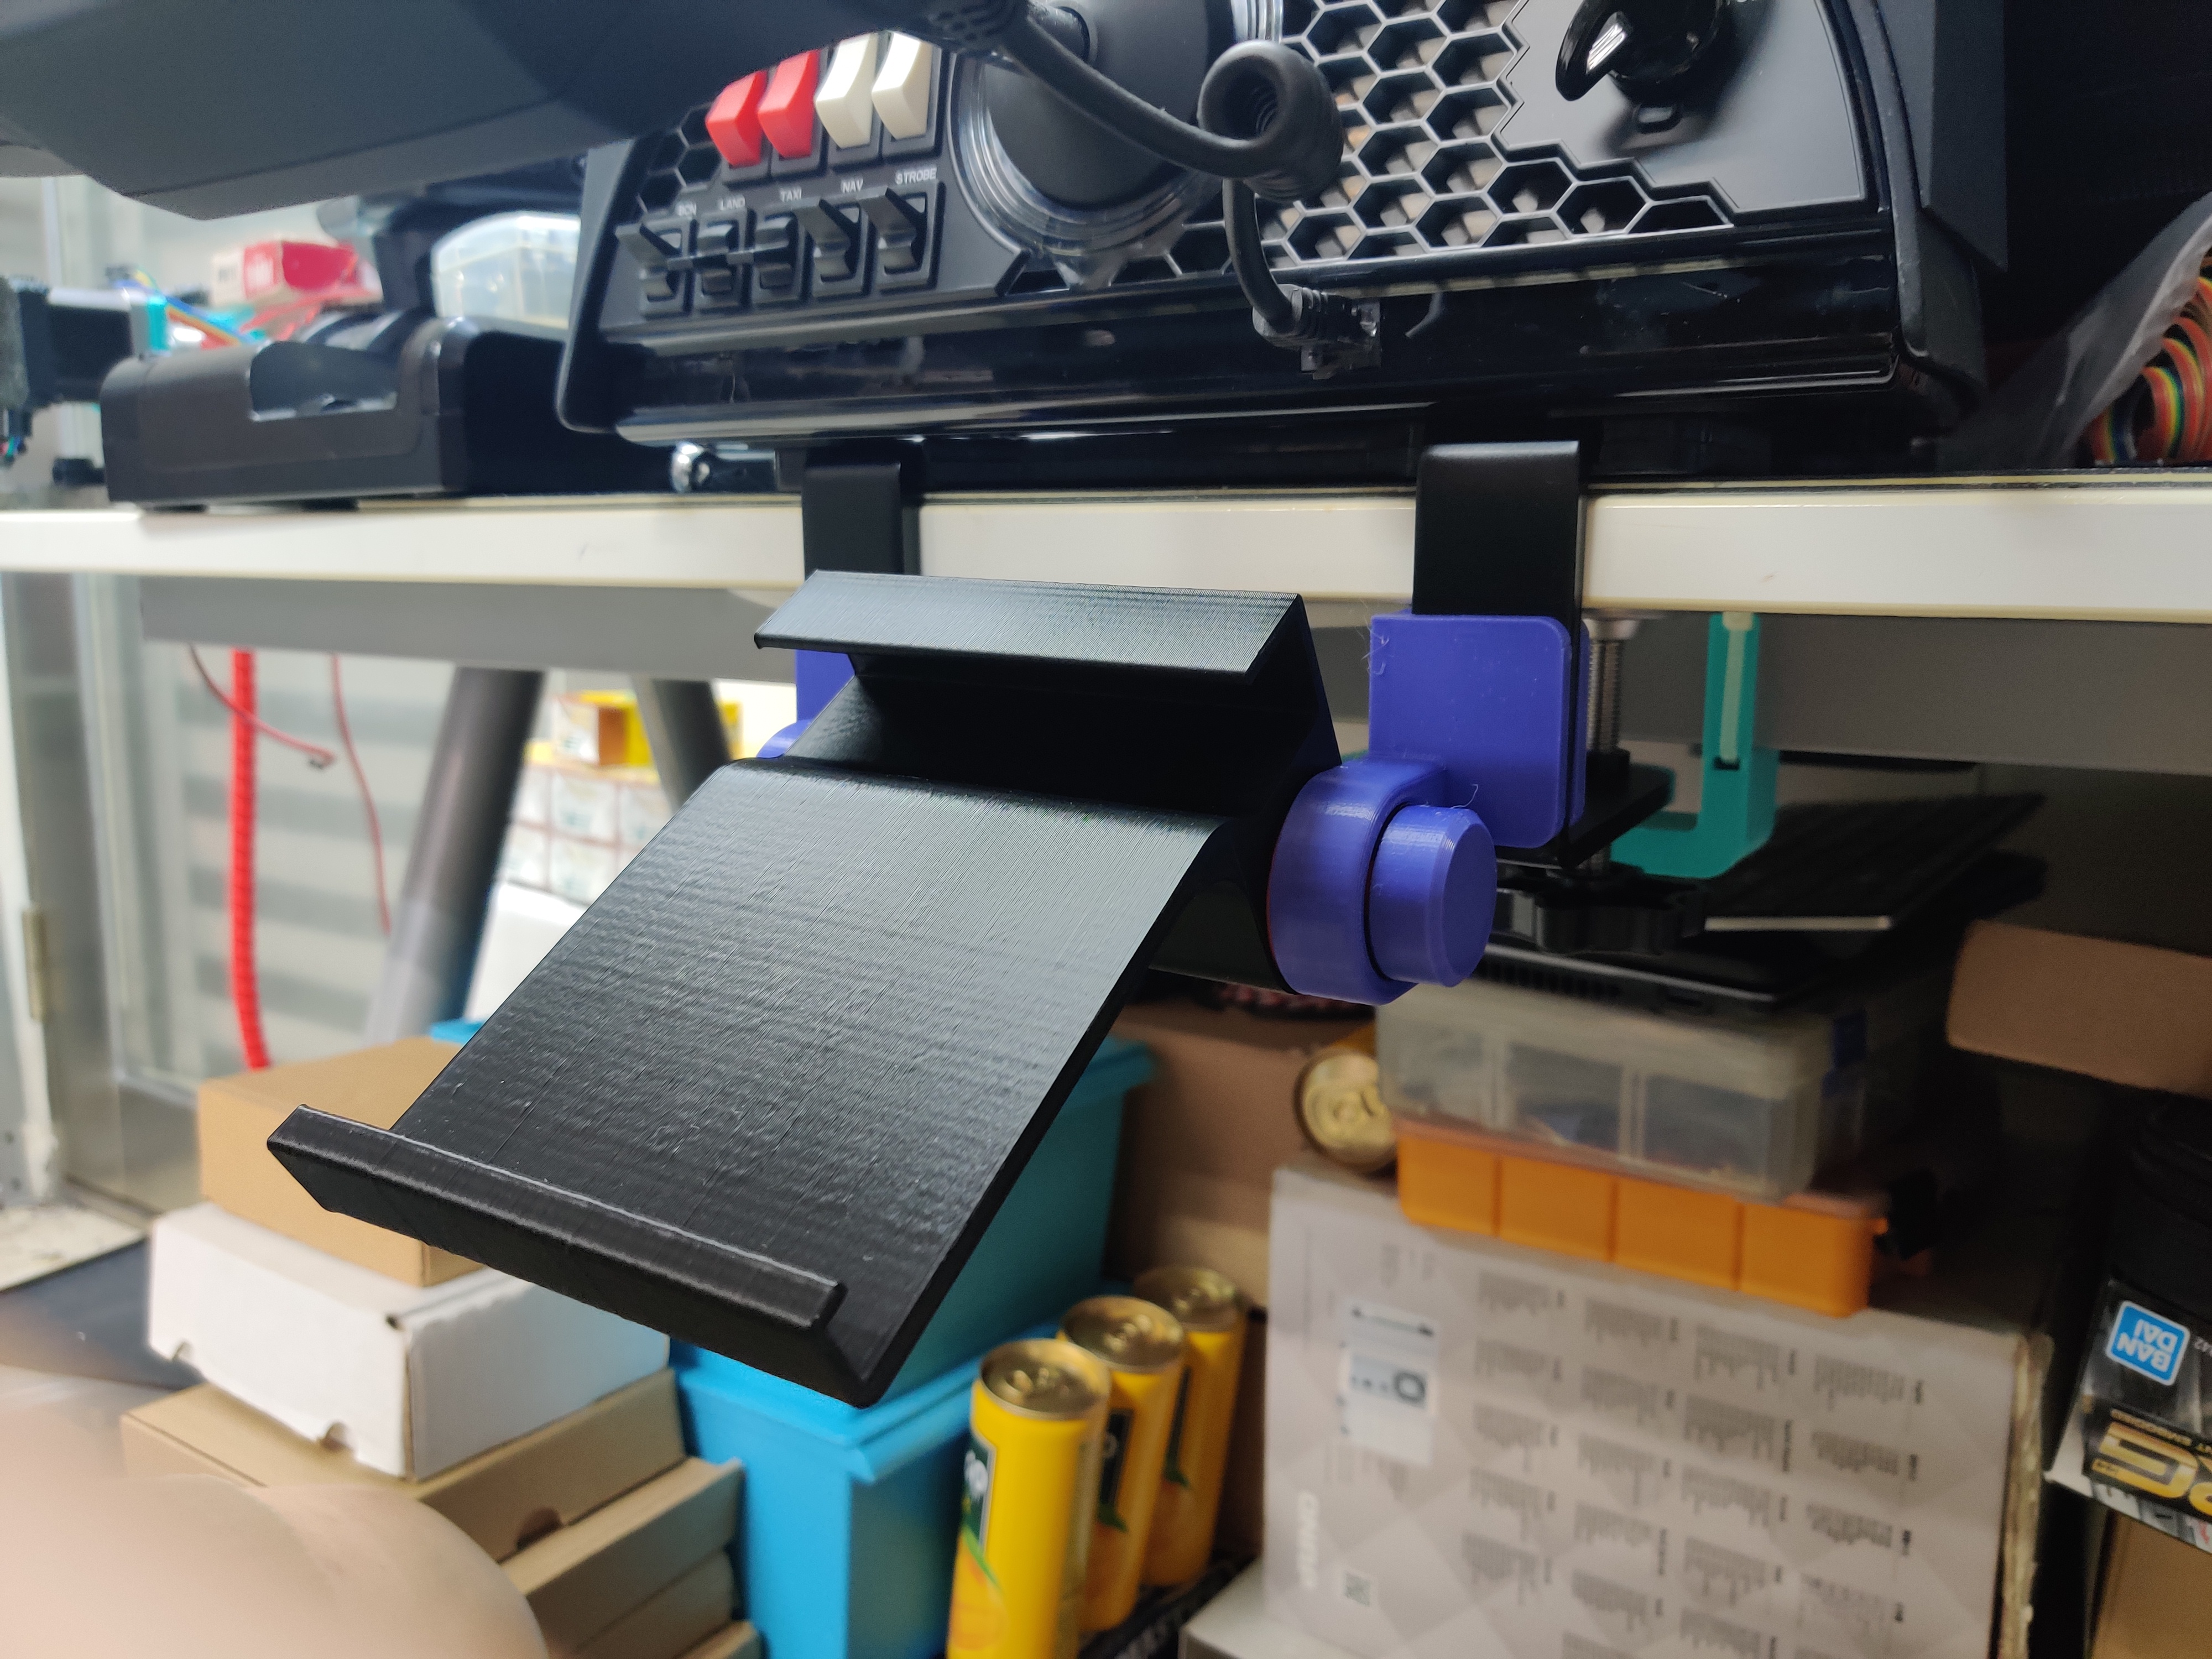
Logitech K400+ Keyboard Holder for Honeycomb Alpha Yoke
prusaprinters
<p>I have very little space where I fly my flight sim. The Honeycomb Alpha Yoke already took out a large chunk of my desk space, there is no place to put my keyboard which is a small Logitech K400+. An underdesk keyboard drawer is not feasible because the Yoke mounting brackets are in the way. So, I have to design my own keyboard holder utilitizing the yoke mounting bracket as the mounting point. After a few iterations, I designed a Keyboard holder that rotates around the bracket from horizontal to upside down position, hiding under the desk and bracket when not in use. The holder can be locked to any angle between the two position in 15 degree increments by press the unlock button on the right.</p> <p>Hardwares required to complete the build:</p> <ol> <li>A M3x40mm socket head screw (To reinforce the locking shaft, I found one from the Prusa extruder upgrade left-overs)</li> <li>A 13x40mm compression spring ( I found one inside the pump of my shampoo bottle)</li> <li>A M5x30 socket head screw ( I have plenty lying around, so I just picked one)</li> </ol> <p>The Spring preloader is optional, it depend on the strength of your spring, print it if your spring is too weak to keep the lock in place.</p> <h3>Print instructions</h3><p>I printed all the parts with my Prusa Mini at 0.25mm layer height, but I also use the variable layer height feature to get better details for the screw threads and the tooths. Only the locking shaft need to be printed with support.</p> <ol> <li>Print all the parts</li> <li>Pre-thread the left bracket hole with a M5 tap or M5 screw</li> <li>Insert Spring preloader into keyboard holder if needed</li> <li>Insert Spring into keyboard holder</li> <li>Insert M3 screw into locking shaft</li> <li>Insert locking shaft into right bracket and screw on the push button</li> <li>Loosen Yoke metal mounting brackets and slide them out about halfway</li> <li>Put left and right brackets onto yoke metal brackets</li> <li>Align the square part of the locking shaft to the square hole in the keyboard holder and slide the keyboard holder onto the shaft</li> <li>Align the keyboard holder with the left brackets then insert the M5 screw onto the left bracket hole, lightly tighten the screw to lock the keyboard in place</li> <li>Slide the yoke metal bracket back in and while pressing the push button, make sure that the keyboard can rotate freely and not too tight or loose. Tighten the yoke metal bracket</li> </ol>
With this file you will be able to print Logitech K400+ Keyboard Holder for Honeycomb Alpha Yoke with your 3D printer. Click on the button and save the file on your computer to work, edit or customize your design. You can also find more 3D designs for printers on Logitech K400+ Keyboard Holder for Honeycomb Alpha Yoke.
