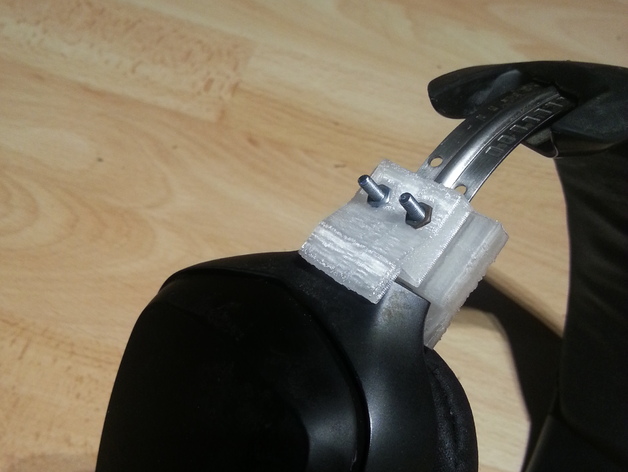
Logitech G35 Repair Part
thingiverse
Repair part for broken Logitech G35 Headsets. Suitable if your headset looks like this: https://forums.logitech.com/t5/Logitech-G-Headsets/Logitech-G35-broken/td-p/616476 You will need: 2 Screws M3 x 15mm (or 20mm like in my case) 2 Nuts M3 The printed parts A small cross screwdriver What to do: Print the parts. Remove the plastic part normally connected to your earpiece, mounted by 4 small cross screws. Only leave the bare metal rail behind. Add M3 nuts to the outer printed part (the smaller one). Screw M3 screws through the inner printed part (the bigger one) just barely into the bottom holes of the metal rail. Insert the earpiece into the designated notch of the inner printed part and secure it with the outer printed part. Be careful not to damage the cable! Screw the parts together. Go play some games or do whatever you like with your headset. OnShape public document: https://cad.onshape.com/documents/086eabfe6bde1189eb17ddc3/w/4551fd0cea118631ad3cf1ea/e/ae0481696338593ee168e49f Print Settings: Printer: MendelMax 1.5 (modified) Rafts: No Supports: No Resolution: 0.2mm Layer height Infill: 20% Grid Notes: Used Cura 2.1.2 for Slicing Printed in clear PET How I Designed This: OnShape Document I created this part online using the OnShape cloud service. The public document link is: https://cad.onshape.com/documents/086eabfe6bde1189eb17ddc3/w/4551fd0cea118631ad3cf1ea/e/ae0481696338593ee168e49f (Named "Logitech G35 Repair")
With this file you will be able to print Logitech G35 Repair Part with your 3D printer. Click on the button and save the file on your computer to work, edit or customize your design. You can also find more 3D designs for printers on Logitech G35 Repair Part.
