Lockblock - printable connector
prusaprinters
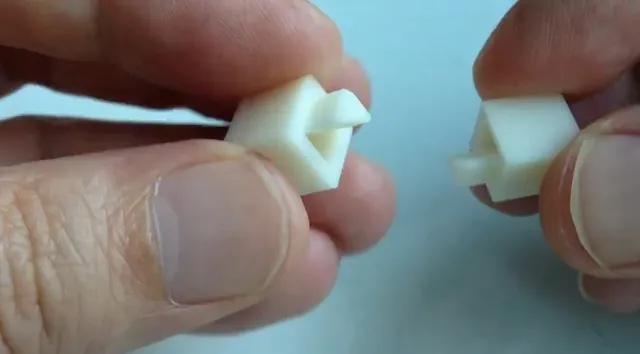
Many puzzle pieces have complex shapes with inevitable overhangs whichever way you orient them. I would like to try soluble support material but I don't yet have dual extruder printing capability. Ordinary support material leaves nasty marks on the downward-facing surfaces. My latest idea was to split the piece horizontally through the middle and print the two halves facing upwards with a custom connecting joint on top of each piece. The joint consists of a triangular peg next to a triangular hole, all contained within the outline of a single cube. The prototype was first modelled in Tinkercad and then transferred to OpenSCAD for easier customisation. Watch the video of the first test at http://youtu.be/Fp63gR9HTJA Update April 2019 - make sure you check out Aaron Siegel's fabulous Puzzlecad which takes this idea to the next level. Instructions The parameters in the script work best for me, but if your version is too tight or too loose try changing the offset. You will probably need to use the cooling option in your software and/or a fan - these are small pieces which can easily overheat. Print two and then lock them together. You could also add a drop of acetone (ABS) or superglue (PLA) to make the bond even stronger. I used Blender to divide the two puzzle pieces in the photo and then grafted the lockblock STL on top of each half. If you look carefully you can see the join halfway up the vertical on each piece. The module could be included in other scripts to lock larger pieces together. Category: Puzzles
With this file you will be able to print Lockblock - printable connector with your 3D printer. Click on the button and save the file on your computer to work, edit or customize your design. You can also find more 3D designs for printers on Lockblock - printable connector.