Locinox LAKQ & LAKZ Installation Jigs
prusaprinters
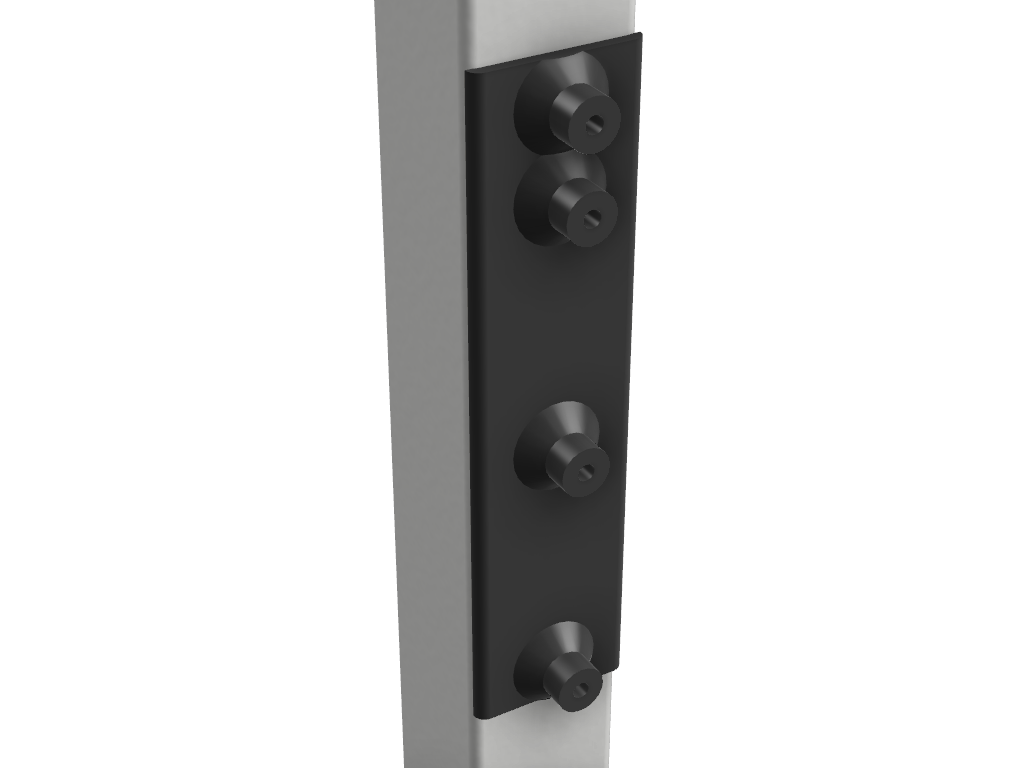
<p>I had to install a new lock on my house gate and i selected a Locinox LAKQ. This is designed to install on a 40x40 mm square tube.</p><p>There are a series holes to be drilled with a precise spacing and various diameters. The most difficult part is that for each holes there is a counter bore to drill in perfect alignment. The hole and counter bore are not necesarily of the same diameter. I created a series of jigs to facilitate this operation. There is one jig made to drill the initial centering holes with the proper placement and then 3 individual jigs to perfectly align the counter bore. Please follow the utilisation procedure for more information.</p><p>There are:</p><ul><li>x4 18 mm holes, two on the front and two other counter bore.</li><li>x2 15 mm holes</li><li>x2 9 mm counter bore</li></ul><p>Here is the installation drawing found from the <a href="https://www.locinox.com/en-gb/gate-hardware/locks/standard-locks/surface-mounted-gate-lock-lakqu2">manufacturer website</a>.</p><figure class="image image_resized" style="width:50%;"><img src="https://media.printables.com/media/prints/271286/rich_content/03bb732e-6947-4df1-996e-476e510d33cf/lakqu2__dimensions_1280px.jpg#%7B%22uuid%22%3A%221305599e-ad0d-4c19-936b-79b486375a9c%22%2C%22w%22%3A1280%2C%22h%22%3A1037%7D"></figure><p>You can also review my related model <a href="https://www.printables.com/fr/model/273947-locinox-lakq-lakz-accessories">Locinox LAKQ & LAKZ Accessories</a>.</p><h4>Printing</h4><p>I recommand printing at .2 mm layer height with 4 périmètres. We need the perimeter to be strong to use as a jig. I recommend printing in PTFE.</p><h4>How To Use</h4><p>⚠️ Drill at a reasonable speed and concider using cutting oil to avoid high temperature when using the plastic printed jigs.</p><ol><li>Place the drilling profile plate to the proper location. Fasten the plate using a clamp or zip ties for exemple.<br>⚠️ Make sure the orientation is correct, the drills are not symetric. The two closest slots should be up. </li><li>Drill the four centering holes using a 4 mm drill.</li><li>Drill the 4 final holes on the front using the previously created center hole. <ol><li>18 mm (x2)</li><li>15 mm (x2)</li></ol></li><li>Use the 18 - 4 centering jig to drill two 4 mm counter bore on the 18 mm holes made on step 3.1.</li><li>Drill the two final 18 mm counter bores.</li><li>Use the 15 - 4 centering jig to drill two 4 mm counter bore on the 15 mm drill made on step 3.2.<br><i>This step is optional as you can go to next step and drill the 9 mm holes directly but i recommend to start with 4 mm center holes for better results.</i></li><li>Use the 15 - 9 centering jig to drill the two final 9 mm counter bores.</li></ol>
With this file you will be able to print Locinox LAKQ & LAKZ Installation Jigs with your 3D printer. Click on the button and save the file on your computer to work, edit or customize your design. You can also find more 3D designs for printers on Locinox LAKQ & LAKZ Installation Jigs.