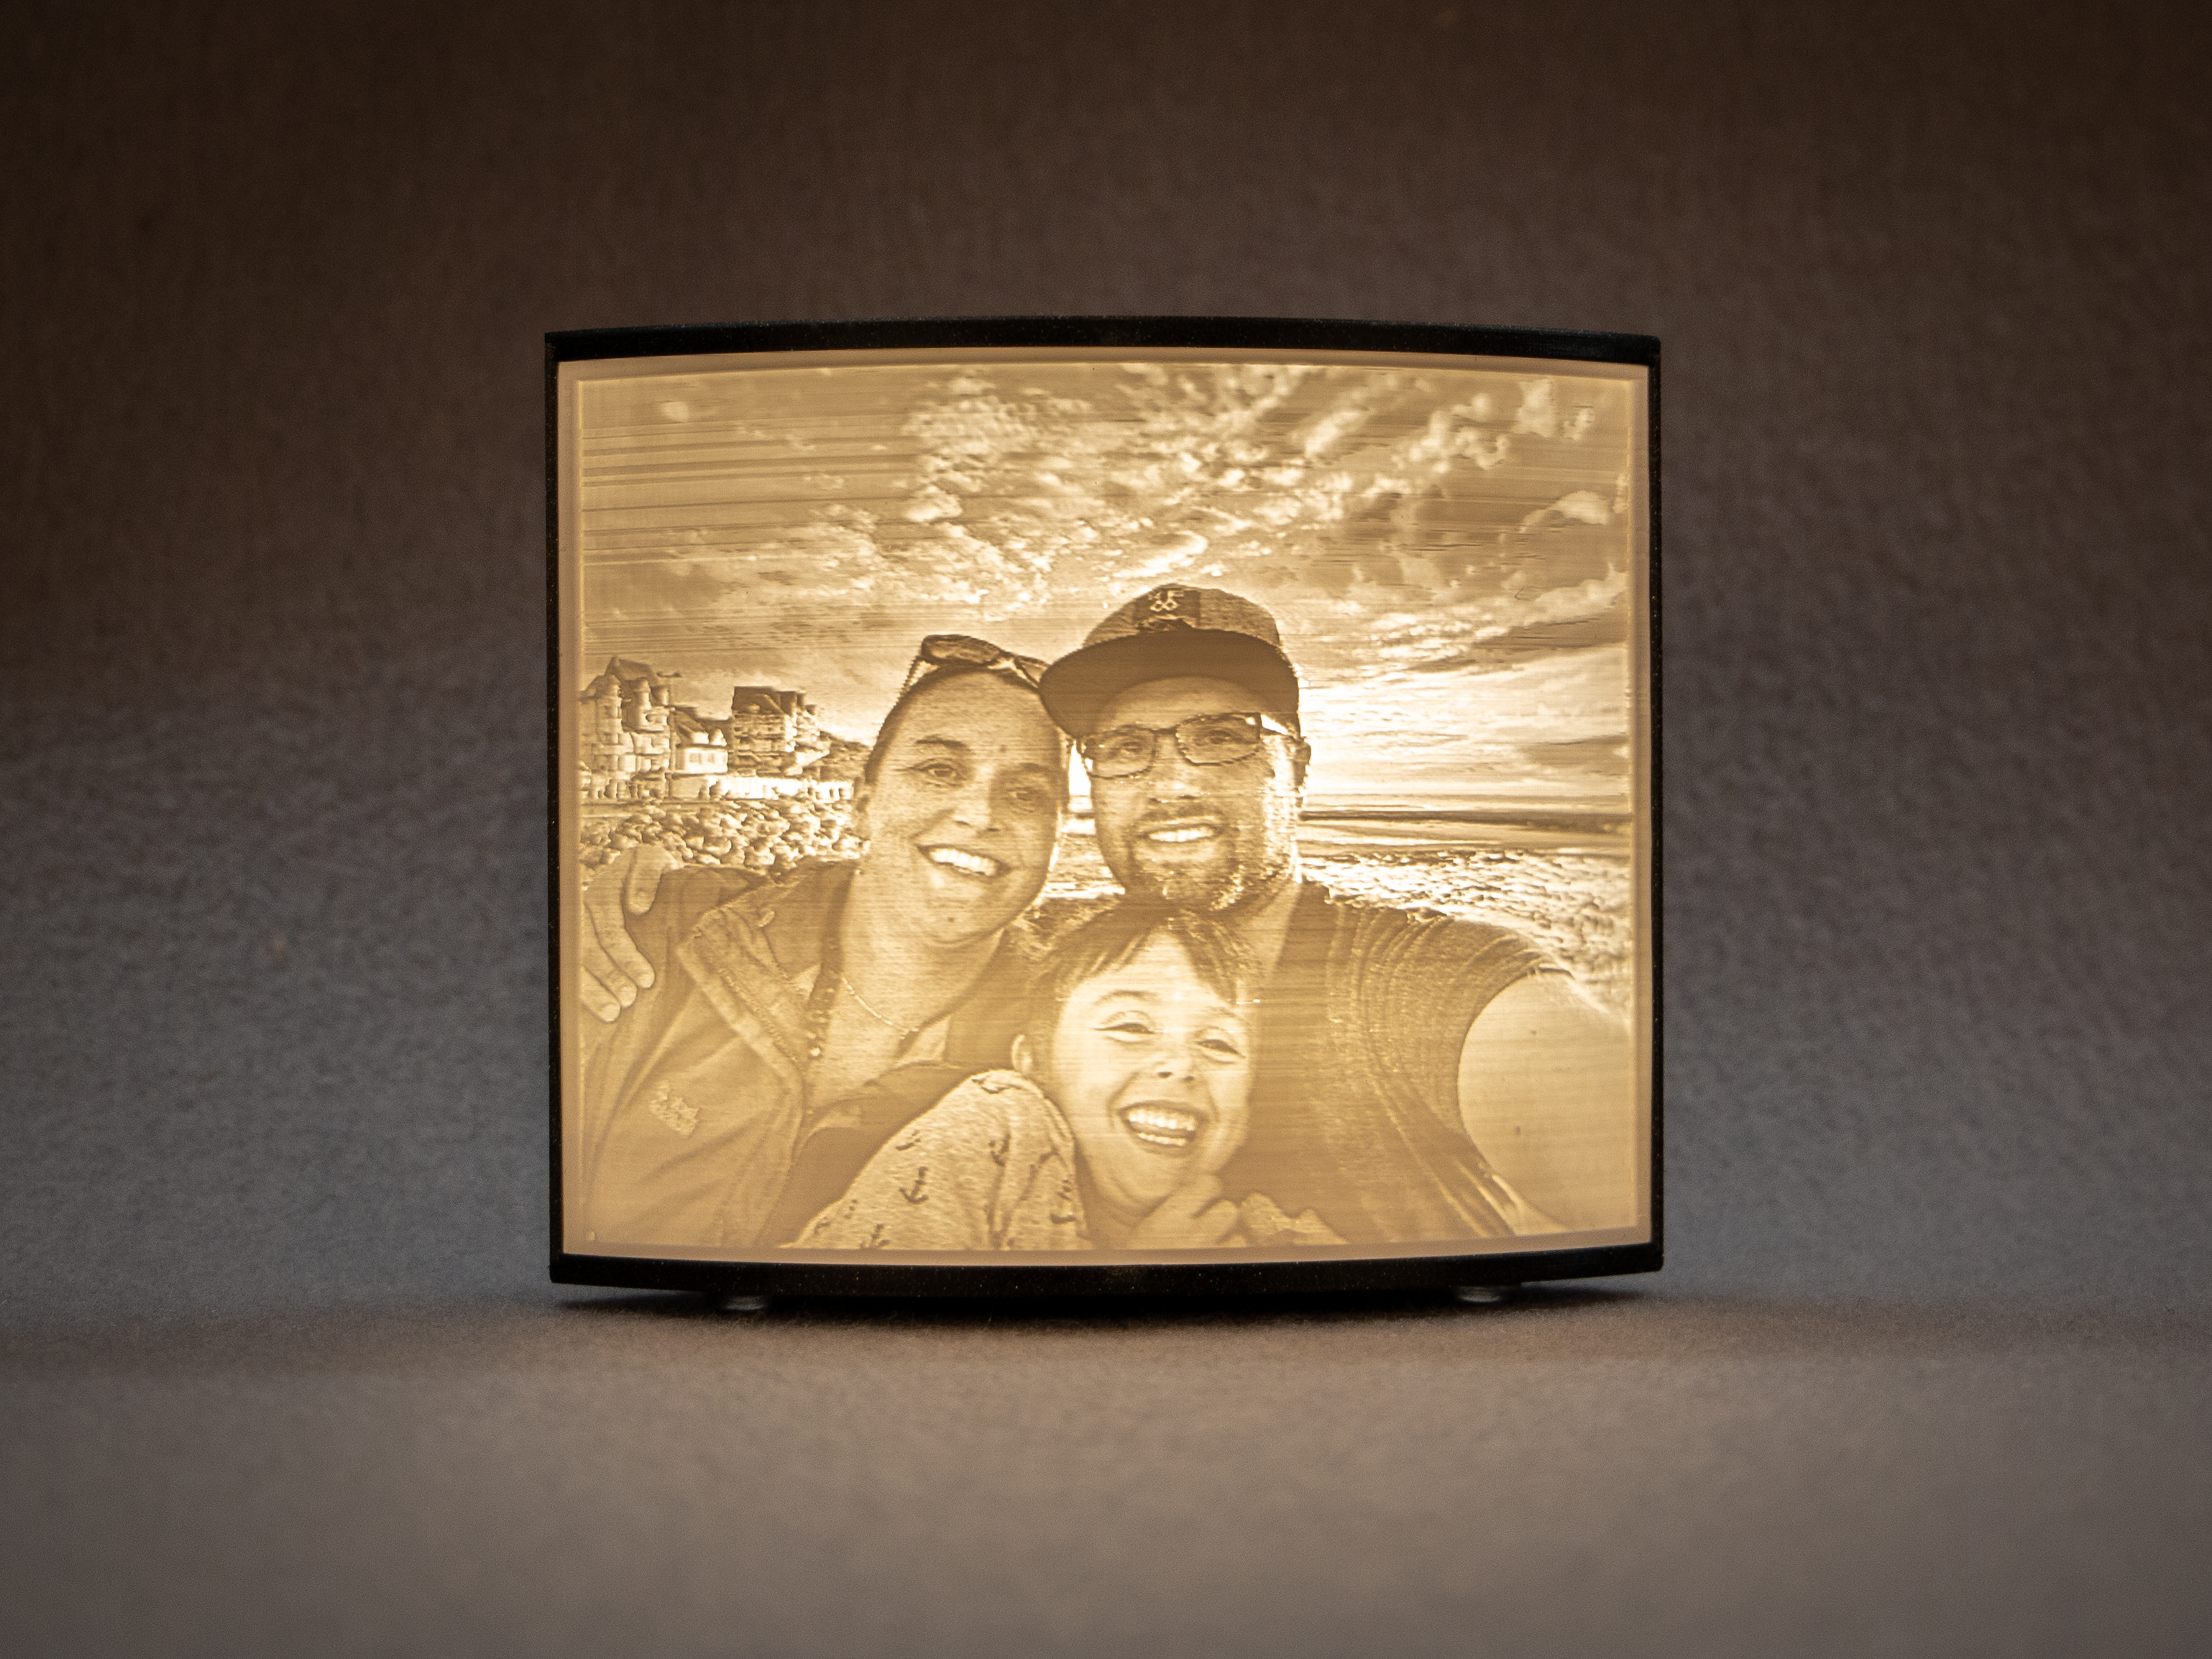
Lithophane LightBox with LED-Strip
prusaprinters
<p>Since i like the effect of lithophande images very much and it is very easy to print, i decided to create a matching light box with led strips. The box is also easy to print without support structures and is simply glued together with glue. Unfortunately, the soldering of the 10cm LED strips is necessary here. Therefore, but the cost is quite low.</p><p><i>You need:</i></p><ul><li>Printed parts ;-)</li><li>Glue</li><li>5x LED Stripes a 100 mm <a href="https://cutt.ly/WjRqNTk">https://cutt.ly/WjRqNTk</a></li><li>soldering iron and solder</li><li>power Source ( 12V 1-2A ) <a href="https://cutt.ly/JjRqX12">https://cutt.ly/JjRqX12</a></li><li>Rubber buffer ( diameter 10-11 mm) <a href="https://cutt.ly/QjRqKQS">https://cutt.ly/QjRqKQS</a></li></ul><h3> </h3><h3><strong>How to print it? Scroll down!</strong></h3><p> </p><p><strong>Happy printing</strong></p><p>MFG</p><p>Chris</p><p><i>Follow me on...</i><br> </p><figure class="image image-style-align-left image_resized" style="width:7.08%;"><img src="https://www.prusaprinters.org/assets/favicons/favicon-16x16.png" alt=""></figure><p> </p><p><a href="https://www.prusaprinters.org/social/391-schiffer-softde">prusaprinters.org</a><br> </p><figure class="image image-style-align-left image_resized" style="width:7.22%;"><img src="https://cdn.thingiverse.com/site/img/favicons/favicon-16x16.png" alt=""></figure><p> </p><p><a href="https://www.thingiverse.com/schiffer-soft">thingiverse.com</a></p><figure class="image"><img src="http://schiffer-soft.de/api/instagram/insta16x16.png" alt=""></figure><p><a href="https://www.instagram.com/schiffer_soft">Instagram @schiffer_soft</a></p><p>If you like it ;) - Thx for me!<br><a href="https://www.paypal.me/schiffersoft">www.paypal.me/schiffersoft</a></p><p> </p><h3><strong>How to print it?</strong></h3><p> </p><p><strong>Step 1. prepare the image</strong></p><p>The image should have the following pixel dimensions. ( of course larger or smaller is also possible, but the ratio must be correct ) in my case the image is 3648 x 2736 px</p><p>Create the image as a black and white image and make sure that black and white stand out well from each other. By applying an HDR filter, the transitions can be adjusted a bit more extreme, which will result in an even better lithophane after printing.</p><figure class="image"><img src="https://media.prusaprinters.org/media/prints/71888/rich_content/2fe375e5-3c62-419e-bab5-ba40e527569a/img_20200730_185515_6x.jpg#%7B%22uuid%22%3A%2215f97499-c80c-4e49-8d7c-310c3c6f0ec7%22%2C%22w%22%3A1500%2C%22h%22%3A1125%7D"></figure><p><br><strong>Step 2. Upload ur Image</strong></p><p>Upload ur image to: <a href="https://3dp.rocks/lithophane/">https://3dp.rocks/lithophane/</a><br>( There will certainly be more sites here with which you can make a lithophane. I just did it with this site )</p><p>On the page, the image is uploaded in the first step via "images" choose file.</p><p>then go to "settings" -> "Model Settings" and apply the settings from the following image.<br>then do the same with "settings" -> "Image Settings"</p><p>now hit "Model" -> "Outer Curve" -> "Refresh" -> Wait few seconds -> hit "Download"<br>Now your Image as STL will be downloaded.</p><figure class="image"><img src="https://media.prusaprinters.org/media/prints/71888/rich_content/46e03ab5-05a3-4874-bc09-b8673a481480/einstellung1.jpg#%7B%22uuid%22%3A%229a41e612-b4fe-47c4-aaec-d0f082436a5c%22%2C%22w%22%3A1152%2C%22h%22%3A774%7D"></figure><figure class="image"><img src="https://media.prusaprinters.org/media/prints/71888/rich_content/ae97a889-3d95-4018-86fd-14ed53f9102d/einstellung2.jpg#%7B%22uuid%22%3A%2273370648-d452-4b2d-872c-9b7a9b546ced%22%2C%22w%22%3A1144%2C%22h%22%3A849%7D"></figure><p><br><strong>Step 3. check the dimensions</strong></p><p>The dimensions of the image must be exactly 147mm from tip to tip and 121mm in height.<br>This ist verry important!!!</p><figure class="image"><img src="https://media.prusaprinters.org/media/prints/71888/rich_content/b2fe7b80-e9f2-4f30-bfcb-b59d7034472f/image-2.png#%7B%22uuid%22%3A%228df45130-894f-439e-bb8e-05e9f23ac752%22%2C%22w%22%3A866%2C%22h%22%3A741%7D"></figure><figure class="image"><img src="https://media.prusaprinters.org/media/prints/71888/rich_content/9e364107-bb16-4c0d-ac3c-16a4c21febcb/bild-3.jpg#%7B%22uuid%22%3A%2280b6c220-c218-4169-944e-4bab783183bf%22%2C%22w%22%3A1515%2C%22h%22%3A900%7D"></figure><p><br><strong>Step 4. Print everything</strong></p><p>Now everything can be printed. It is only important that the lithophane is printed in a fairly bright and slightly transparent filament. I made sure that the outer sides were always on the print bed so that I could get the textured surface on the outside if u have one.</p><figure class="image"><img src="https://media.prusaprinters.org/media/prints/71888/rich_content/c31a7f6e-9214-4728-9ee5-7a33c8eaad8b/20201127_185926-01.jpeg#%7B%22uuid%22%3A%22a0732c77-328a-477a-8134-9f970a76b025%22%2C%22w%22%3A2266%2C%22h%22%3A2266%7D"></figure><p><br><strong>Step 5. Solder LED Lines</strong></p><p>Next you need 5x 10cm LED strips. These I simply connected from one side with plus and from the other side with minus. But that goes quite quickly if you have done this a few times</p><figure class="image"><img src="https://media.prusaprinters.org/media/prints/71888/rich_content/9c61f8d0-e47d-4ca5-80a6-21bd97511e09/20201127_201833-01.jpeg#%7B%22uuid%22%3A%22879831d5-2392-4f43-8353-939b391d44fc%22%2C%22w%22%3A3024%2C%22h%22%3A2268%7D"></figure><p><br><strong>Step 6. Glue everything together</strong></p><p>Now everything can be glued together. I always start with the LED back panel and glue the lower base with the holes for the rubber studs first. Make sure that the hole for the power source is also at the base of the LED back panel.</p><figure class="image"><img src="https://media.prusaprinters.org/media/prints/71888/rich_content/eec65458-3844-4d94-b6a4-a781aa7e3951/20201127_233701-01.jpeg#%7B%22uuid%22%3A%225c60c7f6-9dc5-4888-8f78-cdf600ce3b39%22%2C%22w%22%3A2266%2C%22h%22%3A2266%7D"></figure><figure class="image"><img src="https://media.prusaprinters.org/media/prints/71888/rich_content/d158fd7a-2b78-4bf9-bb38-22ee0a67365e/20201127_234457-01.jpeg#%7B%22uuid%22%3A%2207c5cc30-dfc0-44a8-83c5-33f7b6cf2b0d%22%2C%22w%22%3A4032%2C%22h%22%3A2268%7D"></figure><p><br><strong>Step 7. Finish</strong></p><p>Before the lid is put on and glued, you should check the LED again to see if it is lit. Afterwards, it is best to glue the top only in a few places, so that it can be removed more easily in the event of a repair.</p><p>Now everything is ready. Have fun with it.</p><figure class="image"><img src="https://media.prusaprinters.org/media/prints/71888/rich_content/26c6d63f-e118-4f03-84f0-1fc2ba4db5c3/front_fertig.jpg#%7B%22uuid%22%3A%22b71e50b7-ec14-4768-8021-29b33f7fb26e%22%2C%22w%22%3A3077%2C%22h%22%3A2308%7D"></figure>
With this file you will be able to print Lithophane LightBox with LED-Strip with your 3D printer. Click on the button and save the file on your computer to work, edit or customize your design. You can also find more 3D designs for printers on Lithophane LightBox with LED-Strip.