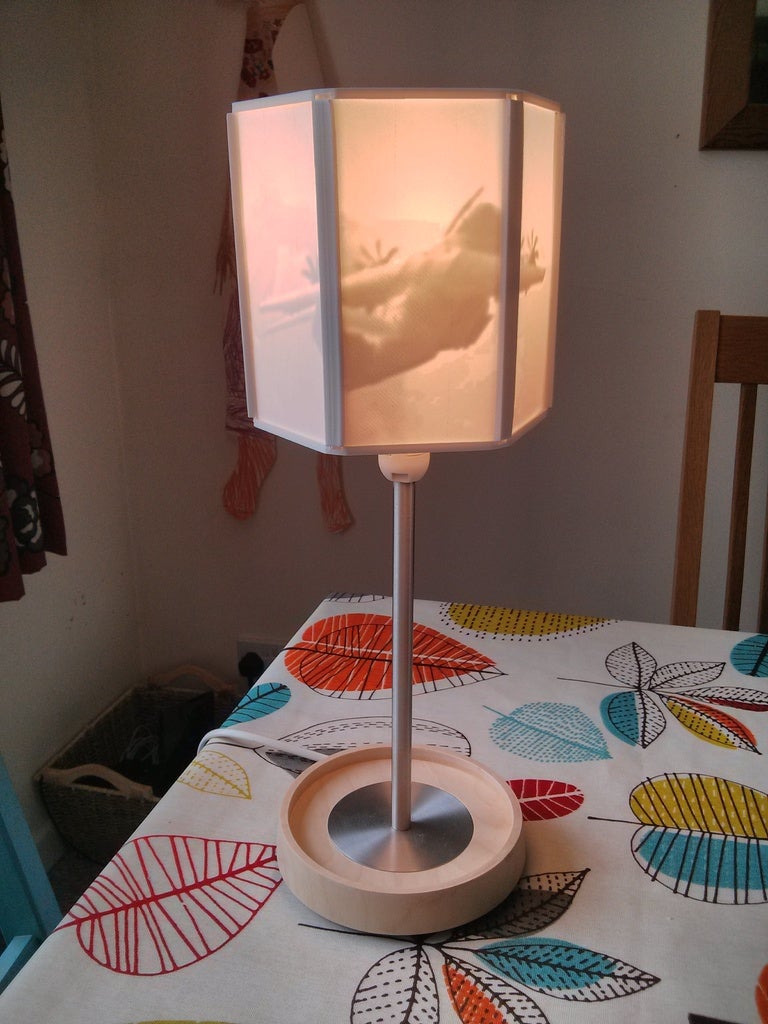
Lithophane Lampshade
prusaprinters
<p>This is the full set of files I used to create a lithophane lampshade with six flat panels (this is a retirement gift for a colleague who worked on the aircraft pictured).</p> <ul> <li>The lamp part is an IKEA 'Basisk' with an LED bulb, this comes with a shade that I've discarded. Most other lamps should work, if not the base frame part can be altered in the scad file (good luck with that). </li> <li>The image panels were made with a Processing sketch (included as a zip with the example images that I used) and the rest was designed with OpenSCAD (file also included). All the frame parts are included as STLs. </li> <li>The CC licensed image files I used were sourced via Wikimedia commons - thanks to the photographers below for these beautiful images: </li> <li>File name: Airbus_A400M_Atlas<em>2</em>(7567921916)<br/> Ronnie Macdonald<br/> <a href="http://commons.wikimedia.org/wiki/File:Airbus_A400M_Atlas_2_(7567921916">http://commons.wikimedia.org/wiki/File:Airbus\_A400M\_Atlas\_2\_(7567921916).jpg</a>.jpg)<br/> CC-BY </li> <li><p>File name: Airbus_A400M_EC-404_ILA_2012_04<br/> Julian Herzog<br/> <a href="http://commons.wikimedia.org/wiki/File:Airbus_A400M_EC-404_ILA_2012_04.jpg">http://commons.wikimedia.org/wiki/File:Airbus\_A400M\_EC-404\_ILA\_2012\_04.jpg</a><br/> CC-BY-SA</p> <h3>Instructions</h3> </li> <li><p>All frame parts are included as STL files since the scad file is monumentally awful - I hope you don't have to change it because it's terrible. Parts were sized to fit on my mini Kossel (180mm diameter round bed) so if you have a bigger bed you may be able to make a bigger lamp (if you can work the scad file).</p> </li> <li>You need to print 1 each of the top and bottom frames with two print runs of the verticals with 3 parts on the bed (6 parts in total). I printed the structural parts using PLA on 0.2mm layers and 20% infill.<br/> Holes are designed for M3x8 socket cap screws - you will need 12 M3x8 bolts and 12 M3 full nuts. </li> <li>Ream the holes with a 3mm drill, clear the support material from the holes in the top and bottom frames, the sockets of the M3 bolts need to fully fit into the holes and any strands of filament will block these. It is a good idea to use the nuts to pull the bolt caps fully into their holes in the top/base frames using the nuts before you mount the verticals since the bolts are only just the right length. </li> <li>I printed the panels using white PLA with 100% fill with 0.1mm layers (0.2mm first layer) onto blue tape. You will need to be able to print 0.1mm or less or the image will have poor brightness resolution. BEWARE: my panels only just fit into the frames, it would be better either to reduce the max thickness to 2mm (mine was ~2.3mm = 0.3 base + 2mm depth range) or process the image to be lighter around the edges or just file/scrape the edges down.</li> </ul> Category: Decor
With this file you will be able to print Lithophane Lampshade with your 3D printer. Click on the button and save the file on your computer to work, edit or customize your design. You can also find more 3D designs for printers on Lithophane Lampshade.
