Lithophane Lamp Structure
thingiverse
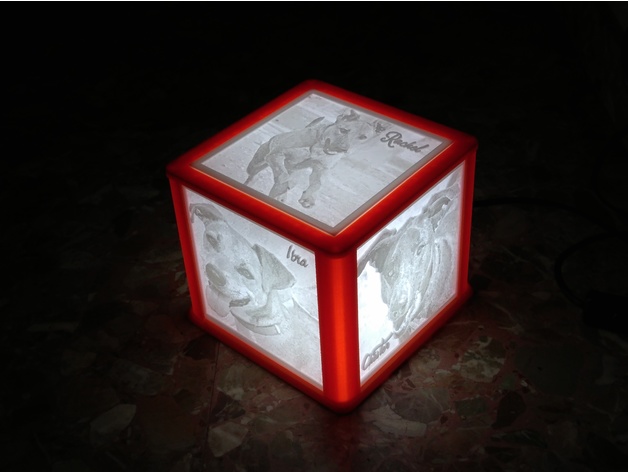
This Lithophane's structure are the best structure (or simple) on Thingiverse, so enjoy! The structure is made for panels of SIZE 130x30mm (but you can scale it up to any size you want). It was calculated with a safety margin of +1mm (131x40mm), but this will change based on your settings and printing. The assembly is very easy - just look at the pictures, use your intuition, and maybe some glue for the tricky parts (except the top panel if you plan to swap out lithophanes later). Depending on your settings and printing, you might need glue; I recommend using it. You should read the post-printing instructions carefully, as they might be important to you. Don't forget to click Like/Made if this project has been helpful. Note: Be careful with the light's heat, especially when using PLA - if the lamp is too close, it will deform the lithophane. I recommend using LED or 9W max bulbs. Note2: Print the litho in a vertical position for better resolution; you'll need to use PLA with a 7mm brim. If you encounter problems with halls, modify the picture before printing and make it darker. Update (6/7/2017): I uploaded a new lower panel version that's compatible with G9 lights. These are the best bulbs for this lamp, so if you want one, I recommend using this updated version. Update (11/22/2017): I redesigned the corners and both lower panels to improve resistance issues. The walls are now wider. In addition: When creating the lithophane, set its thickness to around 2.98mm - sometimes, like Slic3r, it will add an extra 0.2-0.3 mm, so printing at 3.3mm might cause assembly problems. Update (12/13/2017): I redesigned the top panel for a better look. Update (1/25/2018): Tested with Aliexpress bulbs and they work perfectly! You can find similar ones on eBay. Update (4/19/2018): I re-designed the "lower panel G9" to use less plastic while still being strong enough. Update (11/24/2019): Improved measurements in parts for easier assembly, and added a pre-assembled structure ready to print - but be careful not to break any corners! Print Settings: Printer Brand: RepRap Printer: Anastasia Supports: No Resolution: 0.1-0.2 Infill: 100% Notes: Recommended settings in Slicer for printing lithophanes. Layer height: 0.2 Perimeters: 2 Top/bottom layer: 1 Infill: 100% I also recommend using the Slic3r Prusa Edition - it compiles much faster, around 10 minutes. Post-Printing: To assemble it, follow the images carefully and avoid forcing the structure (e.g., screws or panels). The shorter the lamp's length, the better. Consider its heat and light output and aim for a 360-degree illumination. How I Designed This Create a lithophane: I was searching for the perfect lithophane creation software and found two options. 1º This is the best but more difficult (but very simple). It has more definition - you can find it at http://www.imprimindo3d.com.br/software-para-impressao-de-lithophanes/. I recommend reading this tutorial to make a perfect lithophane: http://www.instructables.com/id/Litophanes-How-to-3D-Print-your-photos/. 2º This is more simple and intuitive but with a few less definition - you can find it at http://3dp.rocks/lithophane/.
With this file you will be able to print Lithophane Lamp Structure with your 3D printer. Click on the button and save the file on your computer to work, edit or customize your design. You can also find more 3D designs for printers on Lithophane Lamp Structure.