Lithophane Lamp
thingiverse
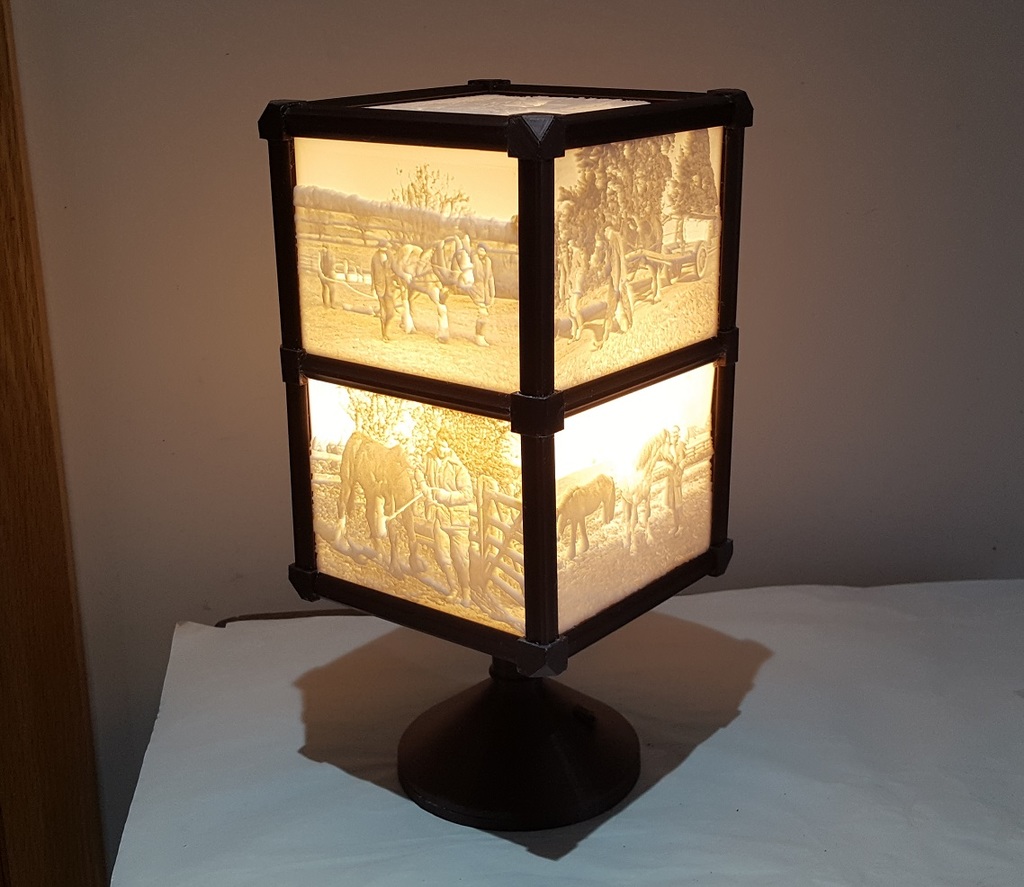
Create a Lasting Display of Your Cherished Photographs or Print a Stunning Gift for Your Loved Ones. To create this unique lamp, you'll need a print bed with a minimum size of 150mm (6 inches). My design is inspired by other similar lamps on Thingiverse. The lampstand is compatible with my Moon Lamp, which can be found at [thing:4235225](https://www.thingiverse.com/thing:4235225). Assemble the Lampstand Get started by printing the lampstand while you prepare your photographs. This will save time in the long run. I printed the lampstand using copper-colored PLA. You'll need to print one of each of the lampstand files provided, as shown in my illustration. You can create a taller lamp by adding additional sections. I printed the lampstand at 0.2 layer height, but printing it at 0.15 could give a better finish. For a single-height lampshade, place the lampshade supporting ring on top of the lampstand section, immediately under the light fitting, as shown in the diagram. For a double-height lamp, place the lampshade supporting ring lower down and adjust the sequence of lampshade sections so that the lightbulb is positioned approximately halfway up the height of the lampshade. I recommend using an 8W LED lightbulb and G9 ceramic bulb holder, which can be found on eBay (see photo). A 5W bulb might also work. Secure the G9 ceramic bulb holder into the printed holder with two small nut and bolts or two small chipboard or self-tapping screws. Feed a mains cable through the hole in the base and clamp it using two small chipboard or self-tapping screws. You can add a zip-tie around the cable inside the base or use a hot glue gun to ensure that it doesn't pull out or put tension on the connections. The base should push fit into the bottom, but you may need to track it with glue if it's too loose. Prepare Your Photographs Lithophanes are grey-scale images, so select photographs with good contrast. They are low-resolution, so crop your images to discard any irrelevant background and focus on the important parts. You'll need one square photograph (height = width) for the top of the lampshade. You'll also need four photographs for the sides, which should match the aspect ratio of your chosen images. Print the Lampshade Frame I recommend leaving this step until you're happy with your image sizes. Print a lampshade base, 4 x lampshade horizontals, and 4 x lampshade corners. They are a fairly tight push fit to assemble. Glue the parts together using an acetone melt glue for ABS or a cyanoacrylate superglue for most other plastics. Print 4 x lampshade uprights according to the aspect ratio of your images. If you have square images, use horizontal frame pieces for the uprights. Glue the uprights into the four corners of the base. If you're making a double-height lampshade, print 4 x lampshade intermediate horizontals and 4 x lampshade intermediate corners. Glue the parts together. Print 4 x uprights according to the aspect ratio of your upper layer images and glue them into the corners of the intermediate frame. Print 4 x lampshade horizontals and 4 x corners to make the top frame. Assemble this with the 150mm x 150mm square lithophane to create the top of the lampshade. The rough side of the lithophane should be upwards, and the open connection of the frame corners should be downwards. Optionally glue the top assembly together but only when you're sure that everything is in the correct orientation. Insert the 4 lithophane images into the bottom assembly, ensuring they are the correct way up and the rough side facing outwards. If using the intermediate frame, push-fit it to the bottom assembly, then insert the 4 lithophanes into it. Push-fit the top frame onto the lower assembly. Once you've checked that everything is correctly assembled, you can glue the remaining joints with a small amount of glue just to tack them together. Show Your Appreciation I design these things for myself but publish them for you. If you like my work, please don't forget to "tip designer" to show your appreciation and encourage me to publish more designs in the future.
With this file you will be able to print Lithophane Lamp with your 3D printer. Click on the button and save the file on your computer to work, edit or customize your design. You can also find more 3D designs for printers on Lithophane Lamp.