Lithocoin
prusaprinters
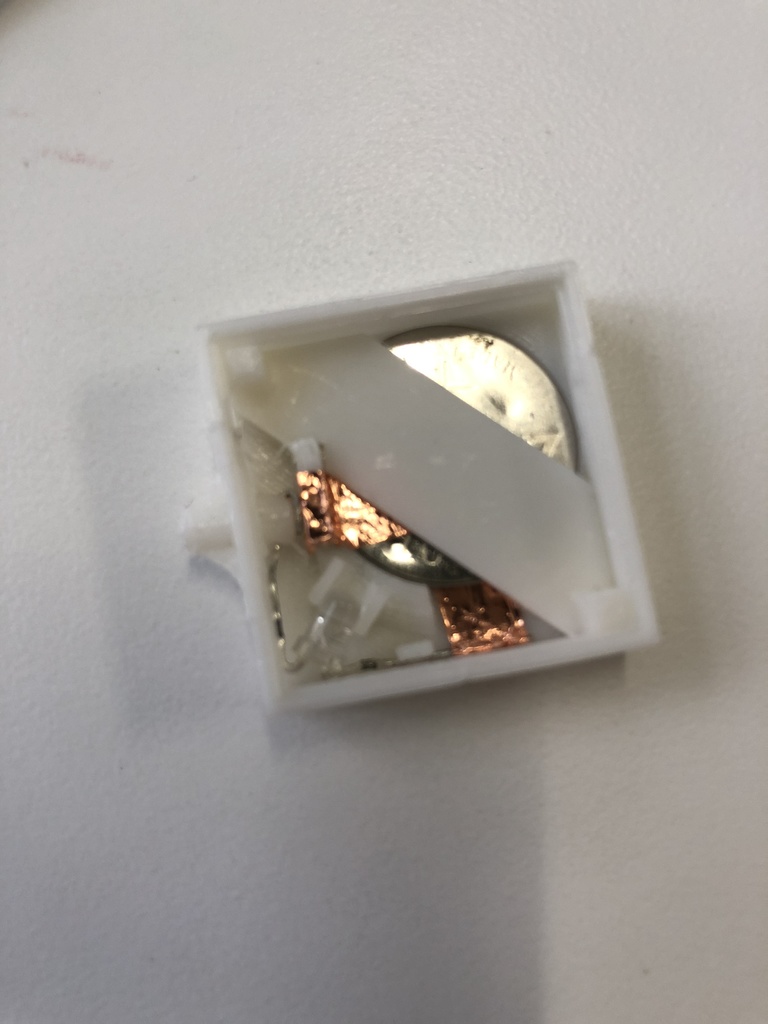
<p>This is a battery holder and box to provide illumination for a 25mmx25mm lithophane. It was designed with the intention of having it placed inside a larger enclosure, with the light and battery mechanism being isolated and modular.</p> <h3>Print Settings</h3> <p><strong>Printer Brand:</strong></p> <p>Prusa</p> <p class="detail-setting printer"><strong>Printer: </strong> <div><p>i3 MK3</p></div> <p><strong>Rafts:</strong></p> <p>No</p> <p class="detail-setting supports"><strong>Supports: </strong> <div><p>No</p></div> <p><strong>Resolution:</strong></p> <p>.10 mm</p> <p class="detail-setting infill"><strong>Infill: </strong> <div><p>100%</p></div> <h3>How it Goes Together</h3> <p><strong>Parts</strong></p> <div><p>In addition to the three parts, the following items are required:</p> 1 CR2016 battery. <p>1 3MM 3V White LED. Other colors may not draw enough voltage from the battery and will require a resistor that may not fit.</p> <p>0.25 inch copper tape</p> <p><strong>How to assemble</strong></p> <p>First, bend the two leads on the LED so that the entire thing looks like a W, with the LED as the center point.</p> <p>Assuming that the box is oriented so that the battery socket is to the upper right.</p> <p>Place the button into the hole in the left wall of the box.</p> <p>The positive lead of the LED is placed through the hole in the button body, and then wrapped around the front of the button. There should be space between the LED lead in the flat surface on the left side of the battery holder.</p> <p>The negative lead of the LED is pressed into the clip at the 'bottom' side of the box, and the LED body itself can be placed in the holder in the lower right corner. It should snap in.</p> <p>Use copper tape to create a path from the center of the battery holder down over the negative lead of the LED. This shoudl help secure the LED in place.</p> <p>Place the battery in the holder. Note that the left side has to be inserted first.</p> <p>Place a length of copper tape on top ofthe battery on the left side, draping it up the small block near the button and down the face that is opposite the button. This will be where the positive lead of the LED contacts when the button is pressed, completing the circuit.</p> <p>Place the bar into the box over the battery. It will be a snug fit that will ensure the battery does not pop out when the box is flexed.</p> <p>Now place a 25mmx25mm lithophane in the top of the box and enjoy your trinket. I use a 1mm minimum and 3mm maximum on the lithophanes used in the box.</p> </div></p></p></p> Category: Interactive Art
With this file you will be able to print Lithocoin with your 3D printer. Click on the button and save the file on your computer to work, edit or customize your design. You can also find more 3D designs for printers on Lithocoin.
