LITHO-FRAME
thingiverse
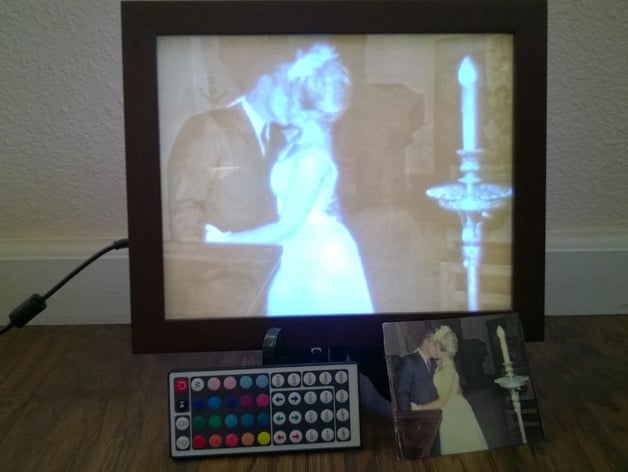
Lithophane Showcase. A Backlit Shadow Box for Displaying Lithophanes. This was my initial attempt at crafting a lithophane frame and sharing a project with others. I chose to create a large 8x10-inch lithophane to commemorate a 50th wedding anniversary. There were some obstacles, but the results turned out well. I included details on some of my mistakes and how I could improve things next time around. Print Settings Printer Brand: LulzBot Printer: TAZ 4 Rafts: No Supports: No Resolution: .1-.4 Infill: 20-100% Notes: I used Cura to generate the gcode. The lithophane was printed in fine mode with 100% fill. I changed the layer height to .1 so that I could achieve a lot of shades (thicknesses) without using too much plastic or requiring a lot of light. I utilized natural ABS for heat resistance and translucence. A brim was added to help prevent warping. The lithophane for this frame should be 7.75x9.75 inches minus 1mm or so. For the frame components (the posted STL files), I used stock ABS fast settings with an added brim. Post-Printing Clean up... I had burnt bits of plastic fall off my hot end during the print. I should have cleaned it better beforehand. Anyway, I dug out the visible bits and removed loose pieces of plastic. How I Designed This Some Project Details... When you open an image in Cura (a cool feature), there is a dialog box that configures how it will generate the STL file. I set the base to .7 so that I could get multiple base layers before the image was printed (to help diffuse the light in the thinnest layer). I set the depth to around 7mm. With the .1 layer thickness, this gave me about 64 shades of gray in the image. It's essential that the input image is pre-cropped to have an 8:10 aspect ratio. My tiny photo required a lot of touch-up and the 300 dpi scan only yielded ~5 pixels/mm. One struggle was creating a balanced illumination. The LEDs are approximately 1.25 inches apart, so I tried to fold/glue my strips onto the back at the same spacing. Because of the lens angle on the LED, you will get bright spots if the lights are too close to the lithophane. I attempted several solutions (diffusers etc.) to keep the box shallow but eventually gave up. By keeping the lights about 1 inch back from the lithophane, the lighting looks even. The frame itself came together in a somewhat random fashion because I was learning as I went and the prints take too long to discard. The back that the LEDs glue to was originally going to replace the cardboard back that came with the frame. Due to the lighting problem (above), I printed the ~1 inch thick spacer that the back glues onto. Since lithophanes aren't an even thickness, I also created a pocket for the lithophane to fit into the spacer (losing 1/4 inch off the 8x10 inch size to still fit the frame). This provides a uniform thickness so it fits into the frame nicely (holding the outer clear plastic snug). I will drill some holes in the back to release heat. Possible Improvements: Most of this could be easily made into a single piece that holds the lighting and the lithophane. Next time around, I will add tabs (or something) so that it can be screwed into the frame (on this one, I used hot glue). Ventilation holes would be a good addition. I decided to keep the LED controller that allows changing colors etc via remote. It's glued onto the back which means the picture can't hang on the wall (goes into a stand – that could be printed). This controller could be housed inside the frame if it held a smaller image. Gluing the lights to the sides (so they don't shine direct on the back of the lithophane) may allow for shallower frames. Parts from Amazon: ~ $17 - Swing Design Chroma Shadow Box Frame, 8 by 10-Inch, Walnut ~ $27 - WenTop LED Strip Lights Kit Non-waterproof SMD 5050 32.8 Ft (10M) 300 LEDs RGB 30 LEDs/m with 44-key IR Controller and 12V 6A Power Supply ~ $22 Mitus ABS Filament 3mm (2.85mm) 1 kg for 3D Printing, Made in the USA, Natural
With this file you will be able to print LITHO-FRAME with your 3D printer. Click on the button and save the file on your computer to work, edit or customize your design. You can also find more 3D designs for printers on LITHO-FRAME.
