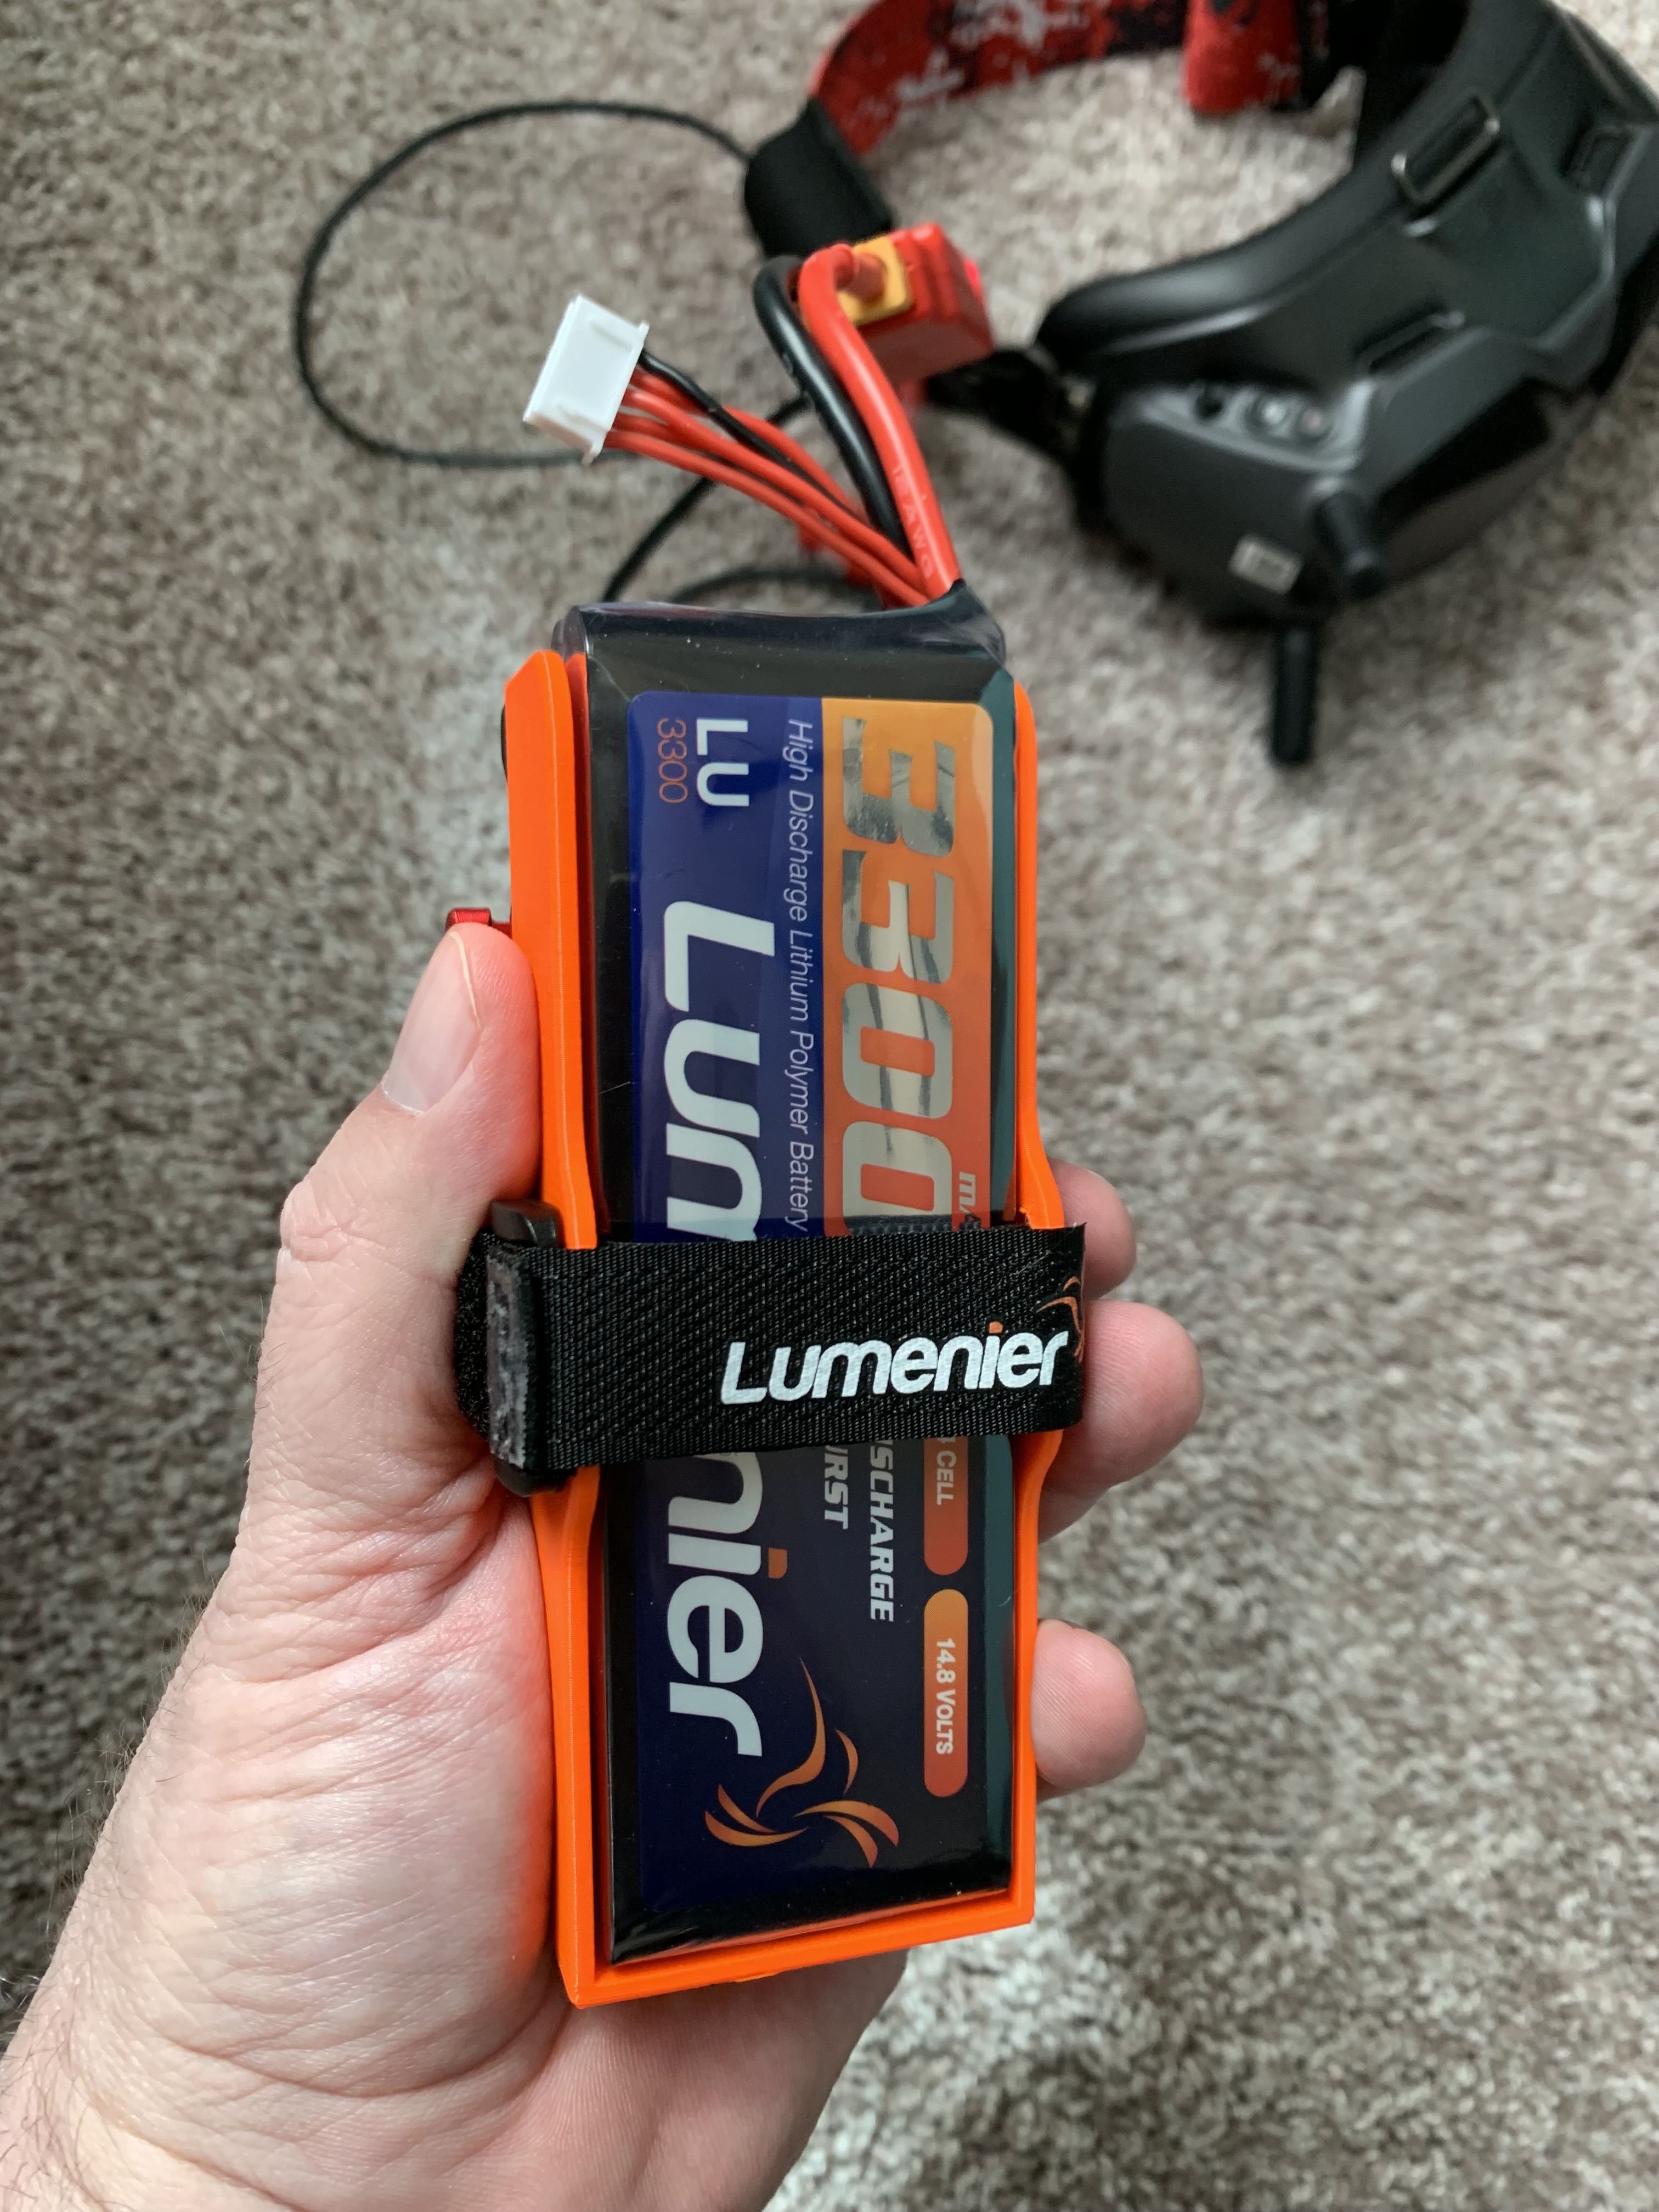
LiPo Battery Carrier for Belt Clip
prusaprinters
<p><strong>Parts Required to Complete:</strong></p><ul><li><a href="https://www.smallrig.com/smallrig-mini-v-mount-battery-plate-with-belt-clip-2990.html">SmallRig Mini V Mount Battery Plate with Belt Clip 2990</a></li><li>V Mount Accessory Plate (<a href="https://www.printables.com/model/50307-v-mount">3D printed</a> or from <a href="https://www.smallrig.com/smallrig-mini-v-lock-assembly-kit-md2801.html">SmallRig MD2801</a>)</li><li><a href="https://www.mcmaster.com/91294A126/">M3 x 6 Flat Head Screws</a> (3)</li><li><a href="https://www.getfpv.com/lumenier-large-lipo-strap-rubber-grip-3pcs.html">Battery Strap</a></li><li>Velcro, Servo Tape, or <a href="https://www.mcmaster.com/93375K427/">Non-Slip Pad</a></li></ul><p><strong>Why I Made This:</strong></p><p>I recently started flying FPV radio controlled aircraft, and I quickly discovered that the FPV goggles tend to blow through the small OEM batteries fairly quickly. Plus, fishing the small factory battery out of my pocket every time I needed to change it out was proving to be a bit annoying. Many FPV pilots mount their batteries on the strap of their goggles, but if I was going to use a bigger battery, I wanted to carry it on my belt, as I felt there was already enough weight on my head with the goggles themselves.</p><p>I'm not alone in this approach, of course: a search turned up a couple of 3D printable belt mounts, but among other things, I wasn't happy with the plastic belt clips on these, as I wanted something both sturdier and which made it easier to change batteries when needed. Thus, this project was born!</p><p><strong>The Design:</strong></p><p>The goggles I have accept a range of input voltages, but the consensus seems to be that a 4S LiPo (providing a nominal 14.8V) is preferred. I selected a fairly high capacity battery to minimize the need for swaps in the field. My carrier is designed around the dimensions of <a href="https://www.getfpv.com/lumenier-3300mah-4s-35c-lipo-battery.html">this particular Lumenier battery</a> (135 x 44 x 26 mm):</p><figure class="image image-style-align-center image_resized" style="width:50%;"><img src="https://media.printables.com/media/prints/175053/rich_content/100dc9e7-eb32-42ca-bbec-d28dcb015ad9/lumenier-3300-4s.jpg#%7B%22uuid%22%3A%221948f3fa-c175-47b1-bc2f-13ef97e11d91%22%2C%22w%22%3A500%2C%22h%22%3A364%7D"></figure><p> </p><p>To attach the carrier to my belt, I decided to use SmallRig's Mini V Mount belt clip, which is of extremely high quality, reasonably priced (< $20 US), and widely available. I used the metal accessory mount from SmallRig's Mini V-Lock Assembly Kit ($25 US), but there are 3D printable versions of the accessory side of the V mount available which will work also. (Make sure to print them using a strong filament such as PETG.)</p><p>Here's the result of several iterations on my original concept:</p><figure class="image"><img src="https://media.printables.com/media/prints/175053/rich_content/e1cfe7da-9cd4-48a4-9ee2-c48385c2934f/lipo-battery-carrier-drawing.png#%7B%22uuid%22%3A%222de307ec-27fa-4292-a607-e7875f3325fe%22%2C%22w%22%3A1721%2C%22h%22%3A1296%7D"></figure><p>Again, the carrier is designed around the battery I'm using. If you plan to use a different battery, I'd be happy to adjust the carrier to fit – just send me the dimensions you need, and I can upload a custom version for you.</p><p><strong>Printing:</strong></p><p>I've printed this in both PLA and PETG, but I'd recommend PETG for maximum strength. The carrier should be printed standing up (that is, with the bottom on the build plate), and the open side should face forward for best results. Default print settings and 0.2 mm slices with 15% infill give great results. No supports necessary!</p><p><strong>Assembly:</strong></p><figure class="table"><table><tbody><tr><td><figure class="image image-style-align-center image_resized" style="width:50%;"><img src="https://media.printables.com/media/prints/175053/rich_content/42bb9246-0180-489c-bae6-beb2de2e9dad/img_2527.jpg#%7B%22uuid%22%3A%22e37de54a-1501-48d5-9c05-224beae09a3e%22%2C%22w%22%3A3024%2C%22h%22%3A4032%7D"></figure></td><td><figure class="image image_resized" style="width:50%;"><img src="https://media.printables.com/media/prints/175053/rich_content/d0a741bf-9ea3-48fa-8b33-253ceeb74f31/img_2531.jpg#%7B%22uuid%22%3A%22d2656916-31a1-4173-bda0-1a3b4d73897d%22%2C%22w%22%3A3024%2C%22h%22%3A4032%7D"></figure></td><td><figure class="image image_resized" style="width:50%;"><img src="https://media.printables.com/media/prints/175053/rich_content/1026980a-7abc-4c70-b86a-6ef9b6589c3b/img_2533.jpg#%7B%22uuid%22%3A%22b925eb53-a588-4bbd-8977-9c132917e6d4%22%2C%22w%22%3A3024%2C%22h%22%3A4032%7D"></figure></td></tr><tr><td><figure class="image image_resized" style="width:50%;"><img src="https://media.printables.com/media/prints/175053/rich_content/37e58664-4663-496f-b435-7b916d7bd971/img_2534.jpg#%7B%22uuid%22%3A%2234bb7806-3acb-48e3-97ce-81a79605c15d%22%2C%22w%22%3A3024%2C%22h%22%3A4032%7D"></figure></td><td><figure class="image image_resized" style="width:50%;"><img src="https://media.printables.com/media/prints/175053/rich_content/8a69413a-8c60-4480-9b58-fe7b8a89a11d/img_2536.jpg#%7B%22uuid%22%3A%2296e7162d-dc41-4a75-8df2-4ae697fd8cfd%22%2C%22w%22%3A3024%2C%22h%22%3A4032%7D"></figure></td><td><figure class="image image_resized" style="width:50%;"><img src="https://media.printables.com/media/prints/175053/rich_content/f1aa1365-01b4-4685-ac32-5e71f1fc4d8d/img_2538.jpg#%7B%22uuid%22%3A%22201c9fbb-acff-4a34-8c63-9eec64958a1f%22%2C%22w%22%3A3024%2C%22h%22%3A4032%7D"></figure></td></tr></tbody></table></figure><ol><li>Attach the V mount accessory plate from the SmallRig kit to the rear of the carrier using M3 x 6 flat head screws</li><li>If using Velcro or tape to secure the battery, cut a piece to fit the <i>bottom </i>of the carrier and apply it; if using a non-slip pad (as shown in the photos above), cut a piece to fit the <i>back </i>of the carrier and apply it using adhesive</li><li>If you're using Velcro, apply the opposite piece from step 2 to the bottom of the battery. If you're using any of the other methods, skip this step</li><li>Feed the LiPo strap from right to left through the holes on the front sides of the carrier; wrap the strap around the carrier so that the buckle ends up against the outside of the left side, and feed the free end of the strap through the buckle; leave it loose for now</li><li>Insert the battery (always handle LiPo batteries carefully – an added benefit of this carrier is that your battery is well protected on 3 sides while in the carrier!)</li><li>Pull the strap tight so that the non-slip surface of the strap is firmly against the front of the battery, then secure the free end of the strap</li><li>Slide the entire assembly into the SmallRig belt clip until it clicks into place; to release the assembly, press the red button on the side of the belt clip</li></ol><p><strong>Final Thoughts</strong></p><p>If you find this useful, please post a make below! If you have any comments or suggestions, feel free to post those as well!</p>
With this file you will be able to print LiPo Battery Carrier for Belt Clip with your 3D printer. Click on the button and save the file on your computer to work, edit or customize your design. You can also find more 3D designs for printers on LiPo Battery Carrier for Belt Clip.
