Linearführung für Sidewinder X1 / Linear rail for Sidewinder X1
thingiverse
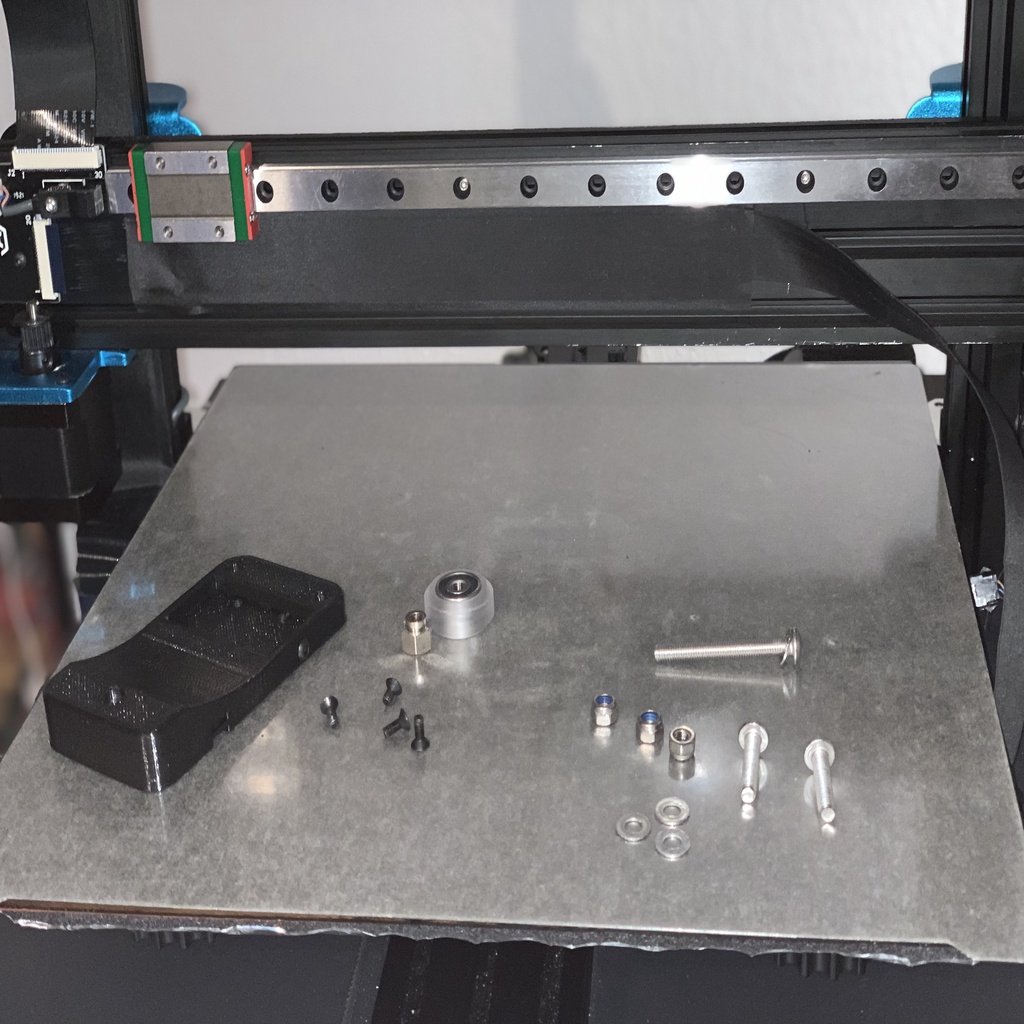
Here is my upgrade/mod of the Sidewinder X1. Thanks to the linear guide, there's a super-stable X axis. For me, it has led to better results. The best thing is that it's 100% disassemblable since no holes are drilled or parts are changed/damaged. Conversion time (without print of the part): about 20 minutes. Conversion costs: approximately $25 This is needed: Linear guide 400 mm with MGN 12H slider e.g. https://www.amazon.com/gp/product/B07LD9V7V7/ref=ppx_yo_dt_b_asin_title_o01_s01?ie=UTF8&psc=1 or this: https://www.amazon.com/gp/product/B07L83XHKB/ref=ppx_yo_dt_b_asin_title_o04_s00?ie=UTF8&psc=1 Screws: 2x M5x20 hex socket screws 1x M5x45 hex socket screw 4x M5 washer 3x self-locking M5 nuts (original from the printer) 3x M3x8 hexagon screw 3x M3x6 hexagon socket screw 1x M3x4 hexagon socket screw 1x eccentric (original part from the printer) 1x roll with storage (original part from the printer) 1x 6 mm sleeve (original part from the printer) 2x small cable ties 3x M3 sliding blocks e.g. B. this one: https://www.amazon.com/gp/product/B07K7LBD85/ref=ppx_yo_dt_b_asin_title_o09_s00?ie=UTF8&psc=1 Preparation on the printed part: - Check holes for diameter and re-drill if necessary. - Provide the 4 fastening holes in the direction to the glider with countersinks. - Cut a M3 thread on the side with a tap. The modification: First, disconnect the ribbon cable from the extruder. Then remove the cover and the original carriage including the belt. Now fix the linear guide with 3x M3x8 + 3x M3 sliding blocks on the X-axis at the top - without damaging the ribbon cable. In the next step, attach the straps to the printed part and secure them with cable ties (as on the original) (attention in which direction the teeth must point). Now attach the adaper to the sidecar and screw it down with the 3x M3x 6 and 1x M3x4. Then guide the belts over the rollers again and tension them. Now push in the two M5x20 screws from above and attach the extruder carriage and fasten with two washers and the two original nuts. Now attach the under roll from behind. Assemble the screw (M5x45), washer, roller, eccentric, now push through and tighten with washer and self-locking M5 nut. Now screw on the cover and plug in the ribbon cable. As a last step, slightly raise the end stop of the X axis with the 6 mm sleeve and screw in an M3x4 hexagon socket screw on the side of the printed adapter. Finished. I wish you success.
With this file you will be able to print Linearführung für Sidewinder X1 / Linear rail for Sidewinder X1 with your 3D printer. Click on the button and save the file on your computer to work, edit or customize your design. You can also find more 3D designs for printers on Linearführung für Sidewinder X1 / Linear rail for Sidewinder X1.