LightPainting LED Glowstick
thingiverse
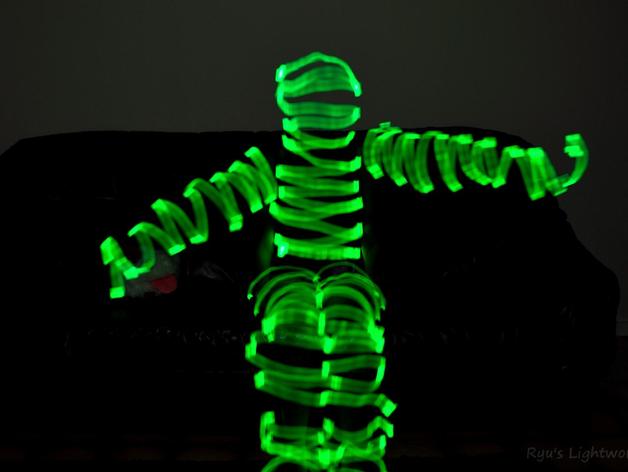
This is a LightPainting tool that replaces chemical glow sticks when doing outlines or ghost silhouettes. LightPainting is a form of photography in which a camera is set to long exposure and some elements are "painted" with light into a scene, or sometimes in pitch black. The first image shows a quick example done with this tool. I have to admit it's not one of the best, but it shows the principal - google LightPainting and glow sticks if you want more examples. On the second image, you can see the assembled tool. I still have to paint the handle green. I've included three versions of the diffuser. The normal one should work well with regular 5mm LEDs. The thin one is meant for use with dim LEDs - red are sometimes a lot dimmer than other colors. The one with inner guides is meant for use with LEDs that have a small light cone, it takes a bit of the centered light cone and guides it to the wall to get an even illumination. You could also use the ones with guides to get a slightly uneven illumination with normal LEDs if you want that effect. Post-Printing After printing the parts should be checked for fit and cleaned of any irregularities that might be in the way. A super clean surface is not really needed, so you can get away with printer settings that produce fast but lower quality prints. The diffuser should have an even surface, because you want an even illumination with no artifacts in it, so it's best to put some sandpaper to it. The surface can be rough, just evenly so. The frame for the diffuser should be 100% opaque, so since I printed them in natural white, I painted them with black paint. Custom Section Printing Notes Depending on the material used (I used PETG which is a pain on overhangs and bridging), the lid and top part of handle need support. The rest is designed to work without any. Since the LED or other electronics shouldn't get hot, any material is fine. Custom Section Needed Vitamins In addition to the printed parts, you will need: 2x regular 5mm LEDs 1x 9V battery 1x a resistor fitting for the LEDs and the power supply Cables Clip for battery 1x micro switch (sometimes called SPDT PCB mini switches) or 1x small tactile push button (6x6x9mm dimensions, sometimes called DIP buttons) Custom Section Assembly Press the diffuser into the frame, it should slide in but have a tight fit. Then you can put in the LEDs in the holes on each end of the diffuser. A drop of glue can hold them in place if the fit is not so tight (it should be though). Next guide a cable through the bottom of the frame and solder it to the LEDs creating a serial connection (anode of one LED goes to cathode of the other). Solder a cable on the other end of one LED and guide it back through the bottom of the frame. The cable should be long enough to go through the frame and the arm all the way into the handle. Now the cap for the frame can be put in place and glued, and you're done with this end of the frame. Next solder another cable to the still visible LED. It should be long enough to go all the way through the arm into the handle. Guide both cables you have now through the arm and glue the arm to the frame. Press the other end of the arm into the hole and guide inside the bottom part of the handle. One of the cables should be guided through the hole on this end of the arm to better reach the switch. Solder this cable to the switch and put the switch in the hole meant for it. The switch is secured in place by two extrusions behind the hole, so it shouldn't need any more support. Solder a correct resistor to the other cable. Next solder the battery clip to the resistor and the other end of the switch. Some shrinking tube is great to prevent any shorts. Guide the battery clip into the battery compartment and put the top part of the handle on. The handle is meant to be glued together. For reference, I've included a screenshot of the CAD-assembly. This tool is meant to be built with a switch, because you need the light to stay on while holding the tool in different positions, so a button isn't always reachable. But I also included a version of the handle that holds a button.
With this file you will be able to print LightPainting LED Glowstick with your 3D printer. Click on the button and save the file on your computer to work, edit or customize your design. You can also find more 3D designs for printers on LightPainting LED Glowstick.
