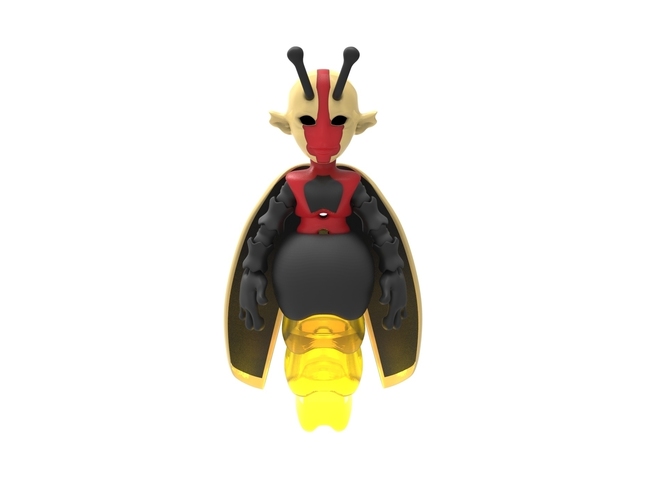
Lightie the lightning bug BJD tiny doll
pinshape
I got a new printer and decided to get back into pinshape to be more active again. To my surprise, they were hosting an amazing contest that was ending in just a couple of days. Inspired by the contest, my new printer, and the filament I had on hand, I created a brand new character: Lightie, the lightning bug/firefly ball jointed doll. Lightie is a fairy bug or a type of fairy with insect attributes, similar to how some fairies look like flowers. Lightie is a special bug that shouldn't be squashed! He helps people who have bad dreams and need a little magical light to calm them down at night. Good sleep is very important for me personally because a bad night with nightmares can trigger serious health problems. So, having a friend like Lightie to protect me and others from the dangers in the dark really resonates with me. The lower half of Lightie is meant to be transparent, and the rest should be made with glow-in-the-dark filament if possible. If scaled up a bit, you can even fit a tiny LED inside. I'll make any necessary tweaks to the design in the future to get better posing, design, and extras as well as swap-able pieces soon. Lightie is fully jointed with double joints, giving him 20 points of articulation including his antenna and wings. The wings and head cap are magnetic, and this model requires a bit of post-work. You can find help on stringing dolls on my YouTube channel or send me a message! (https://www.youtube.com/user/L...) I'll make a video on how to fully assemble Lightie as soon as possible. To put together Lightie, you'll need two pieces of thin elastic cord that are 1mm thick or smaller, a 6-8mm wide jump ring, and eight magnets. Two of the magnets should be 3mm wide by 1m tall for the front of the head and head cap, and six magnets should be 3mm wide but 2-3mm tall for the back of the head and the wings. Take one piece of cord through the hole at the wrist, then take both ends and string them through one set of arm parts. String through the shoulder holes to the other side, then string the other arm parts. Tie the elastic tightly at the wrist. Take the second piece of cord and loop it through the smallest bug abdomen part, then like the arms, take the cord through the torso/lower half parts up through the hip and middle torso part and up through the chest and out the neck hole into the head. Tie the cord tightly onto the jump ring inside the head. Glue in the magnets, making sure to get the poles facing the right direction. If the antenna don't fit into the head holes, use a craft knife to gently widen the holes until they fit. Use a small 5mm bead and some putty like poster tac to add some eyes if you want. You can paint or color Lightie and print him in any workable material and colors. Lightie was printed on a mono select mini printer at "normal" or medium settings. No support was needed for my printer, but I did pre-build a few support structures on the ears and other areas that needed them. I recommend using a good brim and starting the first layer on a slower setting to ensure the parts stick well to the build plate.
With this file you will be able to print Lightie the lightning bug BJD tiny doll with your 3D printer. Click on the button and save the file on your computer to work, edit or customize your design. You can also find more 3D designs for printers on Lightie the lightning bug BJD tiny doll.