Lightbowl (20cm)
prusaprinters
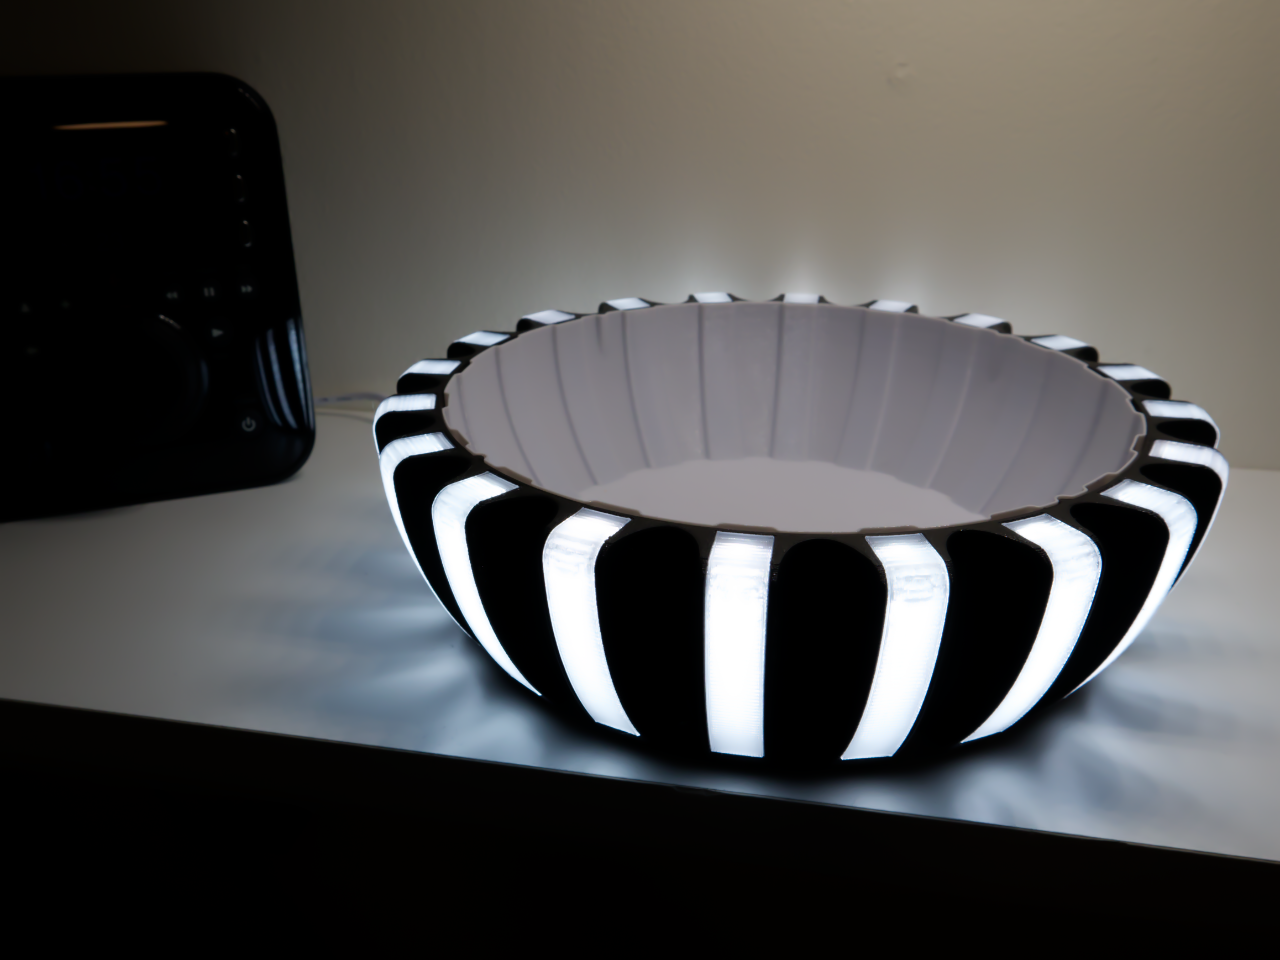
<p>This is the second model in my segmented light series. Here I wanted to combine a lamp and a bowl. It's mostly intended for decorative use but it does put out a decent amount of light (up to 24 watts in my case). Use it to hold everyday items like key's, wallet, cash, or use it as a short plant pot?</p> <ul> <li>If you make one, consider uploading a picture. I wouldn't mind seeing how it's used.</li> </ul> <p>It's in the same style as the previous lamp, but it's a little faster to print. Not that it's fast to print though. The black base alone had a surprising 18 hour print time at 0.2 layers.</p> <p>It has an insert that is printed separately in vase mode, so the inside of the bowl can be any color. The insert has 4 small detents that fit into matching extrusions on the base that will prevent it from rotating (which would disable the air channels). Below the insert is where the electronics are. I only have wires there at the moment, but you can add led controllers or micro-controllers as well, as long as they are under 6.5mm thick. It's also possible to use addressable led's, so if you want a wifi controlled rainbow colored alexa light that reacts to music or whatever, that's very possible. It will fit some ESP's like the D1 mini as well, but you would need to snap off one of the support walls inside the base.</p> <p>It is 52mm high and 20cm in diameter. The insert is 45mm deep and 167mm in diameter.</p> <p>The insert has built in air channels that allows some air to flow from the bottom and along the back of the led strips and out from the top. You will need to put on some stick-on feet to raise the bowl so the air intakes can function. They do work, but I have no idea how effective they are.</p> <p>I used 20 lit vertical segments in this model. Each segment uses a 10mm wide 50mm long led strip. I used very dense 24v white ones that has 12 led's per segment, so I have 240 led's in total. If you want colored lights you can either use rgb strips or print the emitters in a transparent color and use white lights. I added some examples of this.</p> <p>Since it's mostly for a decorative purpose it would likely run at a much lower voltage. That means less heat so PLA could be used. You still need to watch the temperature when testing it though. It could still overheat if your strips get hot. I used PETG for everything.</p> <p>I'm not covering how to solder (search youtube). It's very simple wiring, but somewhat tight, especially if you use rgb strips.</p> <ul> <li><strong>Food contact warning:</strong> If you want to use it for any food contact, the vase mode insert should be sealed with a coating, like a food grade epoxy. If you don't, you might get bacteria embedded into the plastic that will be very difficult to clean. I doubt the food contact rated plastics like PETG apply to printed objects. The rating probably disappears as soon as the plastic hits the extruder. How much of a concern this is I don't know, but I wouldn't use it as a cereal bowl.. <a href="https://formlabs.com/blog/guide-to-food-safe-3d-printing/#fdm">Here is a link explaining it</a></li> </ul> <h3>Print instructions</h3><h3>The parts:</h3><p><br/></p> <p><strong>Base:</strong><br/> I printed mine with 0.2mm layers. Should have enough perimeters to make the side chamber walls solid. Should be printed in a very dark color, unless you want light too bleed trough the walls.</p> <p><strong>Base Segment:</strong><br/> This is a small section of the base that can be used to see if your led strip and connector fits. This should be the first thing to print.</p> <p><strong>Vase Insert:</strong><br/> This part has to be printed in vase mode. I used 0.2mm layers and 0.6mm walls. Add as many bottom layers you need to make it stiff. I think I used 4. I recessed the top 0.5mm so it doesn't stick out of the top. You might get some minor light bleed in the bottom of the bowl if you print in a light color. This can be removed by painting the outside of the insert black.</p> <p><strong>Side Emitter:</strong><br/> These are the side "lenses" the light comes out from. They are printed in a transparent material, like PETG. They have serrations on the inside to diffuse the light. They are printed on the side. Printed with only perimeters to make it solid.</p> <p>These are held by friction, but not very well, so they will probably need a small amount of glue.</p> <p>If you want even more even lights, you can put strips of paper (or anything translucent white) behind the emitters. This will make it very even, but you also loose some brightness.</p> <p><strong>Side Reflector:</strong><br/> The purpose of these is to increase the amount of light inside the chambers and to diffuse the light and make it more even. These are printed in white. Should be glued in place (hot-glue seems fine for me). Printed solid. You will need 40 of these, 20 should be mirrored. They print pretty fast since they are so small and thin (2-3 layers).</p> <p><h3>What you need:</h3><br/> <br/></p> <p><strong>10mm LED strips</strong></p> <p>Finding these should be easy. I recommend using 24 volts strips since they have a much lower current than 12 volts. I would also look for very dense strips. The light will be more even the denser they are.</p> <ul> <li>Note: I would not use silicone covered (waterproof) strips. They are likely to get hotter and could jam in the mounting track.</li> </ul> <p>The strips are mounted from the top and slid down the tracks.</p> <p>Consider removing the adhesive tape from the strips. It serves no purpose and probably insulates them, causing higher temperatures.</p> <p>I would avoid strips with resistors that are right at the edge. It might interfere with the track the strip sits in.</p> <p>Also, don't add too much solder on the strips. It can also jam in the track.</p> <p>The tracks for the strips are 10.5mm wide so it may fit strips up to this size if the slots are printed clean. Keep in mind that a tighter fit will transfer more heat to the plastic.</p> <p><strong>Barrel Jack Connector</strong><br/> eBay Search: 5.5 (2.1,2.5) panel connector</p> <p>I think the current rating on these is 3a, so it's unlikely your strips will go over this (maybe with 5v addressable strips). These are available with a 2.1 or 2.5mm center pin.</p> <p>Wires should be soldered on the inside of the connector tabs so the wires doesn't get wedged in the connector hole. Connector is glued in place.</p> <p>My strips uses 1 amp with 24 volts, but it does not need to be anywhere near that bright. Looks ok around 16v, where it uses just 80ma.</p> <p><strong>Wires</strong></p> <p>I'm using 26AWG silicone wires for the strips and 20AWG going around the inside, separated by 4 small pieces of stripboard where 5 strips are connected. All strips are connected in parallel.</p>
With this file you will be able to print Lightbowl (20cm) with your 3D printer. Click on the button and save the file on your computer to work, edit or customize your design. You can also find more 3D designs for printers on Lightbowl (20cm).