Light clock by led
thingiverse
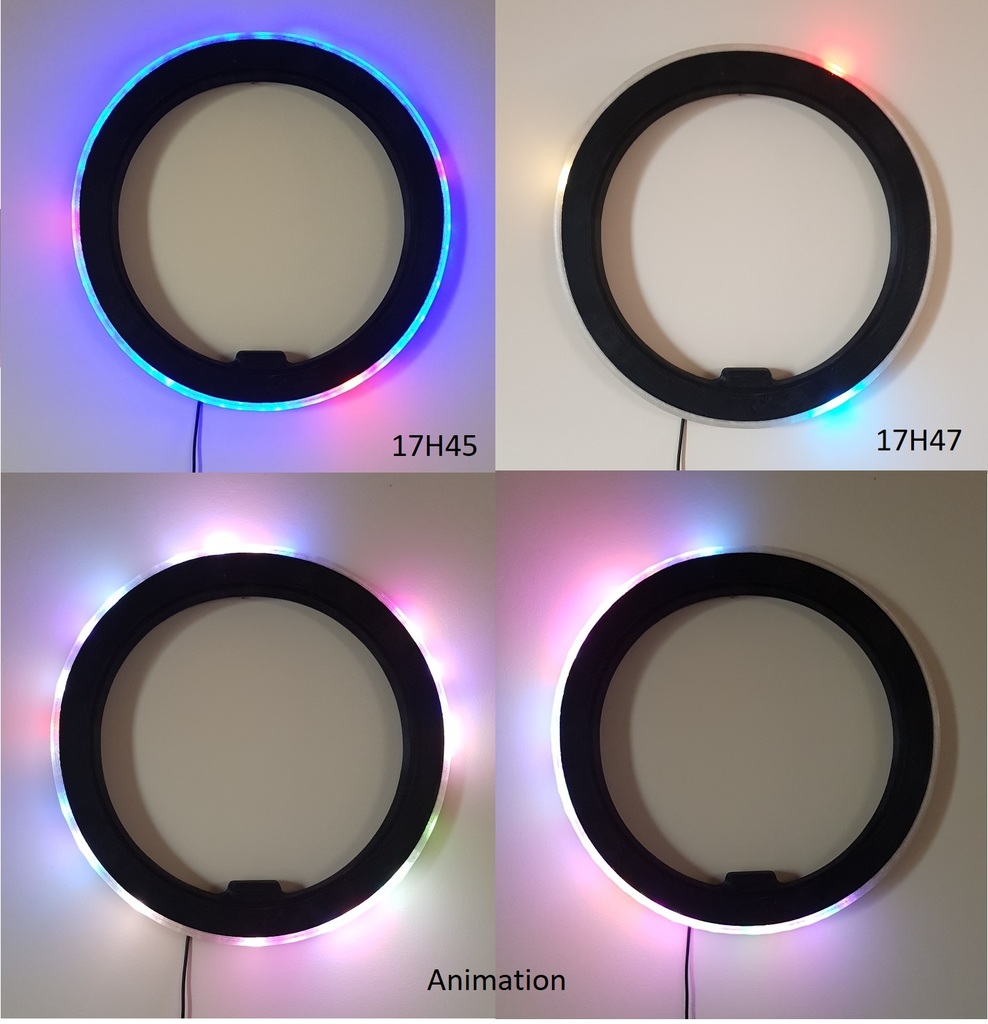
Here is a rewritten version of the text: **Project: Human** Combine the power of 3D printing with Arduino automation for a futuristic home decor project. **Shopping List:** * 60 WS2812B LED individually addressable RGB 5050SMD (10mm x 3mm) - €7 * 1 Arduino D1 mini ESP8266 ESP-12 WeMos Wi-Fi development board - €2 **Print Two Parts:** Design a 330mm diameter model using 3D printing technology. **Application: Free** Enjoy the freedom of customizing your Human project without any costs. **Results:** After configuration, you can control the color and ambiance of your Human project using the Blynk app on your phone via Wi-Fi. The time is automatically updated, ensuring a seamless experience. You also have the option to start three demonstrations at your convenience. **Wire Connection:** To connect the LED DIN to the Arduino pin D1, simply follow these steps: 1. Connect the LED's positive terminal to the pin. 2. Connect the LED's negative terminal to the ground. 3. That's it! The connection is complete and ready for use.
With this file you will be able to print Light clock by led with your 3D printer. Click on the button and save the file on your computer to work, edit or customize your design. You can also find more 3D designs for printers on Light clock by led .