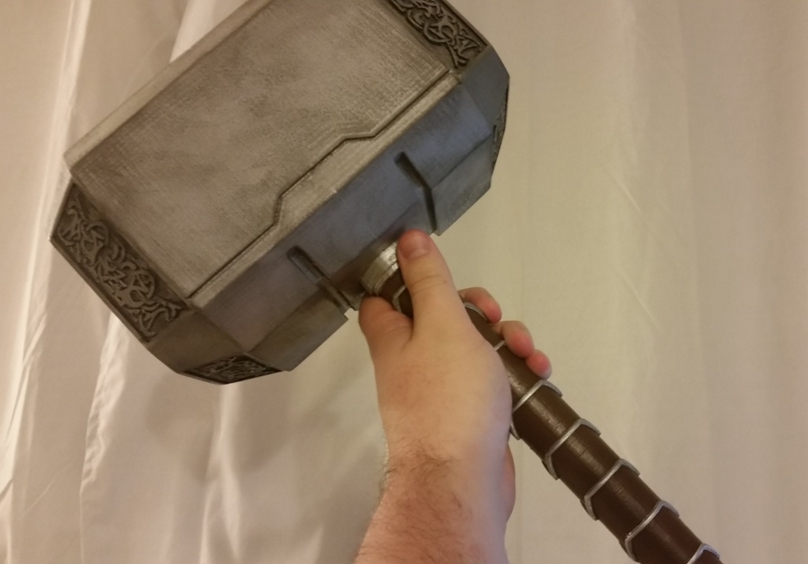
Life Size Thor's Hammer (Mjolnir)
myminifactory
Welcome all who dare to take on this epic challenge! Check out this video for more information and a firsthand look at it in action: https://youtu.be/D6DdESIhi4c Get ready to unleash your inner Thor with this fully 3D printed Mjolnir, scaled up to life size. I know it's not an exact replica of the movie prop, but it's close enough. Plus, you can easily scale it down if needed. This version is inspired by The Dark World movie. I've provided two options for the main hammer head - one hollow and one solid. Print them in two identical sections, and you'll be ready to wield your mighty Mjolnir. If you're looking to save filament, go with the hollow option; if not, the solid one will give you more weight and a more realistic feel. Get printing! Print Settings: Printer Brand: Robo 3D Printer: R1 ABS + PLA Model Rafts: No Supports: Yes Resolution: 0.3mm Infill: 20% Notes: All these settings are pretty flexible. You'll only need supports for the little slot on the bottom of the bigger part, but they're not essential. I didn't use any supports when printing and just had to do some clean-up. Print at a 0.3mm layer height or increase it for more details - I was trying to save filament. Infill doesn't matter much here. Post-Printing: Step 0: Get all the parts printed. Step 1: Sand them down as smooth as possible. The handle and hammer details can be tough to get smooth, but do your best. Make sure the sides are completely smooth to the touch. Start with coarse grit sandpaper (around 100 grit) then move up to 400 or higher for the best results. Step 2: Glue the parts together using printed pins to hold them in place, then apply glue to those pins to secure them. I used Gorilla Glue Two Part Epoxy and held it until it dried. Once the parts are stuck together, take a paintbrush or similar tool to apply epoxy generously over any cracks or seams you want to cover. After it's dry, sand down those areas for a smooth finish. Step 3: Prime the hammer with a black spray primer from Krylon. Coat it at least twice, letting it dry completely between coats. Just lightly spray across the surface using a normal spray painting technique - don't stress about the details too much. Step 4: Paint the hammer with Hammered Metal spray paint in silver. Apply three coats, letting each one dry completely before adding more. If needed, sand any rough areas between coats - use your judgment on what looks best. The paint should fully cover the hammer. Step 5: Paint the handle with brown acrylic paint and a paintbrush. Leave the silver rings and base of the handle as is. Use multiple brushes to get into hard-to-reach areas. Apply three coats for smooth, plentiful coverage - you can always go back over details with silver paint if needed. Step 6: Apply a wash by mixing silver and black acrylic paint with water and applying it to the details on the handle and hammer sides. Use a paper towel or spare paintbrush to dab off excess - this will give recessed areas a more defined shadow. Step 7: Rough up the paint on the bulk of the hammer to give it a worn, used look. Take sandpaper to the edges, lightly sanding them for texture. Then dust darker color across the body using paper towels and adding even more texture. Step 8: Apply a finish coat with spray clear coat once it's completely dry - this will help protect it from scratches and damage. LifeSizeThor'sHammer (Mjolnir) by ChaosCoreTech is licensed under the Creative Commons - Attribution license.
With this file you will be able to print Life Size Thor's Hammer (Mjolnir) with your 3D printer. Click on the button and save the file on your computer to work, edit or customize your design. You can also find more 3D designs for printers on Life Size Thor's Hammer (Mjolnir).
