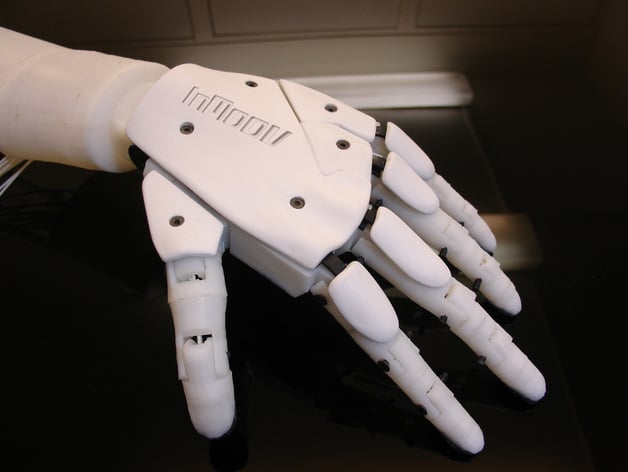
Left Hand robot InMoov
thingiverse
This left-hand robot, "InMoov," is a derivative of its right-handed predecessor that you've already assembled. For additional parts and information, refer to http://www.thingiverse.com/thing:17773. Before printing the files, make sure to check the website for updates on the latest versions. Important instructions: 1. Print one of each STL file attached; the creator used ABS. 2. Find a tutorial at http://www.inmoov.fr/hand-and-forarm/. 3. Print leftwriargeV3, leftwristsmallV3, leftthumb4, leftopsurface, arduinosupport, cableholder with an infill of 30%, 3 shells; best results without support or raft. 4. For leftauriculaire2, index2, majeure2, ringfinger2, use an infill of 30%, 1 shell; no support or raft is recommended. 5. Print leftrobpart2V3, leftrobpart3V3, leftrobpart4V3, and leftrobpart5V3 with an infill of 30%, 3 shells; ideal with raft. 6. For leftcoverfinger, use an infill of 30%, 3 shells with support. 7. Also print the rotational wrist (http://www.thingiverse.com/thing:25149) and simple servo support (http://www.thingiverse.com/thing:65274). 8. Big bolts are now printable, but may not be very strong - use for testing purposes only. You can replace 16x3mm parts with pins/pegs of filament instead of bolts for a cheaper, easy, and strong enough alternative. 9. Use an 8mm x 8cm bolt to attach leftwriarge to leftwristsmall, an 8mm x 4cm bolt to attach leftwriarge to thumbbottom, and an 8mm x 6cm bolt to attach leftwriarge to leftrobpart1. 10. Assemble 16x3mm x 2cm bolts for all finger hinges (the creator has re-cut each bolt to adapt to finger width). 11. Attach parts using acetone, following the pictures provided. Redrill 8mm holes if needed and re-drill all finger hinges with a 3mm drill. Ensure fingers move freely. 12. Print the forarm without support but with raft. Remove added supports and anti-warp structures. 13. If necessary, redrill 8mm holes and add rods of fishing braid (200 LB) to each finger. Run rods through servo brackets, making sure not to twist them as they pass through hinges. Attach a ring2 in the hinge and secure rods at the tip of fingers with cyanoacrylate glue. 14. Glue leftrotawrist1V3, leftrobpart2V3, and leftrobpart5V3 together, ensuring servo brackets are aligned. Do the same for leftrobpart3V3 and leftrobpart4V3. 15. Mount simple servo bed. Fit and bolt in four HK15298 servos. Wire the servos to exit Robcap. 16. Add two rods of fishing braid (200 LB) to each finger, passing through the servo and attaching a ring2 in the hinge. Tie knots at the tip of each finger and secure with cyanoacrylate glue. Make sure rods are tight between the horn and tip of the finger. 17. Glue tips of fingers together with acetone, leaving the tips free. 18. Mount lefttopsurface on the back of the hand using 3mm x 2cm bolts. Glue the leftcoverfinger onto the top of the fingers, ensuring movement is free with hinges. 19. Keep up-to-date with the latest updates by checking the website regularly. Many parts are subject to change until the project is complete.
With this file you will be able to print Left Hand robot InMoov with your 3D printer. Click on the button and save the file on your computer to work, edit or customize your design. You can also find more 3D designs for printers on Left Hand robot InMoov.