LEDdial
prusaprinters
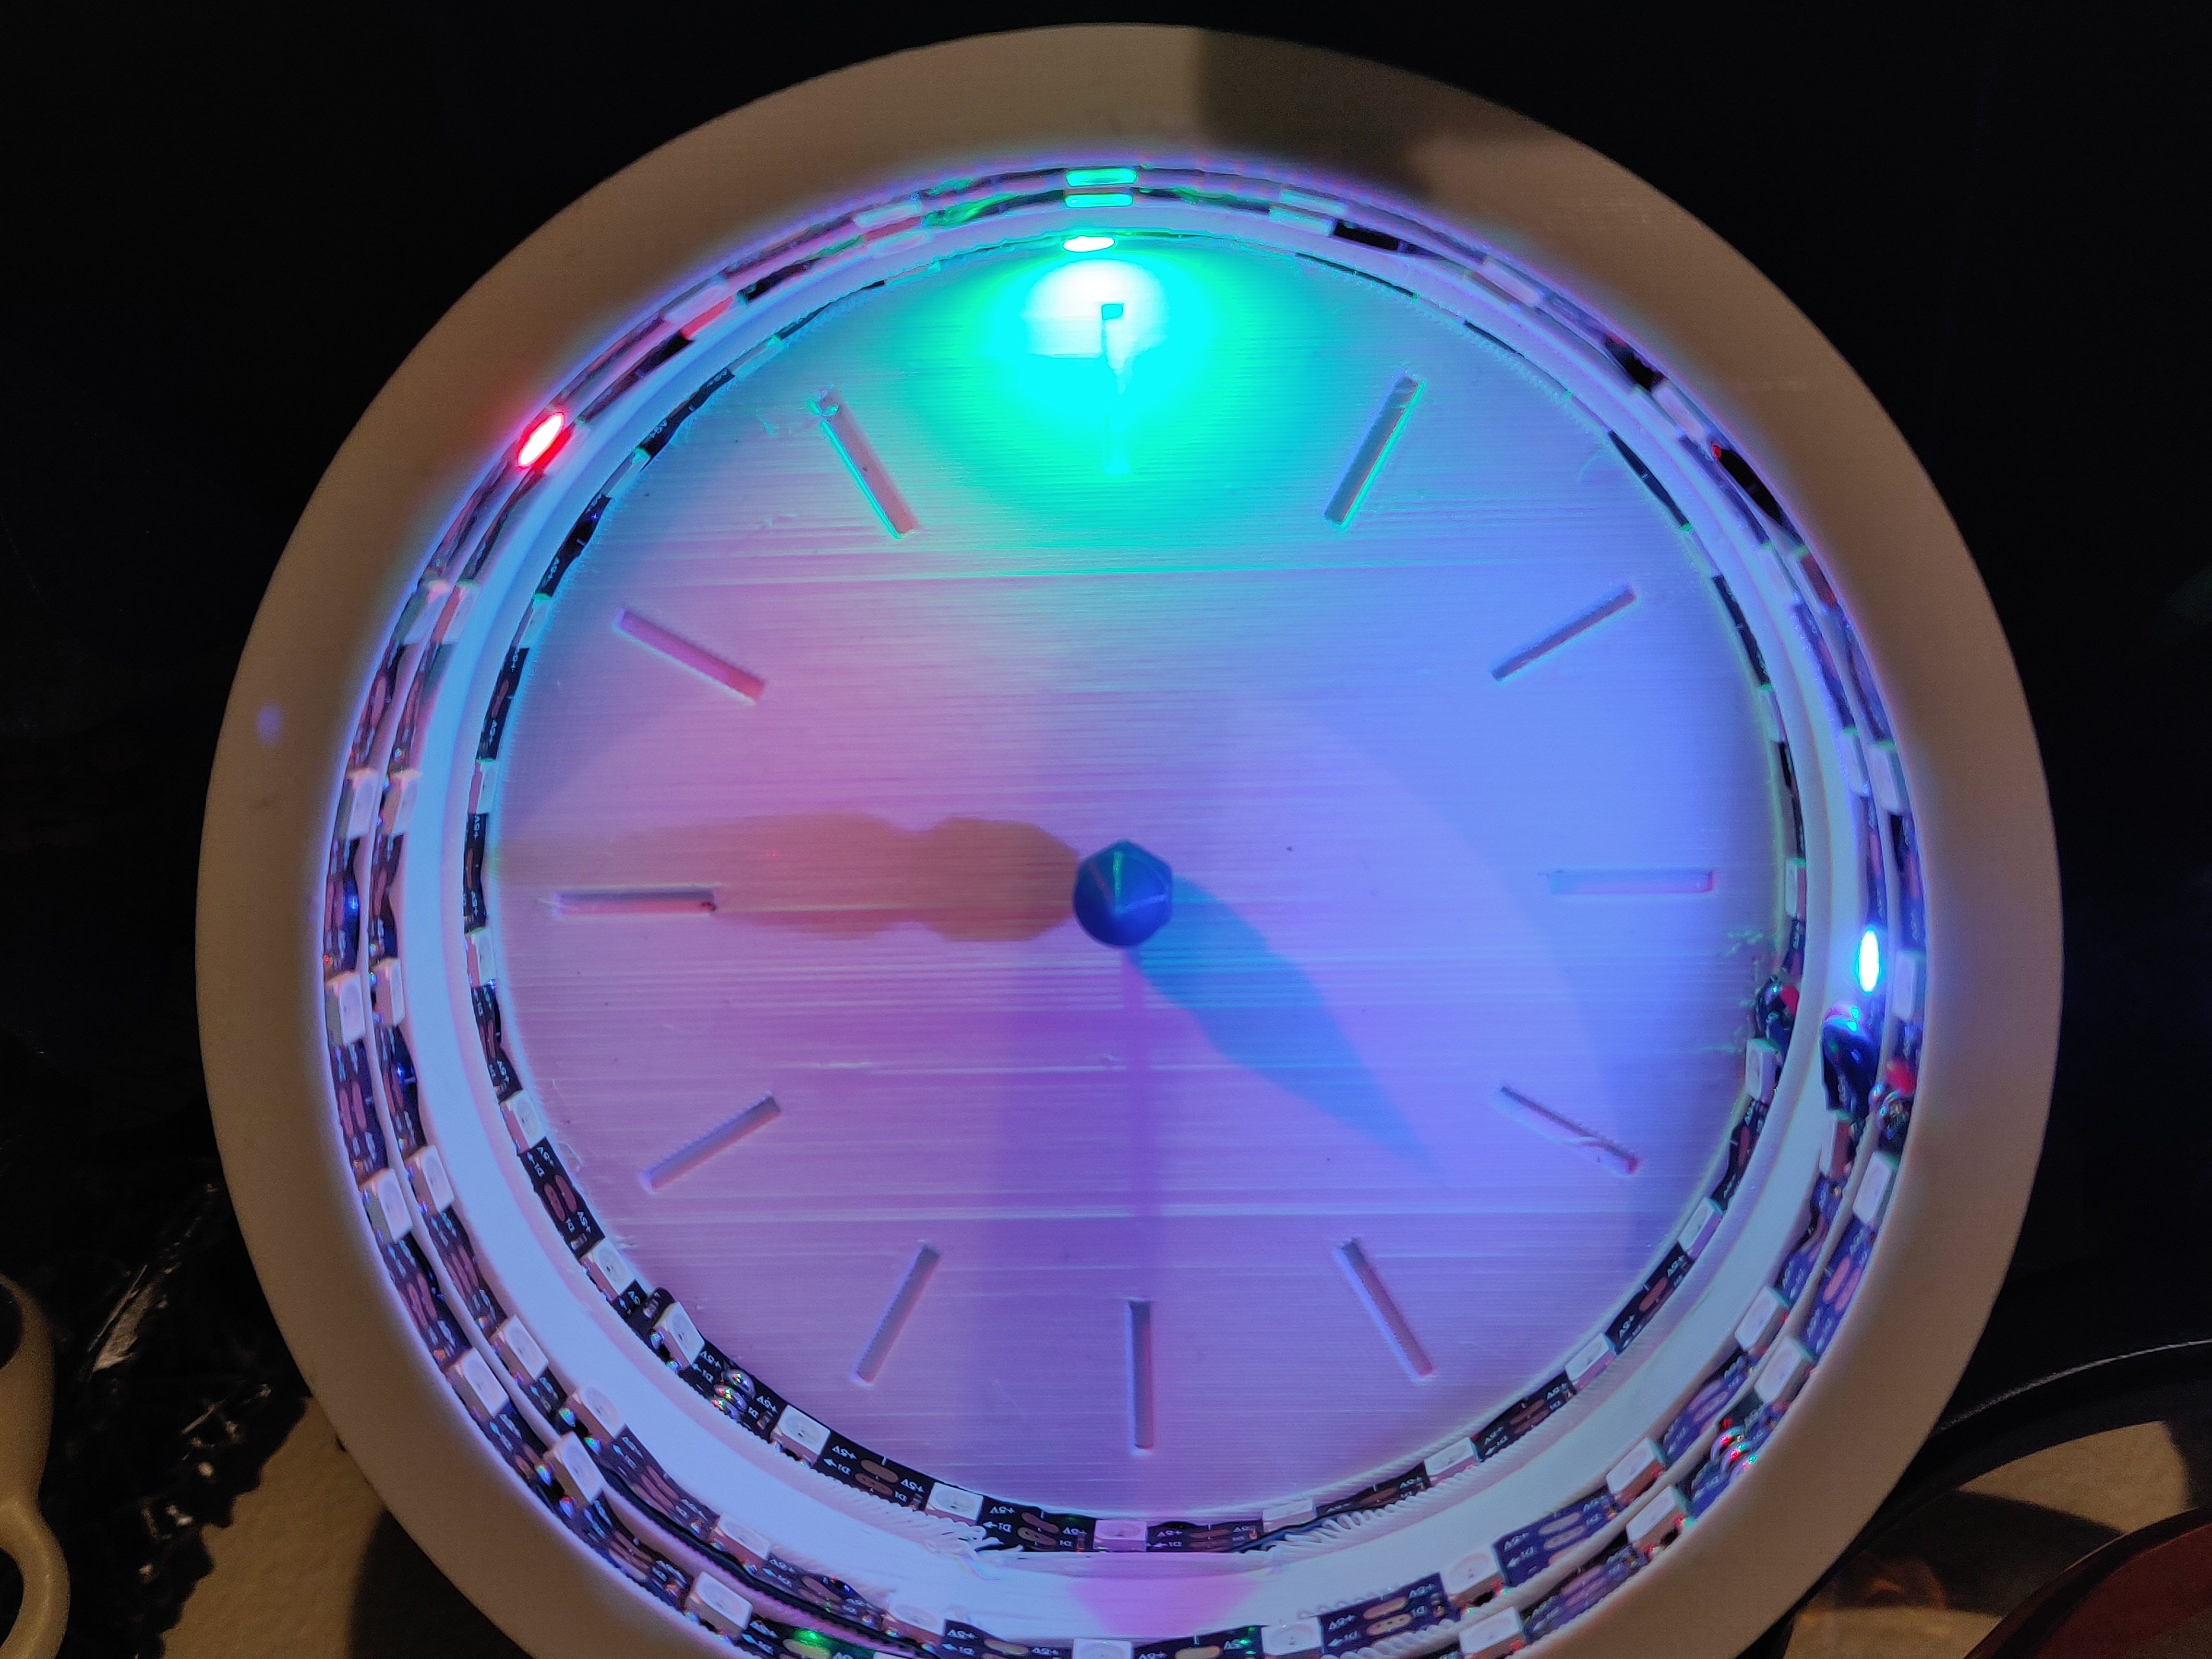
<p>A clock whose hands are "shadows" projected by LEDs.</p> <h3>Print instructions</h3><h3>Hardware Requirements</h3> <ul> <li><a href="https://www.amazon.com/gp/product/B00JYPJAL2/">WS2812B LED strip</a>.</li> <li>An Arduino or compatible board.</li> <li>Breadboard</li> <li>Soldering iron</li> <li>Solid wires</li> <li>3D printer</li> </ul> <h3>Software Requirements</h3> <ul> <li>Arduino IDE</li> </ul> <h3>Building Instructions</h3> <ol> <li>3D print the LEDdial and gnomon STLs. These can be printed without supports, however there are a lot of 45º angles in the LEDdial module, so it may require a finely tuned 3D printer. The gnomon can be any color, but I recommend to use a light color, preferably white, for the LEDdial as it will improve visibility for the "shadows". The LEDdial STL is pretty big, so you might have to print it on a 45º angle and without a skirt.</li> <li>Cut a piece of filament of about 8mm.</li> <li>Insert the piece of filament in the hole on the center of the LEDdial.</li> <li>Insert the gnomon in the other end of the stick. </li> <li>Cut 3 segments of 24 LEDs from the LED strip and solder wires into their inputs.</li> <li>Attach each of the strips into the 3 strip guides inside LEDdial. The first LED from the side without cables should be aligned with 9 o'clock and the rest of the LEDs should follow counter-clockwise.</li> <li>Insert the cables into the small windows on the side of the clock and pull them to the back of the clock.</li> <li>Connect all the 5v cables into the VIN/RAW pin in the Arduino.</li> <li>Connect all the -/GND cables into the GND pin in the Arduino.</li> <li>Connect the strips, from top to bottom, into the digital 4, 3, and 2 pins in the Arduino.</li> <li>Connect a wire between the digital 5 pin and GND in the Arduino.</li> <li>Flash the <a href="https://github.com/JavierRizzoA/LEDdial/blob/master/LEDdial.ino">LEDdial.ino</a> file into the Arduino board.</li> <li>To adjust the time in the clock, disconnect the cable that is between digital 5 and GND. This will make the clock go faster.</li> </ol>
With this file you will be able to print LEDdial with your 3D printer. Click on the button and save the file on your computer to work, edit or customize your design. You can also find more 3D designs for printers on LEDdial.