LED-Strip String Lamp
prusaprinters
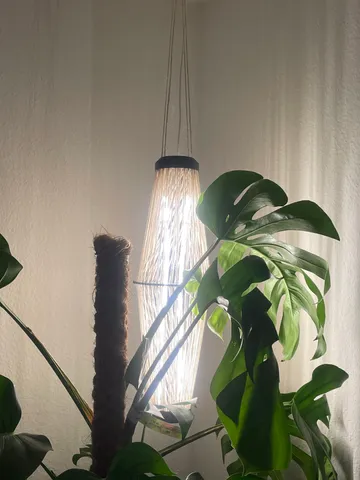
Project Description:Materials Needed:1. G-code and/or STL Files: Top and Bottom with Lid, For the LED clamp and transformer holder. (Only G-code files are available.)2. Holes Specification: 6mm holes for the LED clamp, transformer holder, and STL files.3. Steel Rods: Two rods, each 60cm in length.4. Nuts and End Pieces: Four nuts for each plate and a total of four end pieces.5. LED Strip: Length varies, ideally matching the length of your steel rods. In this example 2x 50cm 6. String: For winding around the lamp structure.7. Transformer: Suitable for your country's voltage, outputting approximately 15 watts or as needed for your LED strip.Assembly Instructions:1. Prepare the Clamps: Use the G-code files to create the LED clamps and transformer holder.2. Inserting the LED Strip: Gently slide a knife or a thin tool into the back of the clamp to open it slightly.3. Securing the LED Strip: Place the LED strip inside the clamp.4. Closing the Clamp: Use the end piece (also provided in the G-code files) to close the clamp, ensuring a secure hold on the LED strip.5. Assembling the Frame: Attach the steel rods as per the design, securing them with the nuts and end pieces.6. Winding the String: Wind the string around the lamp structure for added stability and aesthetic appeal. For a twisted look you can Connect every top piece with every second winding of the middle part.7. Installing the Transformer: Connect the LED strip to the transformer, ensuring it matches your country's voltage requirements.Materials available online:https://amzn.eu/d/29hAUJohttps://amzn.eu/d/djrbJan
With this file you will be able to print LED-Strip String Lamp with your 3D printer. Click on the button and save the file on your computer to work, edit or customize your design. You can also find more 3D designs for printers on LED-Strip String Lamp.