LED Spider with Conductive PLA (NO WIRES) multimaterial
prusaprinters
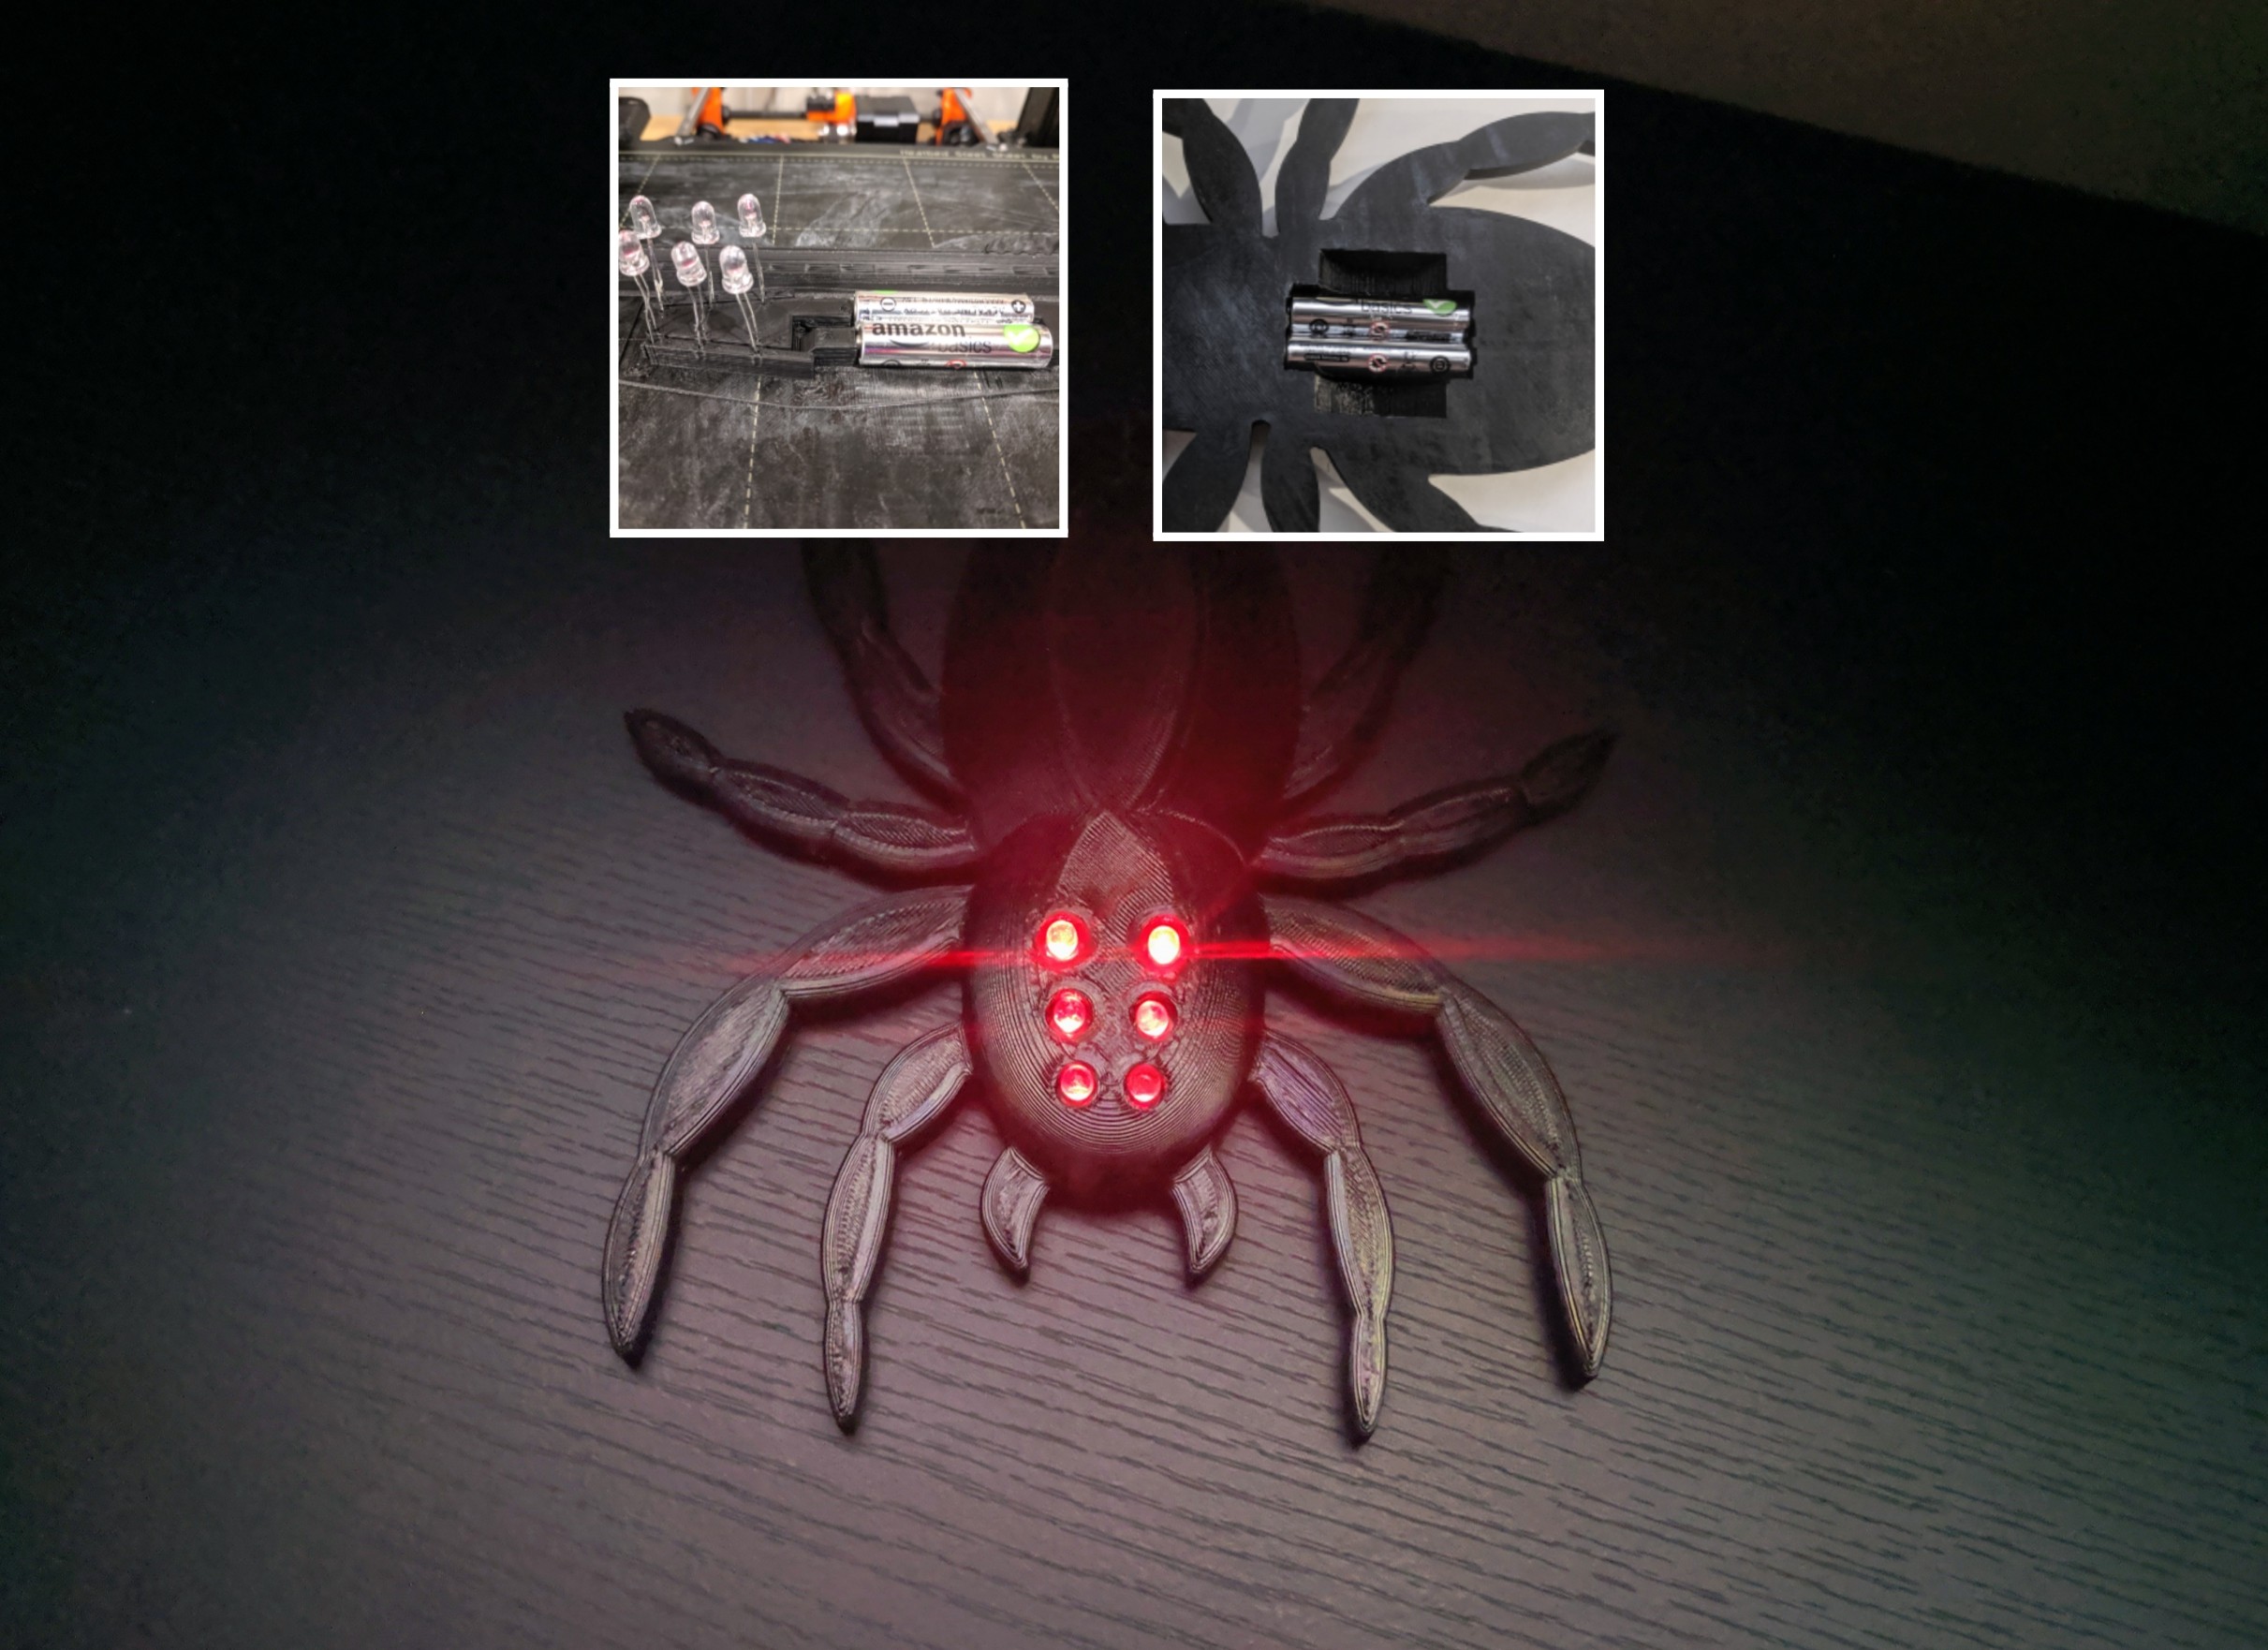
<p>This prints as one part, uses 6 LEDs, and no wiring or soldering required!</p> <p>I designed this to be printed with MMU. It requires a conductive filament to act as the wiring. Using this filament is something that has excited me for a long time but I had never gotten around to designing with it. Even though the conductive filament has severe limitations, the future of designing the circuit directly into the part opens up endless opportunities.</p> <p>Prior to installing the batteries or LEDs, you must verify that there is no continuity between the positive and negative terminals; installing batteries to a short circuit is extremely dangerous. Also there is no on/off switch, so batteries must be removed when not in use.</p> <p>BOM:<br/> Black PLA<br/> Proto-pasta Electrically Conductive Composite PLA<br/> 2 x AAA Batteries<br/> 6 x 5mm Red LED (MFG Part#: SSL-LX5093XRC-TR)</p> <p>When inserting the LEDs the outside holes are positive.</p> <p>I have a couple tweaks to the model that will make assembly easier. Once tested, I will upload the new files.</p> <p>LED cathodes will need to be shortened. They will be pressed into the conductive filament for an interference fit. The hole in the conductive filament it's hard to see, The large one that is visible and it's just a clearance and pull in the non-conductive PLA. Inserting the cathodes into the hole is hard with the current model and the upcoming tweaks will address this.</p> <p>Also for those who care, the spider is not anatomically correct/accurate.</p> <h3>Print instructions</h3><p>Conductive PLA must be used for "Spider Conductive"</p> <p>Recommended print settings:</p> <p>0.35mm Fast</p> <p>Changes:</p> <p>Purging Volumes-<br/> From 2 to 1 = 700<br/> From 1 to 2 = 400</p> <p>Layers and Perimeters -<br/> Detect Bridging Perimeters (checked)</p> <p>Spider Body Layers and Perimeters -<br/> Perimeters: 5<br/> Solid Layers, Top: 5, Bottom: 4</p> <p>Spider Conductive Layers and Perimeters -<br/> Perimeters: 2<br/> Solid Layers, Top: 5, Bottom: 4<br/> External Perimeters First (Checked)</p> <p>Infill -<br/> Spider Body Fill Density: 10% Cubic</p> <p>Spider Conductive Fill Density: 100%, Rectilinear</p> <p>Support Material -<br/> Generate support material (checked)<br/> Contact Z distance: 0.2mm detachable<br/> Don't support bridges (unchecked)</p> <p>Speed -<br/> First Layer Speed: 40%</p> <p>Multiple Extruders -<br/> Interface Shells (checked)<br/> Width: 200 mm</p> <p>Advanced -<br/> Elephant foot compensation: 0.15mm</p> <p>Filament Settings -<br/> Other Layers Temp: 210</p> <p>Unloading Speed at Start: 50 mm/s<br/> Unloading Speed: 15 mm/s</p> <p>Ramming Settings:<br/> Rough Estimates<br/> @0.00(s)=3.0<br/> @0.45(s)=3.5<br/> @1.00(s)=4.5<br/> @1.50(s)=8.0<br/> @2.00(s)=10<br/> @2.50(s)=11</p>
With this file you will be able to print LED Spider with Conductive PLA (NO WIRES) multimaterial with your 3D printer. Click on the button and save the file on your computer to work, edit or customize your design. You can also find more 3D designs for printers on LED Spider with Conductive PLA (NO WIRES) multimaterial.