LED mount for Ciclop
pinshape
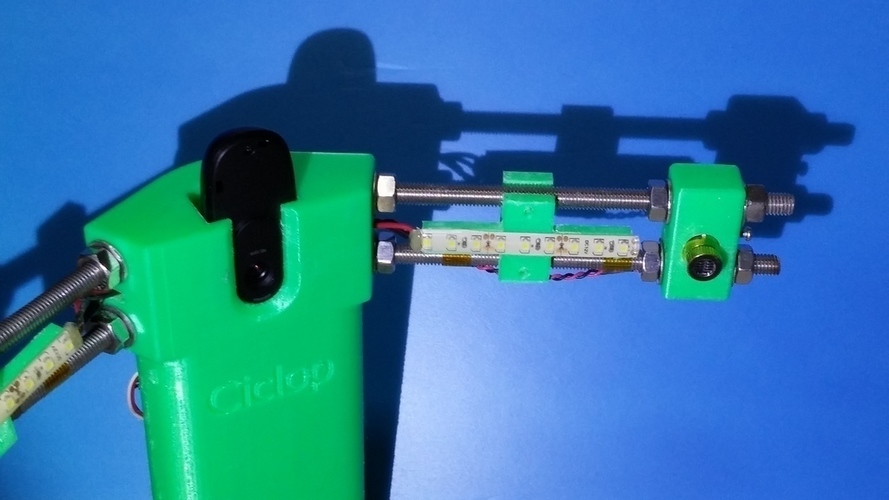
Mounting a LED to your Ciclop 3D printer is an easy process that requires only basic tools and knowledge. First, gather a few necessary materials, including the LED itself, some wire, a small piece of heat shrink tubing, and a screwdriver. Next, carefully attach the LED to the top of the print bed using the provided screws or adhesive. Make sure it's secure and evenly spaced from the edges of the print bed. Now, connect one end of the wire to the positive terminal on the LED and the other end to the power source. Finally, wrap the exposed wire with heat shrink tubing for protection and to maintain a clean look. Your Ciclop 3D printer now has a bright and adjustable LED light to illuminate your prints in progress.
With this file you will be able to print LED mount for Ciclop with your 3D printer. Click on the button and save the file on your computer to work, edit or customize your design. You can also find more 3D designs for printers on LED mount for Ciclop.