LED-Lit Brain
thingiverse
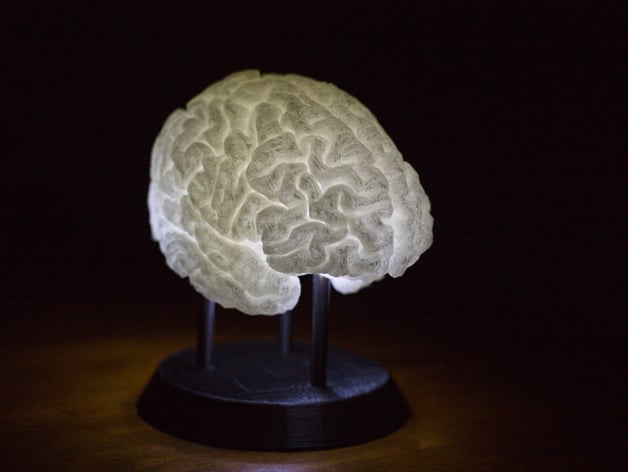
A precise replica of an authentic human brain, accurately modeled from an MRI scan is mounted upon a three-legged stand featuring intricate LED lighting embedded within each sturdy support. We would like to see one successfully printed using radiant filament that emits a soft glow in low-light environments. If you choose to print this model, kindly share some captivating images with us. In certain instances, having access to an MRI scanner at hand or participating in a local university study may simplify the process of printing your very own brain replica. A detailed set of instructions is outlined below for effortless completion. The construction of the stand is remarkably straightforward: First, print using standard settings with a sturdy base plate and choose a dark-colored filament. To minimize support structure requirements, print the stand's foundation upside-down on its supporting leg. Then, print the three hollow tubes vertically. To create the actual brain: Utilize conventional settings alongside raft assistance and opt for a clear-colored filament that is not prone to yellowing with age. Align each hemisphere so their flat side rests firmly parallel against the print surface. To facilitate easy removal of support structures, ensure they remain approximately 5mm above the print bed. Please note that due to its size and complex architecture, the brain requires significant quantities of filament to complete the printing process accurately (a little over half a pound for each side), translating into roughly two days per hemisphere plus a total time requirement exceeding two full days plus nearly a full pound of materials. Once you've successfully completed both the stand and brain print, let's discuss how to add an element of elegance with some additional details. You will require: Three small 5mm LED lights that radiate softly in your desired color A sufficient length of sturdy conductor wire Two small AAA battery compartments and matching batteries An elegant on/off switch Hefty shrink tubing for protecting delicate areas from water ingress and corrosion Reliable soldering equipment including an iron tool and suitable rods Special high-strength adhesive gel To complete this task efficiently: Ensure the neodymium magnets embedded in recessed grooves are secure within both hemispheres of the brain, forming an impenetrable connection. Place the power source component inside a small recess situated at the bottom side of the base support while utilizing high-temperature melting adhesive to create strong chemical bonds with metal or plastic materials. Next solder electric wires that flow seamlessly between all three light sources, power module and main circuitry block terminating abruptly once you toggle the elegantly integrated on/off switch placed strategically near the top area surrounding an already established void for containing electrical hardware safely outside human range.
With this file you will be able to print LED-Lit Brain with your 3D printer. Click on the button and save the file on your computer to work, edit or customize your design. You can also find more 3D designs for printers on LED-Lit Brain.