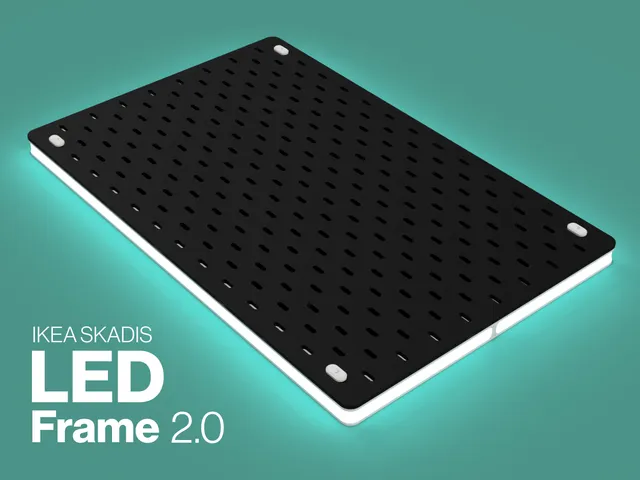
LED Frame 2.0 (Multiboard) for IKEA SKADIS
prusaprinters
LED-Frame 2.0 for IKEA SKADIS pegboard 🚀FINALLY I can share the multi-board version of my LED-Frame.It's controlled by an ESP32-Controller running WLED. The frame is divided in smaller segments, so it can be printed on smaller printers and without supports. On the outside is a groove for a diffusion material. The frame is assembled and mounted using M3 screws and square nuts. You can mount it to the wall with the original bracket from IKEA.If you want a frame for a single SKADIS board only, you might want to go with my old design. The frame connections are fully hidden behind the board, and the cable cutout is always positioned in the middle. This new design is all about flexibility. Updates2024.07.08:📐 .step files added so you can customize parts to your needs🔌 open cable-passtroughs for segments to fit potentially thicker cables DISCLAIMERS ⚠:This system is “untested”. It works digitally, measurements are the same as the old version. I haven't test printed full frames.These frame parts are not compatible with the previous version.The fit of these parts is very “digital”. You might have to make the holes in the boards slightly bigger, since I didn't compensate for manufacturing inaccuracies. Also the boards need to be mounted very precisely to the wall. I imagine this to get exponentially more difficult, the larger the setup gets.Since I'm not good at electronics, this project is only about the frame itself and not the wiring. I had a friend do the calculations, soldering and wiring for me.… I'm sorry! 😉 Feedback 🚀This project (like the one before) took me waaay longer to make than it probably should have. If you find parts with faults in them, please let me know. If you decide to print a frame and enjoy it, please leave a like. And if you care to upload a make, I'd enjoy seeing what you made. MaterialsList of Materials you need to assemble a frame (I linked the specific products I used. You can use whatever you want/have).Materials neededDescriptionPLA filament (or other)Preferably white for better light reflectionLED-Strip: WS2812BI went with 60LED/m for smooth lighting.Amount of LEDs of course depends on your desired setup/size.ESP32 Controller with WLED installedI used this so I can remote control this via smartphone and use all the lighting effects that come with WLEDDiffusion MaterialI went with a diffusion filter for studio-/stage-lights I found online and cut it to size. You could also use paper or print some yourself.SteKu made prints for the old version you can maybe adapt .M3x8mm screws (DIN7984)To connect frame parts horizontallyM3x10mm screws (DIN7984)To connect the frame to the SKADIS-boards using the printed pinsM3x12mm screws (DIN7984)To connect frame bottom and top partsM3 square nuts (DIN562)All srews are attached with square nuts Parts overview and namingI know, i know, there's loads of parts… I tried to name them in a (hopefully) logical way.PartShapeVariantLayerExtrasegment16cmcleandiffusion splitled cutoutdiffusion split + led cutoutbottomboard connection20cmtopcable cutoutcable cutout opencornerregular—bottomtop—invertedsquarelong-mlong-f—board-pin————Naming examples:seg-16_diff-led-cable_bottom_connect(A segment with a length of 16cm, with the diffusion split in the front, a cutout to insert a LED-Strip. It's the bottom part of the pair and in the version, that can be attached to the SKADIS board)corner-regular_bottom(Regular outside corner, and the bottom part of the pair)corner-inverted_square_top(Inverted corner to bridge over multiple boards with equal length sides. Top part of the pair) Printing 🖨I printed all the parts on my Prusa i3MKS+ as listed below:Layer-height: 0.3mmInfill Pattern: GridInfill Density: 32%Orientation: Outside surface downClean up your parts surfaces after printing for a flush fit and no light leaking to the inside of the frame. Assembly 🔨Frame:Assembling the frame is pretty straight forward. Connect the individual parts using the square nuts and screws.⚠ Do not overtighten the screws connecting the board-pins and the frames!LED-Strip:Inserting/removing the LED-strip is possible while all parts are already assembled trough LED-entry-cutouts. I removed the double sided tape from the LED-strips for this. This is most likely getting more difficult with large setups and many corners.Diffusion-Strip:The only tricky part is fidling the diffusion strips inside the groves. For this I removed a top part of one of the segmentsand inserted it from there. You might also be able to disconnect two segments and spread them apart, so you can insert your diffusion layer. On segments with cable passtrough, you need to trim off a corner on each end. Enjoy your new fancy IKEA-Pegboards! 🚀🥳 Happy printing! :)
With this file you will be able to print LED Frame 2.0 (Multiboard) for IKEA SKADIS with your 3D printer. Click on the button and save the file on your computer to work, edit or customize your design. You can also find more 3D designs for printers on LED Frame 2.0 (Multiboard) for IKEA SKADIS.
